Apartment Deep Cleaning Services Brooklyn: A Complete Guide
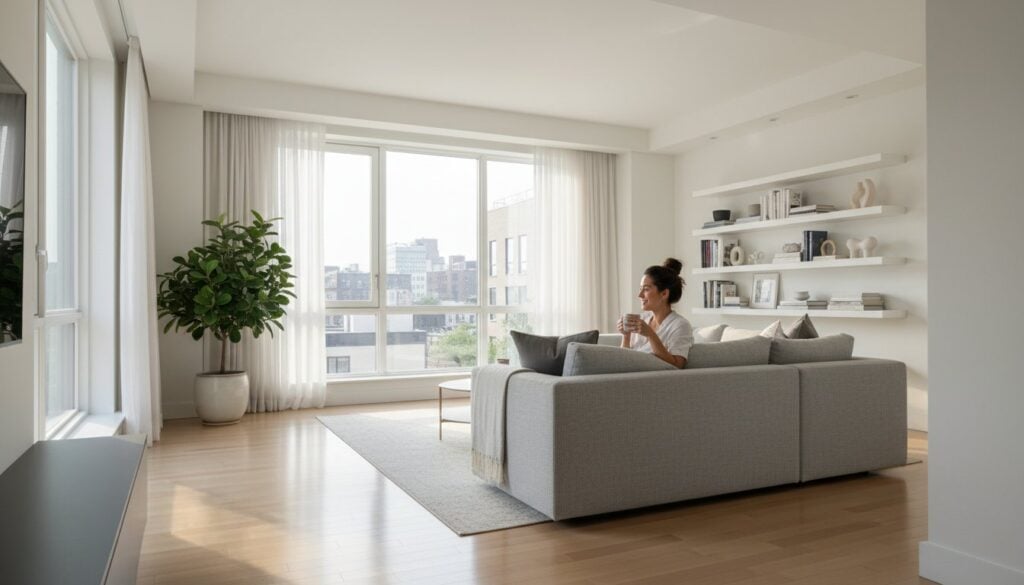
You keep your Brooklyn apartment tidy-surfaces are wiped, clutter is managed-but does it ever feel truly, deeply clean? That lingering sense that dust and grime have settled into hard-to-reach corners is a common frustration for busy city dwellers. It’s the difference between a home that looks neat and one that feels genuinely fresh and reset. For many, engaging professional apartment deep cleaning services Brooklyn is the key to finally achieving that next-level clean that restores both your space and your peace of mind. But finding a reliable service can feel like a challenge. You may wonder what a deep clean actually includes, how much it should cost, and who you can trust to care for your home with precision. This guide was created to answer all your questions. We’ll break down exactly what to expect from a thorough deep clean, why it’s so important for your home’s health, and how to book a stress-free service that leaves your apartment spotless. It’s time to transform your home into a sanctuary that doesn’t just look clean, but feels it. Key Takeaways Understand the crucial difference between a surface-level tidy and a restorative deep clean to ensure you get the meticulous results you expect. Learn why the unique challenges of city living make professional apartment deep cleaning services Brooklyn an essential investment for a truly healthy home. Discover what a comprehensive, top-to-bottom clean should always include with a detailed, room-by-room checklist of professional tasks. Navigate the cost of a deep clean with confidence by learning the key factors that influence your quote for a transparent, stress-free experience. Table of Contents What is an Apartment Deep Clean? (Going Beyond the Surface) The AlphaLux Deep Cleaning Checklist for Brooklyn Apartments Why Brooklyn Apartments Have Unique Deep Cleaning Needs Our Process: How to Book Your Brooklyn Deep Clean Understanding the Cost of Apartment Deep Cleaning in Brooklyn What is an Apartment Deep Clean? (Going Beyond the Surface) A standard cleaning service maintains a level of cleanliness, but an apartment deep clean is a restorative, top-to-bottom service designed to make your home feel brand new. It goes far beyond a simple wipe-down, targeting the hidden grime and buildup that accumulate over time. The goal isn’t just to tidy up; it’s to eliminate deep-seated dirt, sanitize surfaces, and completely reset your home’s hygiene. With AlphaLux Cleaning, your home doesn’t just look clean-it feels profoundly fresh and healthy. This meticulous process is the foundation of our apartment deep cleaning services in Brooklyn, providing the perfect solution for a seasonal reset, a thorough move-in or move-out clean, or a comprehensive refresh after a party or event. It’s the difference between wiping a surface and truly scrubbing it back to its original state. Standard Clean (Surface-Level Tidying) Wiping down countertops and accessible surfaces Cleaning exterior of appliances Quick dusting of furniture Vacuuming and mopping floors Deep Clean (Top-to-Bottom Restoration) Intensive scrubbing of all surfaces to remove buildup Cleaning inside and outside of appliances Detailed dusting, including baseboards, blinds, and light fixtures Moving light furniture to clean underneath and behind The Kitchen: Degreasing and Sanitizing Our kitchen deep clean focuses on the areas that harbor the most grease and bacteria. We meticulously clean the interior of your oven, microwave, and refrigerator, removing caked-on food and spills. Our team thoroughly degreases stovetops, range hoods, and backsplashes, followed by scrubbing cabinet exteriors to lift away fingerprints and grime. We finish by sanitizing sinks and faucets, ensuring every surface is spotless and hygienic. The Bathroom: Eradicating Buildup and Mold We restore your bathroom to a pristine condition by tackling soap scum, hard water stains, and mildew. This involves intensive scrubbing of tile grout and shower doors until they sparkle. Faucets, showerheads, and fixtures are carefully descaled to improve their appearance and function. We conclude with a complete sanitization of the toilet, vanity, and all high-touch areas, leaving the space fresh and revitalized. Living Areas & Bedrooms: Dust and Detail Work In your living spaces, our attention to detail makes all the difference. We meticulously clean the often-neglected areas, including baseboards, door frames, window sills, and light switches. Dust is eliminated from light fixtures, ceiling fans, and individual window blinds. To ensure a comprehensive clean, we carefully move light furniture to vacuum and clean underneath and behind it, capturing dust that standard cleaning leaves behind. The AlphaLux Deep Cleaning Checklist for Brooklyn Apartments At AlphaLux, we believe transparency is the foundation of trust. This detailed checklist is our commitment to you-a precise roadmap for how our professional team delivers a truly spotless home. It outlines the meticulous steps we take, ensuring our apartment deep cleaning services brooklyn residents receive an unparalleled level of care and attention to detail. Our process is designed to tackle the grime and buildup that regular cleaning leaves behind, transforming your apartment into a pristine and welcoming sanctuary. A Meticulous Kitchen Deep Clean We restore the heart of your home to a hygienic and sparkling condition, focusing on areas where grease and germs accumulate. Appliances Restored: We thoroughly clean the interior and exterior of your oven, microwave, and refrigerator, removing built-up grime and restoring their shine. Grease-Free Surfaces: Your stovetop, backsplash, and countertops are meticulously degreased, scrubbed, and sanitized for a truly hygienic cooking space. Cabinet Refresh: We carefully wipe down all cabinet fronts and sanitize handles and knobs, removing fingerprints and daily buildup. Sink & Fixture Polish: Your sink is scrubbed and sanitized, and all fixtures are polished to a brilliant, water-spot-free finish. Comprehensive Bathroom Sanitization Our team focuses on deep scrubbing and total sanitization to create a bathroom that feels exceptionally fresh and clean. Grout & Tile Renewal: We deep scrub your shower, tub, and tile, paying special attention to grout lines to eliminate soap scum and mildew. Fixture Descaling: All faucets, showerheads, and fixtures are descaled and polished to remove hard water stains and restore their luster. Total Toilet Sanitization: The toilet is disinfected from top to bottom, including the bowl, base, seat, and tank exterior, for complete
The Ultimate Move Out Cleaning Checklist for 2026
The final days of a move are a whirlwind of boxes and logistics. Amid the chaos, the pressure of the move out clean can feel overwhelming, with your full security deposit hanging in the balance. Instead of wondering where to even begin, imagine having a clear, professional-grade plan to guide you. That’s precisely why we’ve developed the ultimate move out cleaning checklist 2026-your trusted roadmap to transforming a stressful task into a streamlined, satisfying process. In this comprehensive guide, we’ll walk you through a meticulous, room-by-room process designed to leave your old home truly spotless. Our goal is to empower you with the confidence to tackle every task, from deep-cleaning appliances to restoring sparkling surfaces. By following our expert steps, you can confidently secure your full security deposit, leave the property in impeccable condition for the next resident, and move on to your new beginning with the peace of mind you deserve. Key Takeaways A strategic approach before you begin, such as cleaning a mostly empty property, is essential for a truly efficient and thorough result. Our comprehensive move out cleaning checklist 2026 offers a detailed, room-by-room guide to ensure no detail is overlooked, especially in critical areas. Focusing on kitchens and bathrooms is non-negotiable; these areas require the most attention to detail to meet landlord and new owner expectations. Implementing a final, methodical walk-through is your last and best opportunity to catch any missed spots and secure your full security deposit with confidence. Table of Contents Before You Start: Your Move Out Cleaning Game Plan The All-Areas Checklist: Tasks for Every Single Room The Deep Dive: Your Room-by-Room Action Plan The Final Walk-Through: Your Last Check for Perfection Before You Start: Your Move Out Cleaning Game Plan Moving is a significant undertaking, but the final step-the move out clean-is your opportunity to end on a high note and secure your full security deposit. To achieve a truly spotless result, it is essential to work in an empty or mostly empty property. This allows for unrestricted access to every corner, ensuring no detail is overlooked. A methodical approach transforms this final task from a stressful chore into a confident strategy. This game plan is the foundation of our move out cleaning checklist 2026, designed to provide peace of mind and professional-grade results. Why Your Security Deposit Depends on This Checklist For renters, a thorough cleaning is non-negotiable. Your lease agreement almost certainly contains a clause requiring you to return the property to its original move-in condition, accounting for normal wear and tear. Landlords are legally entitled to deduct professional cleaning fees from your security deposit if the property is left unsatisfactory. For sellers, leaving a pristine home is a professional courtesy and often a contractual obligation that ensures a smooth closing and a positive final impression. Essential Cleaning Supplies for a Spotless Finish Gathering your tools before you begin is the key to an efficient and frustration-free clean. Having everything on hand allows you to maintain momentum and tackle each room systematically. We recommend a professional toolkit for a truly thorough job: Cleaning Agents: All-purpose cleaner, a powerful degreaser for the kitchen, streak-free glass cleaner, and a bathroom disinfectant. Tools & Materials: A generous supply of microfiber cloths, non-abrasive sponges, scrub brushes, a squeegee for windows and shower doors, a vacuum with all attachments, a mop, and a sturdy bucket. A step stool is invaluable for reaching high areas. Protective Gear: Always wear protective gloves to protect your skin, and ensure the space is well-ventilated by opening windows or using fans. The Professional’s Strategy: Top-to-Bottom, Dry-to-Wet The most effective cleaning method follows a simple but critical sequence. Always start at the highest point in any room-think ceiling fans, light fixtures, and the tops of cabinets-and work your way down to the floors. This ensures that dust and debris fall downwards onto uncleaned surfaces, preventing you from having to re-clean areas. This systematic approach is a core principle in any comprehensive guide to cleaning and ensures no surface is missed. Furthermore, always complete dry tasks (dusting, sweeping, vacuuming) before moving on to wet tasks (wiping counters, mopping floors). This removes loose dirt first so you aren’t just spreading it around with a wet cloth. The All-Areas Checklist: Tasks for Every Single Room Before you tackle room-specific duties, there are foundational tasks that apply to every space in the home. Consistency is your greatest asset here; a uniformly clean property leaves a lasting, professional impression on landlords during the final inspection. The goal of this universal move out cleaning checklist 2026 is to create a spotless baseline from which to work. Before you begin cleaning, ensure every single personal belonging and all trash has been removed. Meticulously remove all nails and screws from the walls, carefully patching and sanding any holes to leave a smooth, ready-to-paint surface. Fulfilling these basics, which are central to any professional tenant move-out checklist, demonstrates care and respect for the property. Walls, Ceilings, and Fixtures Always work from the top down to prevent dust and debris from settling on surfaces you’ve already cleaned. This methodical approach ensures a truly thorough result. Pay close attention to the details that are often overlooked but make a significant difference in the overall perception of cleanliness. Ceilings and Corners: Use an extendable duster or a vacuum with a brush attachment to meticulously remove all cobwebs and dust from ceilings and corners. Fixtures: Carefully wipe down all light fixtures, ceiling fan blades (both top and bottom), and HVAC vent covers. A clean fixture brightens the entire room. Walls and Baseboards: Spot-clean walls to remove any scuffs, smudges, or marks. Finish by thoroughly wiping down all baseboards to remove accumulated dust. Switches and Outlets: Use a lightly dampened cloth with a gentle cleaner to wipe away fingerprints and grime from all light switches and outlet covers. Windows and Doors Crystal-clear windows and clean doors create a bright and welcoming atmosphere, signaling to the property manager that the home has been well-maintained. These
The Ultimate Move-Out Cleaning Checklist
The boxes are packed and the movers are scheduled, but one final, daunting task stands between you and a stress-free transition: the move-out clean. This crucial step can feel overwhelming amidst the chaos, fueled by the fear of losing your security deposit and the uncertainty of meeting a landlord’s exacting standards. A thorough move-out cleaning is more than just a chore; it’s your key to securing that deposit and closing one chapter with complete peace of mind. That’s precisely why we’ve created this ultimate guide. Our comprehensive, room-by-room checklist is designed to eliminate the guesswork and transform an overwhelming task into a manageable, step-by-step plan. We’ll walk you through every detail, from forgotten baseboards to the inside of the oven, ensuring you can hand over the keys with the confidence of a job done right. Get ready to leave your old home in spotless condition and ensure your security deposit is returned in full. Key Takeaways View your final clean as an investment. Learn how a thorough job protects your security deposit from surprisingly high landlord fees. Tackle your move-out cleaning with confidence using our comprehensive, room-by-room checklist that highlights commonly missed spots. Equip yourself with the essential toolkit for a DIY clean, ensuring you have the right supplies for a professional-level result. Discover the key criteria for vetting a professional service to ensure you partner with a trusted and reliable company for your move. Table of Contents Why a Thorough Move-Out Clean is Your Best Investment The Definitive Room-by-Room Move-Out Cleaning Checklist Gearing Up: Your DIY Move-Out Cleaning Toolkit Choosing a Professional Service: What to Look For Why a Thorough Move-Out Clean is Your Best Investment Moving is a complex process, and the final clean can feel like just another exhausting task on your list. However, viewing your move-out cleaning not as an expense, but as a strategic investment, is a game-changer. It is your single most effective tool for protecting your security deposit, preserving your rental history, and, for homeowners, presenting a property that captivates buyers and accelerates a sale. A meticulous clean provides a return that far exceeds its initial cost. Securing Your Security Deposit Landlords and property managers inspect a home with a professional eye, and they often withhold funds for issues that go beyond a simple wipe-down. Vague lease terms like “broom-clean” are often misleading; most agreements require the property to be returned to its original move-in condition. To avoid disputes, it’s crucial to perform a thorough clean, paying close attention to common problem areas: Grease buildup inside ovens and on cooktops Hard water stains and soap scum in showers and on fixtures Dust and grime on baseboards, blinds, and ceiling fans Scuff marks on walls and stains or odors in carpets To fully protect yourself, we always recommend taking detailed photos and videos of the property after your clean. This documentation provides undeniable proof of the spotless condition in which you left the home. DIY vs. Hiring a Professional: A Cost-Benefit Analysis Tackling the clean yourself may seem cost-effective, but the true costs quickly add up. Consider the price of specialized supplies, potential equipment rentals like carpet cleaners, and most importantly, your valuable time and energy during an already stressful period. A deep clean requires more than just effort; it demands an understanding of the fundamentals of cleaning to effectively treat different surfaces and remove stubborn grime without causing damage. When you weigh these factors against the straightforward cost of a trusted professional service, the value becomes undeniable. For those asking, “Is it worth it?”-the answer is a resounding yes. A professional move-out cleaning service isn’t just about the labor; it’s an investment in a guaranteed result, freedom from landlord disputes, and invaluable peace of mind. Get a no-obligation estimate and see how affordable peace of mind can be. The Definitive Room-by-Room Move-Out Cleaning Checklist To achieve a truly spotless result, we recommend starting your move-out cleaning process after the property is completely empty. Working in a clear space allows for the meticulous attention to detail required to meet landlord expectations and secure your full security deposit. A thorough clean is a key part of your lease agreement, and understanding your specific tenant rights and responsibilities can provide clarity on the standards you need to meet. Follow this trusted checklist for a pristine, inspection-ready home. Kitchen: The Heart of the Move-Out Clean The kitchen often requires the most effort, as grease and food residue accumulate in hard-to-see places. A deep clean here leaves a lasting impression. Appliances: Clean the refrigerator and freezer inside and out, including seals and behind the unit. Scrub the oven interior, racks, and stovetop. Degrease the range hood and filter. Wipe the microwave inside and out, and run the dishwasher on an empty cycle. Cabinets & Drawers: Empty and wipe down all interiors, removing crumbs and old liners. Clean exterior surfaces, including handles and knobs. Surfaces: Thoroughly degrease the backsplash, countertops, and sink. Polish the faucet and drain. Floors: Sweep and mop diligently, ensuring you clean under appliances and deep into corners. Don’t forget to wipe down the baseboards. Bathrooms: From Grime to Shine Focus on sanitizing surfaces and removing buildup like soap scum and hard water stains to restore the bathroom to a fresh, welcoming state. Tub & Shower: Scrub tiles, grout, and fixtures until they sparkle. Clean the shower door, track, and curtain rod. Toilet & Sink: Disinfect the toilet bowl, seat, lid, tank, and base, paying close attention to the area where it meets the floor. Clean the sink, faucet, and drain. Mirrors & Cabinets: Use a quality glass cleaner for a streak-free mirror. Empty and wipe down the medicine cabinet and any vanities. Ventilation: A commonly missed task-dust the exhaust fan cover completely to remove all lint and buildup. Bedrooms & Living Areas These spaces are all about creating a clean slate for the next resident. Focus on details from top to bottom. Walls & Baseboards: Wipe down walls to remove scuffs and fingerprints. Pay
Vacation Rental Cleaning: Your Guide to Flawless Turnovers & 5-Star Reviews
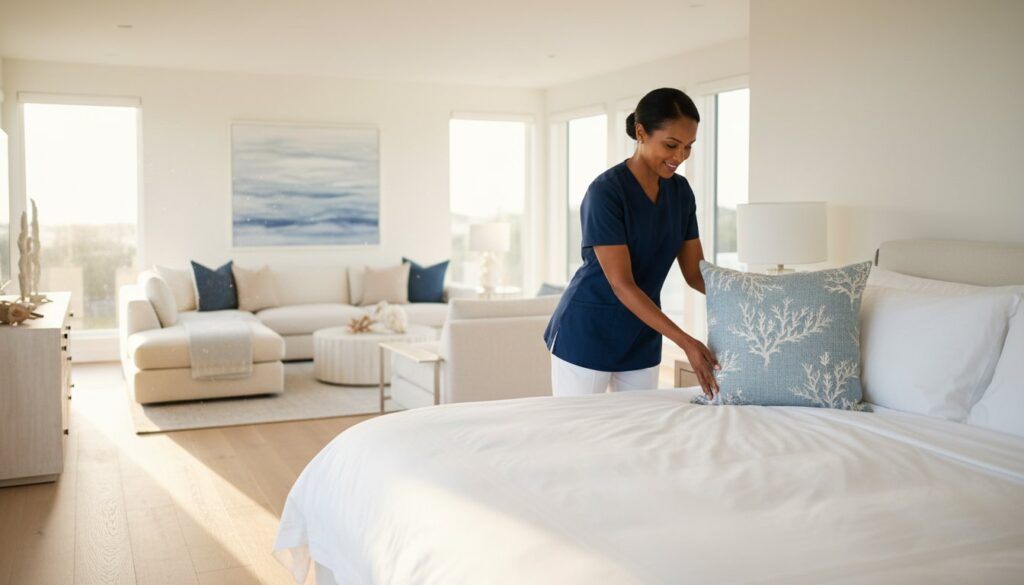
The moment one guest checks out, the countdown begins. In the demanding world of short-term rentals, the pressure of a flawless turnover is immense. You know that a single oversight in your vacation rental cleaning routine-a missed spot on the floor or a less-than-fresh scent-can lead to a dreaded negative review, undermining all your hard work and impacting future bookings. But what if you could trade that stress for the quiet satisfaction of a perfect, guest-ready property every single time? This guide is designed to provide that peace of mind. We will help you master a professional, reliable system that ensures your property doesn’t just look clean-it feels impeccably welcoming. It’s time to transform your turnover process from a frantic rush into a meticulous craft that delivers consistent, five-star results. Inside, you’ll find our expert-backed checklist and professional tips to elevate your hosting game. Prepare to earn those coveted 5-star reviews for cleanliness and build a stellar reputation that keeps your calendar booked solid. Why Vacation Rental Cleaning is a Different League When a guest walks into your property, their first impression is formed in seconds. Unlike a standard home cleaning, professional vacation rental cleaning is an intricate performance designed to create a flawless, welcoming experience every single time. It’s about more than just being tidy; it’s about delivering a hotel-level standard of pristine that directly translates into 5-star reviews, repeat bookings, and maximized revenue. The stakes are incredibly high-one overlooked detail can lead to a negative review that deters countless future guests. This process is not just about cleaning; it’s about resetting and staging the property to look brand new for every arrival. Understanding the key differences from a typical residential clean is the first step toward achieving operational excellence. The Speed and Intensity of Turnovers Turnovers often happen within a tight window, typically just a few hours between one guest’s departure and the next’s arrival. This high-pressure environment leaves no room for error. A systematic, checklist-driven approach is essential to ensure every corner is addressed with precision and care. A missed spot isn’t just an oversight; it’s the first thing a new guest will notice, instantly diminishing their experience and your property’s reputation. Guest Expectations vs. Personal Standards Your personal standard of “clean” is different from what a paying guest expects. They aren’t looking for a “lived-in” home; they are paying for a spotless, sanitized, and impersonal retreat. This level of detail moves beyond simple tidying and into the realm of professional institutional housekeeping, where every surface is scrutinized. It means ensuring bathrooms and kitchens are thoroughly sanitized, appliances are free of fingerprints, and even baseboards are dust-free. The goal is a space that doesn’t just look clean-it feels clean. Inventory and Damage Control A thorough turnover goes beyond wiping down surfaces. It is a critical component of property management that protects your investment and ensures a consistent guest experience. This process includes: A detailed inspection for any damage left by the previous guest. Restocking all essential supplies, from coffee pods and toiletries to paper towels. Staging the property perfectly, ensuring pillows are fluffed and welcome notes are in place. When damage is discovered, having a professional repair service on call is crucial to minimize downtime. For issues that go beyond simple fixes, like significant stains or water damage, it’s important to have a plan. To see the types of specialized services that can handle such emergencies, you can visit The Solution. This meticulous attention to detail is what separates an adequate stay from a memorable, 5-star experience. The Ultimate 5-Star Vacation Rental Cleaning Checklist A flawless turnover isn’t about luck; it’s about a meticulous, repeatable process. This checklist is your blueprint for achieving a 5-star level of clean every single time. In an era where guest expectations for cleanliness are higher than ever, partly influenced by major industry cleaning initiatives, consistency is non-negotiable. Follow this room-by-room guide to ensure your property doesn’t just look clean-it feels clean, safe, and welcoming for every arrival. Kitchen: The Heart of the Rental The kitchen often sees the most use and requires thorough attention to detail. A spotless kitchen reassures guests that the entire property is held to a high standard. Empty the refrigerator and freezer of all leftover items. Wipe down every shelf, drawer, and handle. Clean and degrease the microwave interior, oven racks, and stovetop. Run and empty the dishwasher. Check for and remove any debris from the filter. Sanitize all high-touch surfaces: countertops, sinks, faucets, and cabinet handles. Restock essentials like coffee, tea, sugar, a new sponge, dish soap, and paper towels. Bathrooms: A Sanctuary of Cleanliness A pristine bathroom is a non-negotiable for guests. This space must be sanitized with precision and care to provide comfort and peace of mind. Thoroughly scrub and disinfect the toilet (inside and out), shower, tub, and sink. Polish all chrome fixtures, faucets, and mirrors until they are streak-free and shining. Wash all bathmats and replace all used towels with fresh, professionally folded sets. Restock toilet paper, hand soap, and guest-sized shampoo, conditioner, and body wash. Bedrooms & Living Areas: Comfort and Presentation These are the spaces where guests relax and unwind. Your professional vacation rental cleaning process ensures they are comfortable, tidy, and completely refreshed for the next stay. Strip all beds and remake them with fresh, crisp, and unwrinkled linens. Diligently check under beds, in closets, and in all drawers for items left by previous guests. Dust all surfaces, including nightstands, dressers, ceiling fans, blinds, and window sills. Vacuum all carpets and rugs thoroughly. Mop all hard-surface floors. The Final Touches: Staging for Arrival The final walkthrough is where you transform a clean space into a welcoming experience. These details create a memorable first impression that leads to glowing reviews. Set the thermostat to a comfortable temperature (e.g., 72°F/22°C). Turn on a few welcoming lights, such as porch or entryway lamps. Check that all remote controls are present and that all electronics are working correctly. Arrange pillows, throws, and
How to Clean Your Home: A Professional’s Guide for Beginners

Does the thought of cleaning your home leave you feeling overwhelmed? If you’ve ever felt unsure where to start or spent hours on methods that don’t deliver lasting results, you are not alone. The real challenge for many isn’t finding the motivation, but learning how to clean with professional precision and efficiency. A truly clean home isn’t just about appearances; it’s about creating a space that feels genuinely fresh and restorative, a sanctuary that gives you peace of mind. Pro Tip: If stubborn soap scum and water spots are a constant battle, the issue might be hard water. Treating your water at the source can make surfaces easier to clean and keep them sparkling longer; you can find out more about The AlkaPro Whole House System. This guide was created to banish that feeling of overwhelm for good. We believe your home should be a place of comfort, not a source of stress. Forget the guesswork and wasted effort. Here, you will discover a simple, step-by-step system-the same thorough approach used by our trusted professionals-designed specifically for beginners. Prepare to transform your routine, gain confidence in your skills, and finally achieve a spotless home that doesn’t just look clean, but feels truly welcoming and refreshed. Before You Begin: Assembling Your Professional Cleaning Toolkit The journey to a spotless home doesn’t begin with a marathon cleaning session; it starts with having the right tools. When you’re learning how to clean like a professional, it’s easy to feel overwhelmed by the sheer volume of products available. The secret, however, lies in quality over quantity. A curated collection of versatile, high-performing supplies will deliver better results and create a more streamlined experience. Understanding the fundamentals of the process of cleaning reveals it’s less about harsh chemicals and more about effective methods and reliable tools. We believe in a thoughtful approach that prioritizes both a pristine finish and a healthy environment. Essential Cleaning Supplies To achieve a professional standard of clean, you only need a few trusted essentials. These core items are the foundation of an efficient and thorough cleaning routine. Microfiber Cloths: A set of high-quality microfiber cloths is non-negotiable. They trap dust, absorb liquids, and polish surfaces with unmatched precision, all without leaving behind lint. All-Purpose Cleaner: A reliable, pH-neutral all-purpose cleaner is your go-to for wiping down countertops, sinks, and most hard surfaces. Glass Cleaner: For a truly streak-free shine on mirrors, windows, and glass tabletops, a dedicated ammonia-free glass cleaner is essential. A Quality Vacuum and Mop: Invest in a dependable vacuum with good suction for floors and upholstery. Pair it with a simple mop and bucket or a steam mop for sparkling hard floors. Eco-Friendly & DIY Alternatives We care about your health and the environment. That’s why at AlphaLux, we exclusively use non-toxic, eco-friendly products that are both safe and powerful. You can adopt this same philosophy at home with simple, effective ingredients you likely already own. White Vinegar & Water: A 50/50 solution in a spray bottle works wonders as a natural glass and all-purpose cleaner. Baking Soda: This acts as a gentle, non-scratching abrasive perfect for scrubbing sinks, tubs, and even lifting stains from countertops. Lemon Juice: Its natural acidity cuts through grease and leaves behind a fresh, clean scent. The Cleaning Mindset: Setting Yourself Up for Success Your most powerful tool is your mindset. Approaching cleaning with a plan transforms it from a daunting chore into a manageable and rewarding ritual that gives you peace of mind. Start Small: You don’t have to clean the entire house in one day. Focus on one room or even one task at a time. Make it Enjoyable: Put on your favorite music, an engaging podcast, or an audiobook. Time flies when you’re entertained. Use a Timer: Set a timer for 15 or 20 minutes and focus solely on one task. You’ll be amazed at how much you can accomplish in short, focused bursts. The Foundational Method: How to Clean Any Room Systematically The secret to a professional, lasting clean isn’t about scrubbing harder-it’s about working smarter. To achieve that pristine, welcoming feeling in your home, you need a reliable system. Professionals understand that knowing how to clean methodically is the key to efficiency and flawless results. This approach is built on a systematic cleaning plan, a strategy that prevents re-work and guarantees a thorough finish. By following this foundational method, you can transform any space with precision and care, achieving a deeper clean in less time. The Golden Rule: Top to Bottom, Left to Right The most important principle in professional cleaning is working with gravity, not against it. Dust, crumbs, and debris naturally fall downward. Therefore, you should always start cleaning at the highest point in a room-think ceiling fans, light fixtures, and the tops of bookshelves-and work your way down. Move methodically around the room (from left to right or right to left) to ensure no surface is missed. This simple logic ensures that you never have to re-clean a surface, as floors are always the final step. The Four-Step Process for Every Space For consistent, spotless results in any room, follow this trusted four-step sequence. This is the core framework that simplifies the process and ensures nothing is overlooked. Declutter: Before you begin cleaning, clear the space. Remove items that don’t belong, put away stray objects, and clear surfaces. This gives you a blank canvas to work with. Dust & Wipe: Following the ‘top to bottom’ rule, dust and wipe down all surfaces. This includes everything from shelves and picture frames to tables and countertops. Floors: Once all surfaces are clean, it’s time to address the floors. Vacuum, sweep, and/or mop the entire area to remove the dust and debris that has settled. Final Touches: Complete the process by emptying trash bins, straightening pillows and decor, and perhaps lighting a candle or using a room spray for a fresh, welcoming scent. Tackling Specific Rooms: Where to Focus Your Energy While the four-step method applies