You got the keys. Boxes are packed. The movers are booked. But before a single piece of furniture crosses that threshold, there’s one step you don’t want to skip: cleaning every inch of your new place. A thorough move in cleaning checklist gives you a clear plan of attack so nothing gets overlooked, from the cabinet shelves no one’s wiped down in years to the bathroom grout that’s seen better days.
Here’s the thing, you have no idea what the previous occupants left behind. Dust, grime, pet dander, mystery stains in the fridge. Starting fresh in a truly clean space matters for both your comfort and your health. And once your furniture and boxes are in, reaching those bare floors, empty closets, and naked countertops becomes ten times harder.
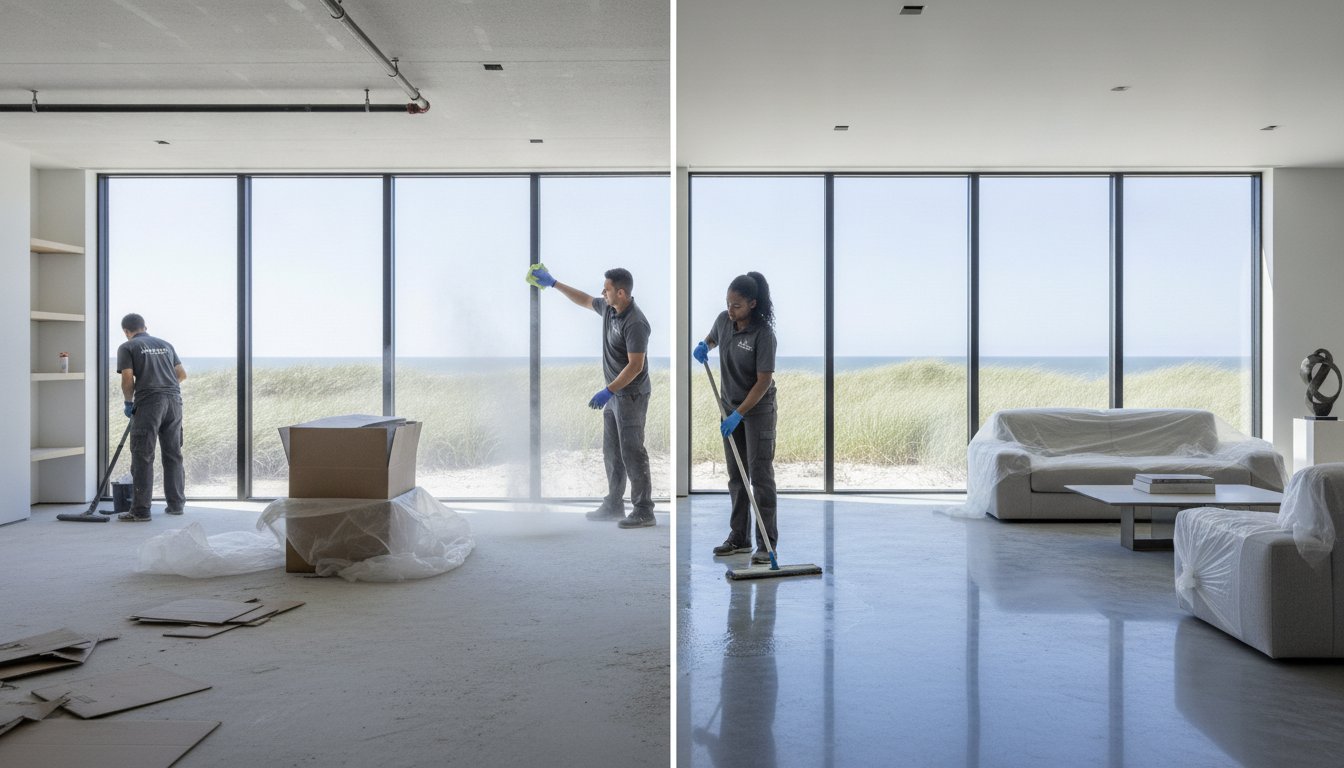
At AlphaLux Cleaning, we handle move-in cleans across New York State every week, so we know exactly what each room demands. We built this guide based on what our teams actually do on-site, a practical, room-by-room breakdown you can follow yourself or hand off to professionals. Below, you’ll find every task organized by space, so you can work through your new home systematically and unpack into a place that genuinely feels like yours.
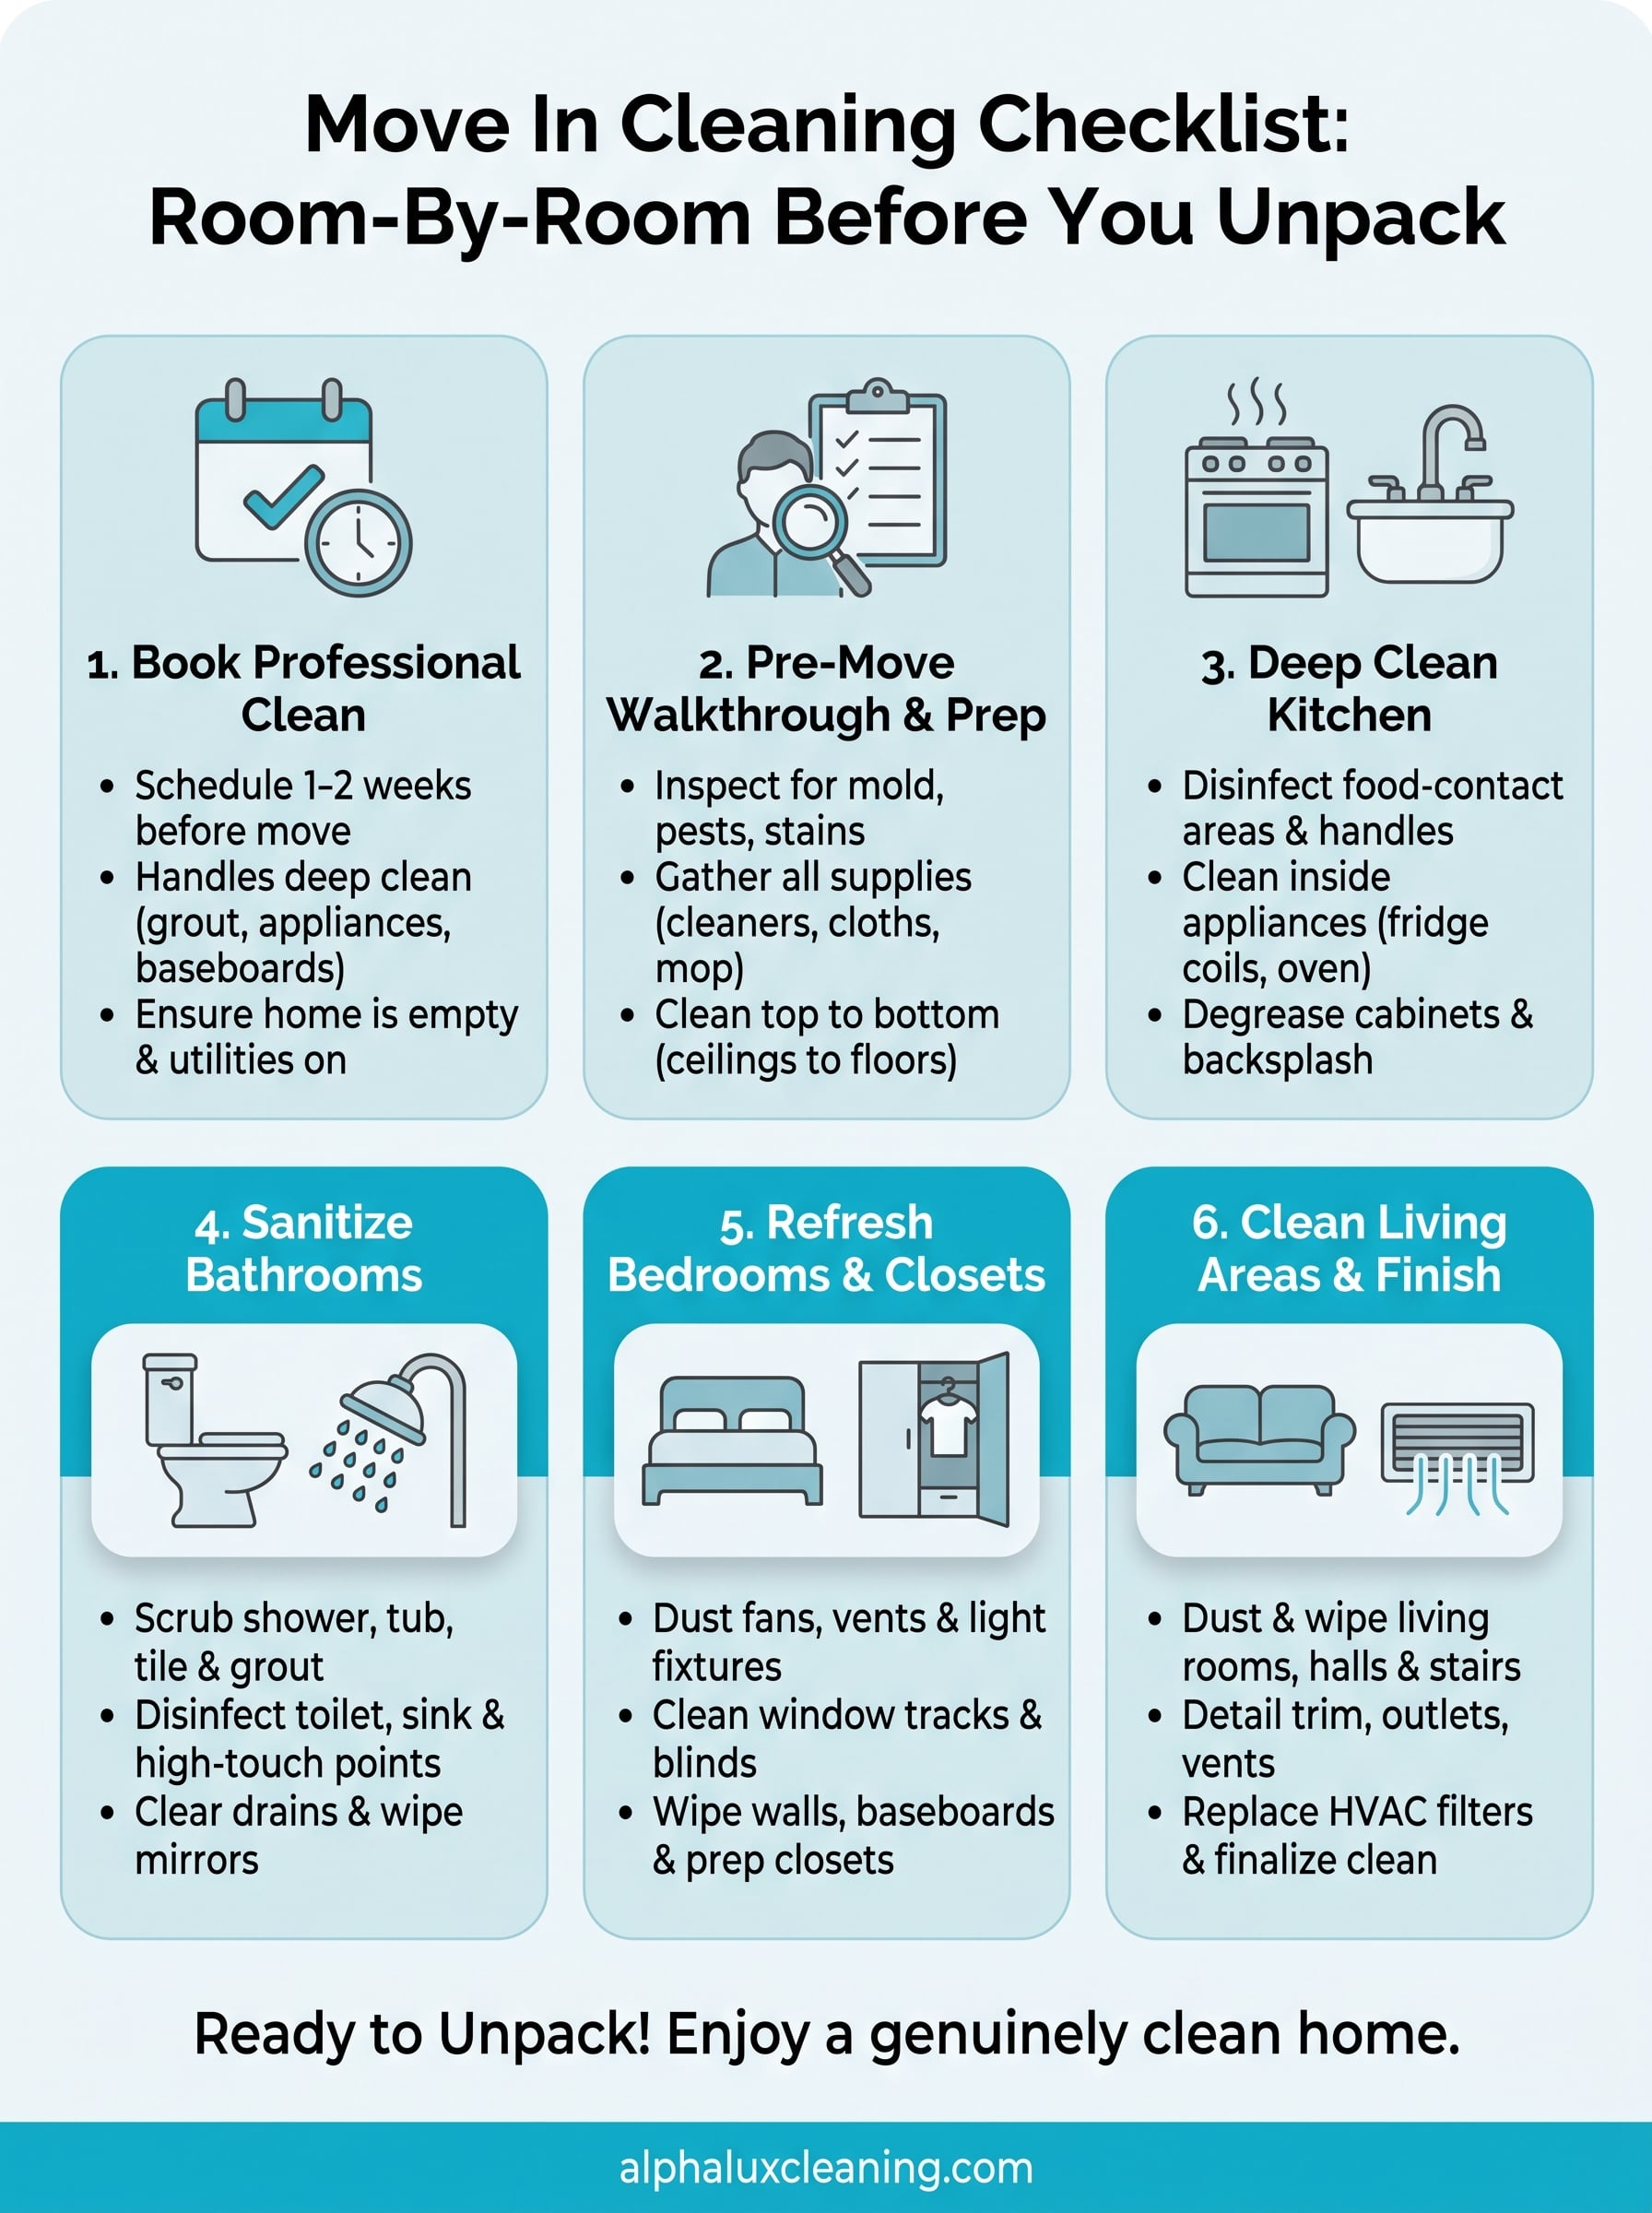
1. Book a professional move-in clean with AlphaLux
Hiring a professional team before you unpack is the fastest way to guarantee a truly clean starting point without burning your move weekend on scrubbing. AlphaLux handles move-in cleans throughout New York State, and booking early locks in your date before the movers show up with the first load of boxes.
What a move-in clean covers before you unpack
A professional move in cleaning checklist goes room by room and targets every surface that collects grime between tenants or owners. That means inside appliances, cabinet interiors, bathroom grout, ceiling fans, baseboards, light switches, window sills, and floor edges – all the spots a standard clean skips. Think of it as a full property reset before your belongings arrive.
Our teams bring industrial-grade, eco-friendly cleaning products that break down buildup more effectively than off-the-shelf options. The result is a home that’s genuinely sanitized, not just wiped down.
When to schedule it in your move timeline
Book your clean one to two weeks before your move date to secure your preferred time slot, especially during peak moving seasons like late spring and summer in New York. Schedule the clean for the day after you get your keys, before the movers arrive with furniture.
Cleaning an empty home takes a fraction of the time it does once furniture is in place, so locking in that window makes the whole move smoother.
How to prep the home so the team can work fast
Your only job before the team arrives is to confirm the home is empty and utilities are on. Running water and electricity let cleaners move through every room without delays. Note any areas with visible damage or special concerns so the team can plan accordingly.
Confirm access details with your building manager in advance if it’s a condo or apartment, and make sure parking is available for the cleaning crew.
What affects pricing for move-in cleaning in New York
Pricing depends on square footage, the number of bathrooms, and the current condition of the property. A home that hasn’t been maintained in months takes longer than one that’s been recently kept up. Add-ons like inside-oven cleaning or refrigerator detailing increase the total.
Request a free estimate from AlphaLux to get an accurate quote based on your specific property rather than a rough ballpark figure.
2. Do a pre-move walkthrough and prep
Before you scrub a single surface, walk through the entire property with fresh eyes. A thorough walkthrough reveals problem areas that need extra attention and helps you prioritize tasks on your move in cleaning checklist before you start.
Spot red flags that change your cleaning plan
Check every room for signs of mold, pest activity, water stains, and strong odors. These issues require different products and techniques than standard dirt and dust. If you spot mold near windows or under sinks, address it before general cleaning so you don’t spread spores through the rest of the home.
If you find active pest evidence or significant mold growth, contact a specialist before your cleaning day.
Gather supplies and set up the space for cleaning
Confirm you have all your cleaning products, microfiber cloths, mop heads, and protective gloves before you begin. Lay out supplies by room so you’re not hunting for tools mid-task. Running water and working electricity are non-negotiable for an efficient clean.

Clean top to bottom and room to room for speed
Always start at ceiling fans, light fixtures, and upper shelves, then work down to countertops, then floors. This method ensures falling dust and debris land on surfaces you haven’t cleaned yet rather than ones you just finished.
Handle safety first with chemicals, vents, and pests
Run all HVAC vents and open windows during cleaning to clear chemical fumes and improve ventilation. Check under sinks and inside cabinets for leftover cleaning products or pest traps from previous occupants and dispose of them before you stock your own supplies.
3. Deep clean the kitchen before food and dishes
The kitchen is where your move in cleaning checklist earns its keep. Previous occupants leave behind grease, food residue, and bacteria on nearly every surface, and most of it isn’t visible at first glance. Clean this room completely before you put away a single dish or food item.
Disinfect high-touch surfaces and food-contact areas
Countertops, cabinet handles, faucets, and light switches all collect bacteria and need a proper disinfectant, not just a quick wipe. Use an EPA-registered disinfectant on all food-prep surfaces and allow it to sit for the full recommended contact time before wiping.
Letting disinfectant dwell on the surface for the full contact time is what actually kills bacteria, not just spreading it around.
Clean inside appliances the right way
Pull the refrigerator out and wipe down the coils, the floor underneath, and the back panel. Remove shelves and drawers, wash them in warm soapy water, and dry them before replacing. Scrub the oven interior with a heavy-duty degreaser and run the self-clean cycle if the unit has one.
Degrease cabinets, backsplash, and range hood areas
Cabinet faces and interiors trap cooking grease and dust that standard cleaners won’t cut through. Apply a degreasing solution, let it soak before scrubbing, then line shelves with fresh liner before loading in your dishes and pantry items.
Finish floors, baseboards, and trash smells
Sweep and mop floors with a cleaner suited to your surface type, whether tile, hardwood, or vinyl. Wipe baseboards and scrub grout lines if needed. Spray the inside of the trash cabinet with disinfectant and let it air dry before you install a new bin.
4. Sanitize bathrooms so they feel truly clean
Bathrooms are the highest-priority stop on your move in cleaning checklist because they hold the most bacteria and residue from previous occupants. Every surface here needs a real disinfectant, not just a rinse. Plan to work through this room completely before your toiletries and towels go anywhere near these surfaces.

Tackle shower, tub, tile, and grout buildup
Grout lines and tub edges collect soap scum, mildew, and mineral deposits that a basic spray won’t cut through. Apply a grout cleaner or oxygen bleach solution, let it sit for 10 to 15 minutes, then scrub with a stiff-bristle brush. Rinse thoroughly and inspect for remaining discoloration before moving on.
Disinfect the toilet, sink, and high-touch points
Clean the toilet inside and out, including the tank lid, base, and flush handle, which most people skip entirely. Use an EPA-registered disinfectant on the sink basin, faucet handles, and soap dish. These surfaces transfer bacteria directly to your hands multiple times a day.
Disinfecting the flush handle and faucet handles matters more than any other surface in the bathroom.
Clear drains and handle mildew and odors
Pour a baking soda and vinegar flush down each drain to break up buildup and neutralize odors. Check the drain stopper and overflow plate for hair and residue, then clean underneath both. If the room smells musty, check behind the toilet and under the vanity for hidden moisture.
Finish mirrors, vents, and bathroom floors
Wipe mirrors with a streak-free glass cleaner and a dry microfiber cloth for a clear, spot-free finish. Remove vent covers, rinse them, and let them dry before reinstalling. Mop bathroom floors with a disinfecting floor cleaner, focusing on grout lines, corners, and the area directly behind the toilet.
5. Refresh bedrooms, closets, and entry storage
Bedrooms and closets often look clean at first glance but collect settled dust, allergens, and lingering odors from previous occupants. Working through these spaces on your move in cleaning checklist before furniture and clothing arrive saves you from storing items around grime you cannot see.
Remove dust from fans, vents, and light fixtures
Ceiling fans and light fixtures are dust magnets that get skipped during routine cleaning. Wipe every blade and fixture cover with a damp microfiber cloth before vacuuming the floor so fallen dust gets picked up in one pass rather than resettling.
Clean windows, tracks, and blinds for air quality
Window tracks and blind slats trap years of dust, dead insects, and debris that circulate through bedroom air once windows open. Scrub tracks with a stiff brush and disinfectant spray, then wipe each blind slat individually with a damp cloth.
Clean window tracks before you open windows for the first time, or you push that buildup straight into the room.
Wipe walls, baseboards, doors, and switches
Light switches, door handles, and baseboards transfer grime constantly and rarely get cleaned between tenants. Wipe all of them with a disinfecting wipe or damp cloth, paying extra attention to the areas around the bed wall and entry door.
Prep closets and floors before clothes move in
Closet shelves and rods collect dust and sometimes hold residue from previous storage items. Wipe every shelf, vacuum the floor thoroughly, and allow the space to air out completely before hanging clothes or placing boxes inside.
6. Clean living areas and finish whole-home tasks
Living areas, hallways, and stairs connect every room in your home and pick up dust and debris from everyone moving through during the clean. Finishing these spaces last on your move in cleaning checklist makes practical sense because particles from other rooms settle here throughout the day.
Dust and wipe living rooms, hallways, and stairs
Start at the top of each space and work down. Ceiling corners, crown molding, and upper wall surfaces collect cobwebs and settled dust that drop onto floors the moment you disturb them. Wipe down windowsills, shelving, and any built-in storage with a damp microfiber cloth before vacuuming the entire floor in one final pass.
Detail trim, outlets, vents, and overlooked corners
Baseboards, outlet covers, and floor vent grilles in common areas rarely get cleaned between occupants. Wipe every outlet plate and baseboard with a disinfecting cloth, then use a vacuum brush attachment on floor vents to pull out settled dust before the system runs.
Cleaning vents before you run the HVAC prevents that first blast of dusty air from coating every surface you just finished.
Reset HVAC filters and improve indoor air
Replace the air filter with a fresh MERV-8 or higher-rated filter before you run the system for the first time. A clogged filter from previous occupants pushes allergens, dust, and odors into every room the moment you switch it on.
Final checklist before you bring in boxes and furniture
Walk every room one final time and confirm floors, vents, light switches, and windows are fully clean and dry. Your home is ready for furniture and boxes once each space has had time to air out completely.
Ready to unpack
Your move in cleaning checklist is complete. Every room has been worked through from ceiling to floor, every appliance scrubbed, every vent cleared, and every high-touch surface disinfected. Your new home is genuinely clean, not just surface-level tidy, which means you can place furniture, hang clothes, and stack dishes without wondering what’s lurking underneath.
Finishing this process before your boxes arrive makes an enormous difference. Unpacking into a clean space keeps your belongings clean from day one and removes the stress of trying to clean around furniture later. You’ve already done the hard part.
If you’d rather skip the scrubbing and hand the whole job to a professional team, AlphaLux Cleaning handles move-in cleans across New York State. Request a free estimate and get your new home ready before the first box crosses the threshold.