Construction dust doesn’t stay where you’d expect. It coats the inside of cabinets, settles into air vents, films over every window, and hides behind appliances you haven’t moved yet. Without a solid post construction cleaning checklist, it’s easy to miss dozens of spots that make a freshly built or renovated space feel far from finished. Whether you’re a homeowner wrapping up a kitchen remodel or a contractor handing off a full buildout, knowing exactly what to clean, and in what order, saves hours of rework.
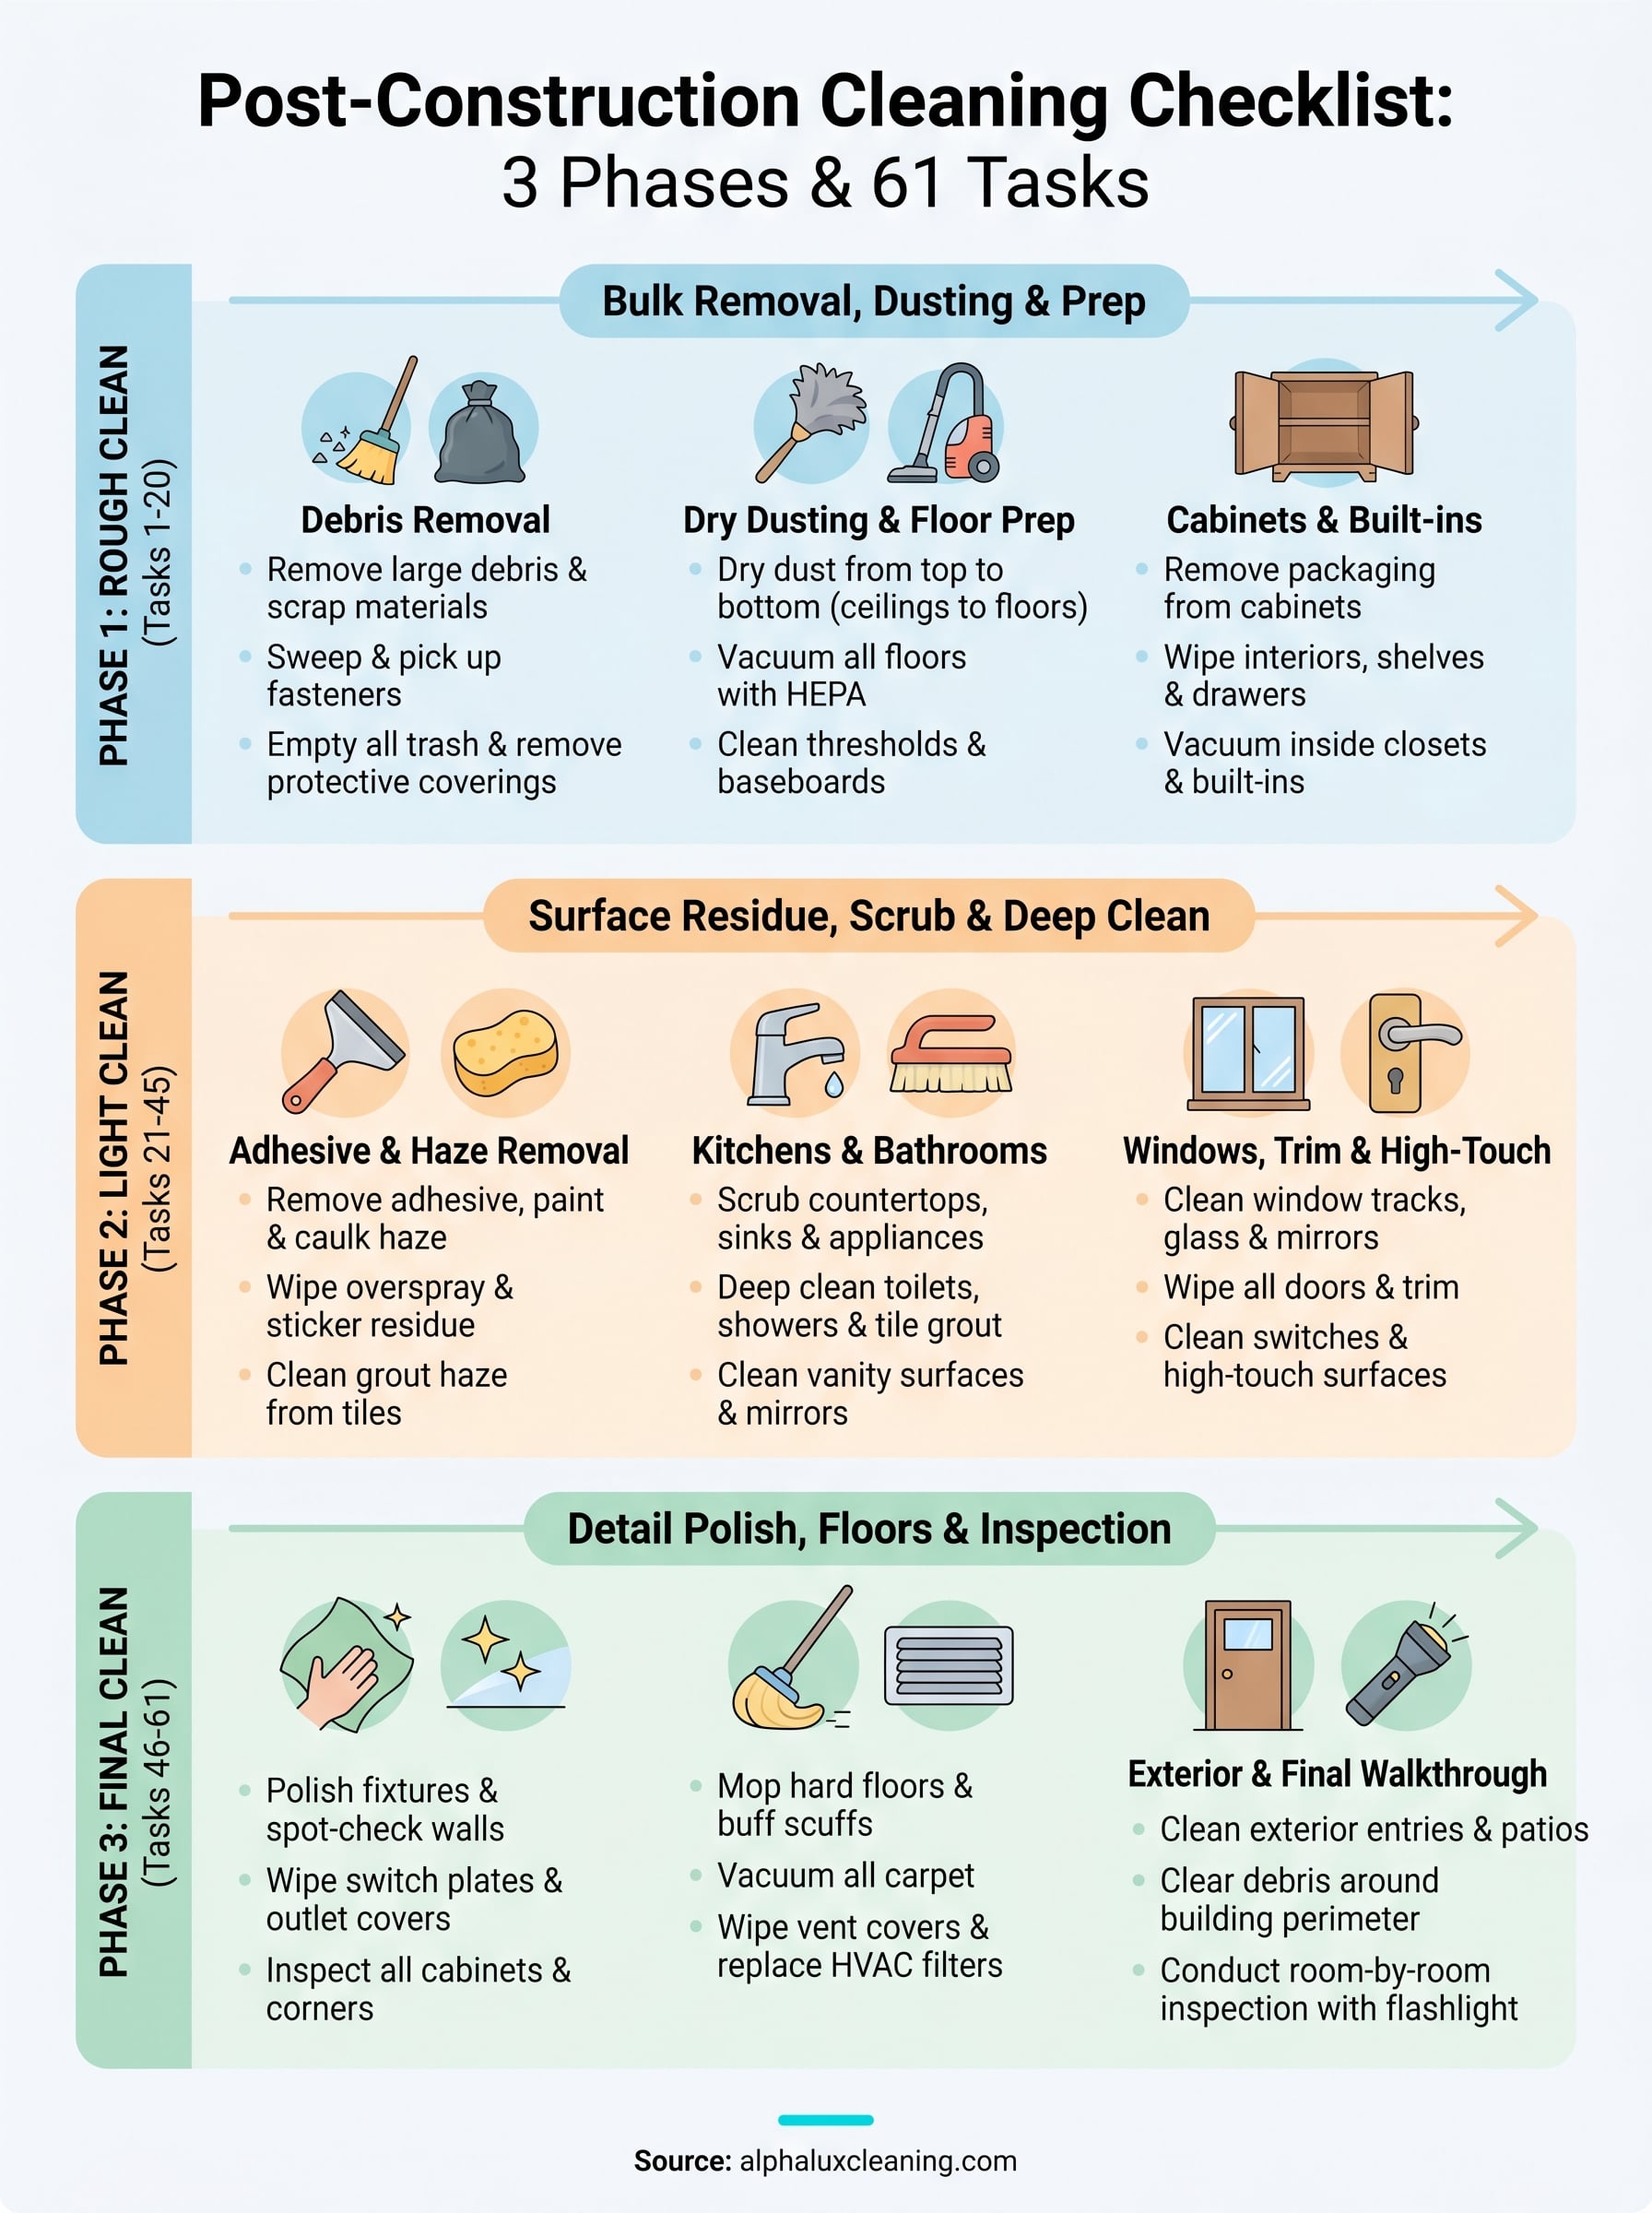
The process breaks down into three distinct phases: rough cleaning, light cleaning, and a final detail pass. Each phase builds on the last, and skipping steps early on creates bigger problems later. At AlphaLux Cleaning, we handle post construction cleanups across New York State, and we’ve seen firsthand how a structured approach makes the difference between a space that looks clean and one that actually is clean, down to the grout lines and door hinges.
Below, you’ll find all three phases mapped out with 61 specific tasks, from debris removal to the final polish. Use it as a working reference on-site, hand it to your crew, or bring it to a walkthrough. Every task is here so nothing gets overlooked before that space is ready for move-in.
1. Book a post-construction cleaning team in New York
Before you pick up a mop, decide whether you’re handling this yourself or bringing in a professional team. Post-construction sites carry serious hazards that most homeowners and project managers don’t anticipate, including drywall dust, silica particles, and chemical residues from new materials. Making the right call early saves you time, money, and a second round of cleaning.
When hiring pros makes sense vs DIY
DIY post-construction cleaning works for small jobs, like a single-room refresh or a bathroom retile. For anything larger, hiring a professional crew makes more sense because the scale and hazard level increase fast. If your project involved drywall, concrete work, or spray paint, fine particulate cleanup requires industrial HEPA equipment and proper disposal methods that most homeowners don’t have.
What a professional post-construction clean should include
Your professional team should cover all three phases in your post construction cleaning checklist: rough debris removal, light surface cleaning, and a final detail pass. Expect them to clean inside cabinets, wipe down all trim and baseboards, scrub tile grout, clean HVAC vents, and leave every window streak-free. If a company only offers a "standard clean" after construction, that’s a red flag.
A thorough post-construction clean addresses every surface, including areas above eye level, inside fixtures, and behind appliances, not just what’s immediately visible.
Questions to ask before you schedule
When you book, ask the company how many crew members they plan to send and what their estimated hours are for your square footage. Confirm they carry general liability insurance and workers’ compensation coverage. Ask specifically whether their scope includes debris hauling, window track cleaning, and HVAC vent wipe-downs, because these tasks are often excluded from base quotes.
What affects pricing and timelines in New York
In New York, post-construction cleaning rates vary based on square footage, project type, and debris volume remaining on-site. A 1,500-square-foot residential renovation typically takes 6 to 10 hours with a two-person crew. Access, parking, and building elevator rules in New York City and Long Island can also add time, so give the team accurate site information upfront.
How to prep the site so the crew can work fast
Clear out any tools, materials, or personal items that don’t belong in the space. Make sure utilities are active so the crew has running water and power for vacuums. Confirm all contractors have finished their work and that no active trades will be on-site during the clean. The faster the crew can move without interruptions, the lower your final bill.
2. Plan the job and stage supplies before you start
Good planning cuts your actual cleaning time in half. Before anyone touches a surface, confirm site conditions and stage every supply you’ll need so the crew moves without stopping.
Confirm the build is truly complete and safe to enter
Walk the site with the general contractor before cleaning starts. All trades should be finished, and you should check for sharp debris, exposed nails, and unstable surfaces before anyone enters with cleaning equipment.
Set the cleaning sequence and define the three phases
Your post construction cleaning checklist runs in a fixed order: rough clean, light clean, then final detail pass. Starting from the top of each room and working down prevents dust from resettling on surfaces you’ve already cleaned.
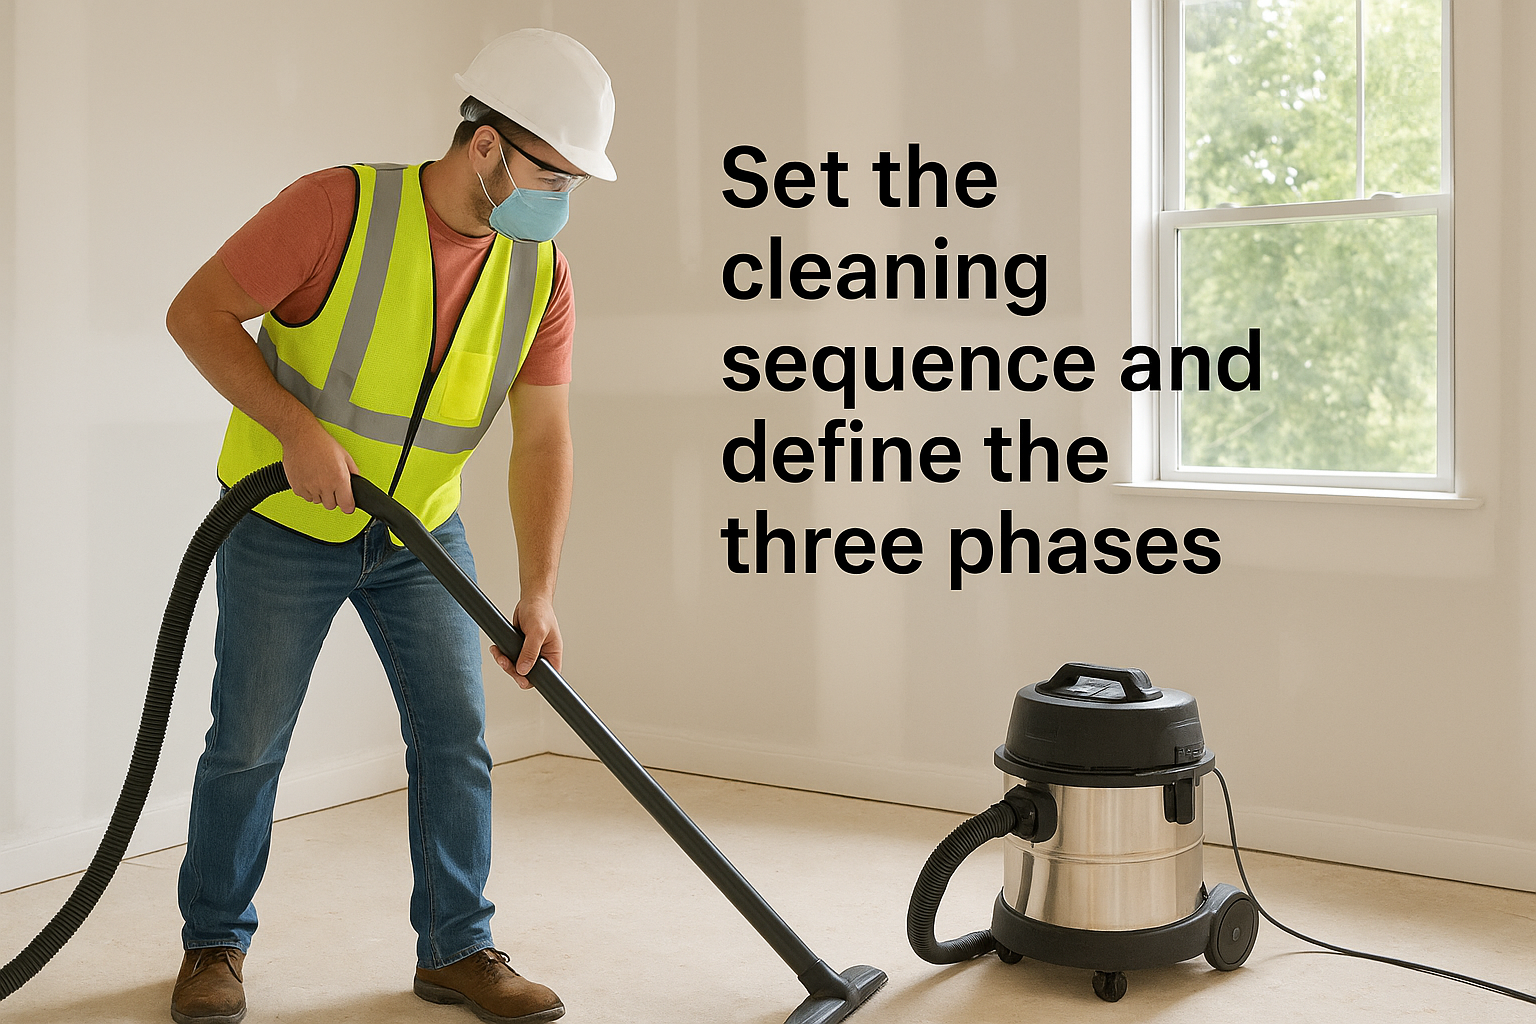
Cleaning out of sequence forces you to redo work, which adds hours to the overall job.
PPE and safety rules for construction dust and debris
Require everyone on-site to wear N95 respirators and safety glasses during rough and light phases. Construction dust contains silica and chemical particulates that cause serious respiratory problems with repeated exposure, so never skip the respirator even for short visits.
Equipment checklist for fine dust and heavy debris
Bring an industrial wet/dry vacuum with HEPA filtration and a heavy-duty broom for bulk debris. You’ll also need microfiber cloths, extension poles, and stiff scrub brushes for grout lines and caulk edges.
Chemicals and surface-safe products for new finishes
New finishes scratch and stain easily. Use pH-neutral cleaners on stone countertops and avoid acidic products near grout or fresh paint. Always test any chemical on a small hidden area before applying it broadly.
Waste sorting, hauling, and disposal basics
Separate construction debris from regular household trash to stay compliant with local disposal rules. In New York, large debris loads require a licensed hauler, so arrange this before cleaning day to avoid last-minute delays.
3. Rough clean phase checklist, tasks 1–20
The rough clean phase is your foundation. Every task here focuses on bulk removal, clearing the site of debris, loose material, and construction residue before any wet or detail work begins. Rushing this phase forces you to clean the same surfaces twice.
Tasks 1–7: Debris removal and jobsite reset
Start here before touching any finished surface. These seven tasks clear bulk waste so your post construction cleaning checklist can progress without loose material contaminating cleaned areas.
- Remove large debris, scrap lumber, and material packaging from all rooms
- Sweep each room from the farthest point toward the exit
- Pick up fasteners, nails, and hardware scraps by hand or with a magnetic sweeper
- Empty all trash left behind from contractor work areas
- Remove protective floor coverings and pull tape residue carefully
- Relocate leftover materials or tools to a staging area outside
- Complete a room-by-room reset to confirm all spaces are clear
Tasks 8–12: Dry dusting from top to bottom
Work from ceiling level down to floor level so falling dust doesn’t resettle on surfaces you’ve already cleared.
- Dust ceiling fans, light fixtures, and smoke detectors
- Wipe all wall surfaces with a dry microfiber cloth
- Clean window sills, ledges, and horizontal surfaces above eye level
- Dust door frames, tops of doors, and interior door surfaces
- Wipe exposed beams or structural elements where applicable
Dry dusting before any wet cleaning prevents debris from turning into a paste that smears into surfaces and multiplies your cleaning time.
Tasks 13–16: Floors, thresholds, and baseboards prep
Floors absorb the most abuse during construction, so this pass removes grit before final floor work begins.
- Vacuum all floor surfaces with an industrial HEPA vacuum
- Sweep thresholds, transitions, and door tracks clear of debris
- Dry-wipe all baseboards to remove dust and overspray
- Clear floor drains of any construction material
Tasks 17–20: Cabinets, closets, and built-ins first pass
Cabinets and closets trap dust in corners and on shelving that gets overlooked on a standard pass.
- Remove all protective wrap and packaging from new cabinetry
- Wipe cabinet interiors, shelves, and drawer boxes with a dry cloth
- Clear closet rods, shelving, and floor surfaces of dust and debris
- Vacuum inside built-in storage and recessed areas
4. Light clean phase checklist, tasks 21–45
The light clean phase targets surface residue and fine contamination that the rough pass couldn’t address. This is where you remove adhesive, scrub fixtures, and work through every wet surface and finish in the space before the final detail pass begins.
Tasks 21–27: Adhesive, caulk haze, and paint speck removal
These seven tasks tackle the sticky residue and caulk haze that construction leaves on nearly every surface. Work carefully to avoid scratching new tile and glass finishes.
- Remove adhesive residue from floors and cabinets using a safe solvent
- Dissolve caulk haze from tile and glass with a pH-neutral cleaner
- Scrape dried paint specks from hard floors with a plastic scraper
- Wipe paint overspray from trim and baseboards with a damp microfiber cloth
- Remove sticker and label residue from windows and fixtures
- Clean grout haze from tile surfaces
- Wipe all walls to remove smudges and surface contamination
Tasks 28–33: Kitchens and break areas scrub and wipe-down
Kitchens collect construction dust in every crevice, from inside drawer slides to the back of countertops. Scrub all surfaces and hardware thoroughly before moving on.
- Wipe all countertops with a surface-appropriate cleaner
- Clean inside and outside of all appliances
- Scrub the sink basin and faucet hardware
- Degrease cabinet faces and hardware
- Clean range hood filters and vent surfaces
- Wipe down backsplash tile and grout lines
Tasks 34–39: Bathrooms deep clean and grout focus
Bathrooms need extra attention to grout lines and caulk joints where construction residue accumulates and hardens against tile and fixture surfaces.
Grout haze left to cure past 48 hours becomes significantly harder to remove, so prioritize bathrooms early in this phase.
- Scrub all tile surfaces and grout lines with a stiff brush
- Clean toilets, tanks, and bases thoroughly
- Wipe down vanities, countertops, and cabinet faces
- Scrub shower walls, doors, and thresholds
- Clean mirror surfaces and chrome fixtures
- Flush and sanitize all drains
Tasks 40–43: Windows, glass, mirrors, and tracks
Window tracks trap more construction debris than almost any other surface, and streaks on glass show clearly once natural light hits the room, so work methodically here.
- Clean all window tracks and frames with a small brush and vacuum
- Wash interior window glass with a streak-free solution
- Wipe all mirrors from top to bottom
- Clean sliding door tracks and door glass panels
Tasks 44–45: Doors, trim, switches, and high-touch points
Your post construction cleaning checklist isn’t complete in this phase until you address every door and switch plate. Fingerprints and dust from contractor traffic coat these surfaces on every job.
- Wipe all door surfaces, edges, and hardware with a damp microfiber cloth
- Clean all light switches, outlet covers, and high-touch surfaces throughout every room
5. Final clean phase checklist, tasks 46–61
The final clean phase is where your post construction cleaning checklist delivers its payoff. Every task here brings the space to move-in-ready condition, and cutting corners at this stage shows immediately once furniture and lighting go in.
Tasks 46–50: Detail dusting, polish, and spot checks
This pass targets every surface that catches light at a sharp angle. Work slowly, because fine dust and smudges you miss now will be obvious the moment a client or homeowner walks through the door.
- Polish all stainless steel and chrome fixtures with a clean microfiber cloth
- Wipe down light switch plates, outlet covers, and cover panels a second time
- Spot-check all walls for scuffs and wipe clean with a damp cloth
- Dust all ceiling corners and edges for remaining cobwebs or debris
- Inspect all cabinets inside and out and wipe any missed residue
Tasks 51–54: Floor final finish, edges, and corners
Floors take the hardest look during any final walkthrough, so finish them last to avoid foot traffic marking up your work.
- Mop all hard floors using a surface-appropriate cleaner
- Clean all floor edges and corners where vacuums miss debris
- Buff any scuff marks from hard floor surfaces
- Vacuum all carpet areas with a clean HEPA filter installed
Floor edges and corners are the most commonly missed spots on any final clean, and they stand out immediately on inspection day.
Tasks 55–57: HVAC vents, filters, and air quality steps
Construction dust saturates HVAC systems far beyond what’s visible, and dirty filters will recirculate that dust after move-in.
- Wipe all supply and return vent covers clean
- Replace HVAC filters with new ones rated for fine particulates
- Run the HVAC system briefly and check for any dust discharge
Tasks 58–60: Exterior entries, patios, and curb appeal
First impressions start at the entrance, so exterior surfaces matter as much as any interior finish.
- Sweep and rinse all exterior entry areas and stairs
- Clean exterior door surfaces, handles, and door frames
- Clear patios, walkways, and any debris around the building perimeter
Task 61: Final walkthrough standards for a move-in-ready handoff
Your final walkthrough confirms every task is complete before you hand off the space. Walk each room with a strong flashlight held at a low angle to catch dust, streaks, or missed spots that overhead lighting conceals.
- Conduct a room-by-room inspection using a flashlight at a low angle, checking floors, glass, fixtures, and surfaces against your completed checklist before signing off
Clean handoff, done right
Working through this post construction cleaning checklist in sequence gives you a finished space that holds up to a close inspection, not just a quick glance. Each phase removes what the previous one couldn’t, so by the time you reach task 61, every surface, fixture, and floor has been addressed at least once and verified before anyone moves in.
Your results depend on the discipline you bring to each phase. Skipping steps or reversing the sequence always creates rework, and rework costs you time you don’t have at the end of a project. Whether you run this list yourself or hand it to your crew, the outcome is a space that’s genuinely ready from the baseboards to the HVAC vents.
If you’re in New York and want a professional team to handle it from start to finish, book a post-construction clean with AlphaLux Cleaning and get it done right the first time.