Professional Move Out Cleaning for Military Housing: A Stress-Free PCS Guide
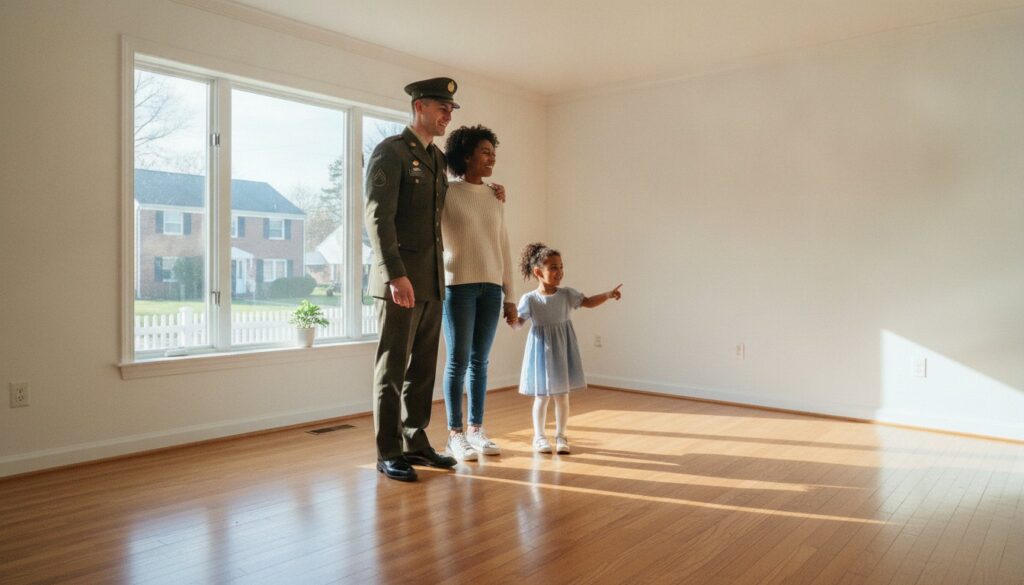
Did you know that military families typically face about $1,900 in unreimbursed expenses during every PCS move? When you’re already physically exhausted from packing your life into boxes, the looming “white-glove” inspection can feel like an impossible hurdle to clear. We understand that the pressure to meet 2026 military housing standards is high, especially when a single missed detail in your kitchen or bathroom can result in unexpected fees. Securing professional move out cleaning for military housing isn’t just a luxury; it’s a tactical decision to protect your finances and your peace of mind. You deserve to focus on your family and your next duty station rather than scrubbing baseboards at midnight. This guide will show you how to master your final walkthrough by leveraging a professional cleaning strategy that aligns with the latest Tenant Bill of Rights. We’ll explore the specific requirements of the 2026 Military Housing Rulebook, detail the common cleaning pitfalls that lead to failed inspections, and provide a roadmap to reclaiming your time during an otherwise chaotic transition. Key Takeaways Understand the rigorous “white-glove” standards used by housing offices to identify high-failure areas before your final walkthrough. Discover why professional move out cleaning for military housing is a strategic investment that prevents expensive re-cleaning fees and failed inspections. Compare the true costs of DIY cleaning against professional results to protect your time, energy, and military record during a PCS. Establish a stress-free transition by booking your cleaning service early and scheduling the deep clean after your household goods have been removed. Learn how a meticulous, professional approach to cleaning provides the mental clarity and reclaimed time needed to focus on your family’s next chapter. Table of Contents Navigating the Stress of Military PCS and Move-Out Inspections The 'White Glove' Standard: What Military Housing Inspectors Look For DIY vs. Professional Move-Out Cleaning: A Strategic Comparison Your PCS Cleaning Timeline: From Orders to Final Inspection Why AlphaLux Cleaning is the Trusted Partner for NY Military Families Navigating the Stress of Military PCS and Move-Out Inspections Receiving orders for a Permanent Change of Station (PCS) triggers a complex sequence of logistical and emotional events. Unlike a civilian move where “broom clean” often suffices, military housing offices demand a level of precision that can feel overwhelming. This is where the standard for move out cleaning for military housing differs significantly from traditional rental transitions. You aren’t just tidying up; you’re preparing a unit for immediate occupancy by another military family under the watchful eye of a strict inspector. Failing a final walkthrough isn’t just an inconvenience. It carries real financial weight. Beyond the physical exhaustion of the move, a failed inspection can result in mandatory re-cleaning fees or even delays in your travel timeline. According to 2024 housing standards, even minor oversights like a dirty stove, refrigerator, or uncleaned bathroom can lead to significant per-room charges. A “military-grade” clean involves a level of detail that standard housekeeping rarely touches. This includes: Degreasing the interior and exterior of all kitchen appliances, including the oven and dishwasher. Scrubbing baseboards, door frames, and light switches until they’re free of scuffs and oils. Clearing dust and debris from window tracks and sliding door channels. Removing hard water stains and soap scum from bathroom fixtures and wall tiles. The 30-Day Notice and Your Cleaning Window Once you provide your 30-day notice to the housing office, the clock starts. Successful families align their cleaning schedule directly with their household goods (HHG) pickup. Attempting to deep clean while boxes are still being moved is a losing battle. The pre-final inspection serves as your most important diagnostic tool. It’s essentially an open-book test where the inspector identifies specific areas of concern. By scheduling your professional move out cleaning for military housing immediately after the movers depart, you create a vital buffer zone. This ensures the home remains pristine for the final walkthrough without the risk of new dust or debris from moving activities. Emotional Relief Through Professional Support There is a profound psychological shift that occurs when you transition from a lived-in home to a “cleared unit.” Doing this work yourself often leads to physical burnout at a time when you need your energy for family and travel logistics. Professional support provides more than just a clean space; it offers the quiet satisfaction of knowing a difficult task is handled to the highest standard. You can focus on saying goodbye to friends and managing the details of your next duty station. Leaving a home in pristine condition isn’t just about passing an inspection. It’s about closing one chapter with excellence and starting the next with a clear mind and a rested body. The ‘White Glove’ Standard: What Military Housing Inspectors Look For The term ‘white glove’ is often used as a metaphor for high standards, but in military housing, it describes a literal inspection method. Inspectors check for even the slightest trace of dust on door frames or grease on a range hood. Successfully achieving this level of move out cleaning for military housing requires more than a quick wipe down. It demands a systematic approach that targets the areas most residents overlook during the exhaustion of a PCS move. Meticulous attention to detail is the hallmark of a professional service, ensuring that every surface meets the rigorous 2026 standards. High-failure areas are typically those that accumulate grime over years of occupancy. Inspectors aren’t just looking at the center of the room; they’re looking at the corners, the crevices, and the mechanical components of the home. Using non-toxic, eco-friendly products ensures that the home doesn’t just look clean, but feels fresh and healthy for the next family. This approach avoids the harsh chemical residues that can sometimes trigger concerns during a final walkthrough. If the physical demands of this process feel daunting, choosing a professional deep cleaning service can provide the reassurance you need to pass with confidence. Kitchen and Appliance Deep-Dive The kitchen remains the most frequent site for inspection rejections. Inspectors will pull the stove
Emergency Cleaning Service: When You Need Help Fast
How To Clean Vinyl Plank Floors Like A Pro, Step-By-Step
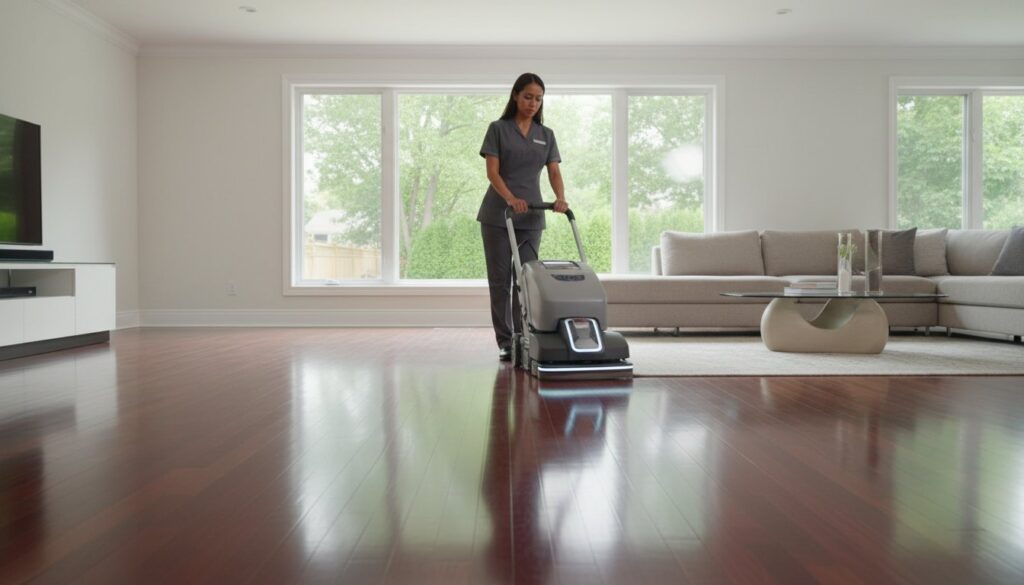
Vinyl plank flooring is one of the most popular choices in New York homes and businesses, and for good reason. It’s durable, water-resistant, and looks great. But even the toughest floors lose their shine without proper care. Knowing how to clean vinyl plank floors the right way keeps them looking new and prevents the kind of damage that shortens their lifespan significantly. The problem is, a lot of common cleaning habits actually do more harm than good. Using the wrong mop, the wrong cleaner, or even too much water can warp planks, dull the finish, or leave behind a sticky residue that attracts dirt. The right approach matters, and it’s simpler than most people think, you just need to know what works and what to skip. At AlphaLux Cleaning, our teams clean vinyl plank floors in homes and offices across New York every single day. We’ve put together this step-by-step guide based on what we actually use and recommend on the job. Below, you’ll find the exact process, tools, cleaning solutions, and mistakes to avoid so you can maintain your floors like a professional between service visits. What to know before you start Before you grab a mop or any cleaning product, you need to understand a few things about vinyl plank flooring specifically. Not all hard floors clean the same way, and the approach that works on hardwood or tile can seriously damage vinyl. Taking two minutes to understand your floor type and gather the right tools will save you from costly, sometimes irreversible mistakes and make the entire process faster and safer. What type of vinyl plank floor do you have? Vinyl plank flooring comes in two main formats, and knowing which one you have changes how carefully you need to work. Luxury vinyl plank (LVP) is thicker and more rigid, while standard vinyl plank tends to be thinner and more sensitive to moisture at the edges and seams. Check your floor’s documentation or look up the brand if you’re unsure. Most modern floors installed in New York homes and offices over the past five years are LVP, but older installations may not be. The key difference that matters for cleaning is the wear layer thickness. LVP with a thicker wear layer (12 mil or above) tolerates scrubbing better than thinner options. Thinner wear layers scratch and dull faster, so you’ll want to use gentler tools and solutions regardless of how dirty the floor looks. Tools and cleaners to have ready Having the right gear assembled before you start makes the whole job straightforward and keeps you from improvising with the wrong products mid-clean. Here’s what you need: Microfiber dust mop or dry mop (not a broom with stiff bristles) Soft-bristle vacuum attachment (no beater bar) Spray mop or flat mop with a microfiber pad pH-neutral floor cleaner labeled safe for vinyl Warm water in a bucket or spray bottle Microfiber cloths for spot treatment Rubbing alcohol for scuff marks Avoid anything abrasive, including steel wool, scrub brushes, or scouring pads. These scratch through the protective wear layer and leave marks you can’t buff out. Keep your kit simple and specifically matched to vinyl, and you’ll avoid most of the common damage people accidentally cause during routine cleaning. What to avoid entirely One of the most common questions people ask when learning how to clean vinyl plank floors is whether they can use the same products they use on other surfaces. The short answer is no. Steam mops, for example, force heat and moisture directly into the seams of the planks, which causes warping and bubbling over time. Even floors labeled as "waterproof" are not designed to handle the sustained heat and pressure that a steam mop delivers. Never use ammonia-based cleaners, wax-based products, or anything marketed for hardwood floors. These strip the protective layer, leave residue, or build up a film that dulls your floor’s finish permanently. "Mop and shine" style products are another frequent mistake. They promise a glossy result but leave behind a waxy buildup that traps dirt and becomes harder to clean with every application. Stick to pH-neutral cleaners and plain warm water, and your floors will stay clear and clean without any residue accumulating over time. Step 1. Remove grit and debris first Dry cleaning your floors before any moisture touches them is the most important step most people skip. When you wet mop over grit, sand, or crumbs, you are essentially dragging abrasive particles across your wear layer with every stroke. Over time, this creates tiny scratches that dull the finish and are impossible to reverse without replacing planks entirely. Always remove loose debris before any wet cleaning, no matter how clean the floor looks at first glance. Why this step protects your floor Vinyl plank flooring has a clear protective wear layer on top that shields the printed design underneath. That layer handles everyday foot traffic well, but it is not immune to fine particles like sand, salt, or gravel tracked in from outside. In New York homes, where sidewalk grit and winter salt get walked in regularly, skipping this step is what separates floors that look great after 15 years from floors that look worn out in five. The damage from grit-under-mop scenarios builds gradually, so you will not notice it after one cleaning. After dozens of cleanings, though, the surface dulls noticeably and no amount of mopping will restore the original finish. This step takes three minutes and prevents a problem you cannot undo. The right way to clear debris You have two reliable options: a microfiber dust mop or a vacuum with a hard floor setting. Both work well, and knowing when to use each one makes a real difference in how to clean vinyl plank floors effectively without causing any wear in the process. Use a microfiber dust mop for quick daily passes. It traps fine dust and pet hair without scratching and takes under three minutes for most rooms. Use a vacuum with a soft
Deep Cleaning Services Prices in Long Island: 2026 Homeowner’s Cost Guide
What if the true value of a professional service isn’t just about the numbers on a quote, but the relief of knowing every corner of your home is truly sanitized? For many homeowners, searching for deep cleaning services prices long island often leads to more questions than answers. Most people feel frustrated by opaque pricing or the worry that a lower rate might result in a superficial clean that ignores hidden allergens. You deserve a home that feels restored, healthy, and handled with professional precision. This 2026 guide provides the transparency you need to understand the current market with confidence. We’ll explore the specific factors that influence regional costs and show you how to identify a service that prioritizes both meticulous detail and the safety of your family. By the end, you’ll have a clear framework for securing a high-quality clean that protects your investment and your peace of mind. Key Takeaways Understand the vital distinction between a standard maintenance clean and a comprehensive “top-to-bottom” restoration of your home’s hygiene. Learn how square footage and the current state of your property directly impact deep cleaning services prices long island for the 2026 market. Identify the specific advantages of flat-fee project pricing over hourly rates when seeking budget certainty for larger Long Island estates. Discover how to vet professional quotes to ensure you are receiving meticulous service from insured experts rather than surface-level results. Recognize the long-term health and lifestyle benefits of choosing eco-friendly, non-toxic cleaning methods tailored to New York families. Table of Contents Understanding Deep Cleaning vs. Standard Service Costs Factors Influencing Deep Cleaning Prices in Long Island Estimated 2026 Deep Cleaning Price Ranges Evaluating Quotes: How to Get the Best Value AlphaLux: Premium Deep Cleaning Services for Long Island Understanding Deep Cleaning vs. Standard Service Costs To accurately evaluate deep cleaning services prices long island, you must first distinguish between routine maintenance and environmental restoration. A standard clean is designed to manage the surface, focusing on high-traffic areas and visible dust. In contrast, a deep clean is a meticulous, top-to-bottom overhaul of your living space. It targets the hidden grime and allergens that standard tools simply cannot reach. While a recurring visit keeps a home tidy, a deep clean restores it to its original, healthy state. This difference in scope is why deep cleaning is a higher-ticket, one-time investment rather than a weekly chore. The transition from a cluttered or dusty home to a professionally sanitized environment offers a profound psychological shift. There is a quiet satisfaction in knowing that the air you breathe is filtered and every surface is truly clean. This service is often sought during the traditional practice of thoroughly cleaning a house, but it’s equally vital after a home renovation or before hosting a major event. It isn’t just about the aesthetic results; it’s about the mental clarity that comes from a well-managed sanctuary. The Technical Checklist: What Your Investment Covers A professional deep clean involves a rigorous set of tasks that go far beyond a quick wipe-down. Your investment covers the intensive labor required to hand-wipe baseboards, door frames, and window tracks where dust often sits undisturbed for months. In the kitchen, the focus shifts to degreasing ranges and sanitizing the exteriors of all appliances to remove stubborn oils. Bathrooms receive a full restoration, where experts concentrate on scrubbing grout, reviving tile, and removing the tough mineral deposits common in New York plumbing. These tasks require specialized products and significant physical effort to execute correctly. Why a One-Time Deep Clean is the Best Entry Point Starting with a deep clean establishes a “baseline” of cleanliness that makes future upkeep significantly easier. When you begin with a home that is professionally sanitized, your subsequent recurring cleaning services become more efficient and less costly over time. It’s a strategic move that protects your property’s value while reducing the long-term burden of maintenance. Professional teams utilize industrial-grade equipment, such as HEPA-filter vacuums and non-toxic degreasers, which provide a level of hygiene that DIY efforts rarely match. Understanding how these factors influence deep cleaning services prices long island helps you see the service as a vital component of a balanced, high-end lifestyle. Factors Influencing Deep Cleaning Prices in Long Island Pricing for professional home restoration is rarely a one-size-fits-all calculation. To understand deep cleaning services prices long island, you have to look at the specific variables that dictate a team’s time and resources. Square footage remains the primary driver because it determines the volume of surfaces requiring attention. However, the condition of the home often plays an equally significant role. A property with heavy pet dander or years of accumulated dust in window tracks requires more intensive labor than a well-maintained residence. Meticulous care takes time, and the price reflects the thoroughness required to meet high-end standards. Geographic nuances across Nassau and Suffolk Counties also influence the final quote. Logistics and travel time for a team moving between the North Shore and the Hamptons can impact scheduling and resource allocation. Professional firms must account for these regional differences to provide reliable, on-time service. If you’re looking for a transparent estimate, choosing a partner like AlphaLux for professional deep cleaning ensures that these variables are discussed openly from the start. We believe that clarity in pricing is the first step in building a relationship of trust. Property Type and Architectural Challenges Long Island’s diverse architecture presents unique hurdles for cleaning professionals. Older North Shore estates often feature intricate crown moldings, high ceilings, and delicate antique finishes that require a slow, careful touch. Modern South Shore builds might prioritize large glass panes and open-concept layouts that demand streak-free precision. Additionally, homes near the water face the constant challenge of coastal salt air. This salty residue can create a sticky film on surfaces, necessitating specialized cleaning agents to prevent long-term corrosion or dulling of finishes. Every architectural detail requires a specific technical approach to ensure the home’s integrity is preserved. The Role of Specialized Cleaning Supplies The materials used
Porcelain Tile Floors: How To Clean For A Streak-Free Shine
Porcelain tile is one of the most durable flooring options you can install, but even the toughest surfaces lose their luster without proper care. If you’ve noticed dull spots, sticky residue, or streaks that won’t quit, learning how to clean porcelain tile floors the right way makes all the difference. The good news? You don’t need expensive specialty products or hours of scrubbing to get them looking like new. A few simple techniques and the right cleaning solutions can restore that original shine. At AlphaLux Cleaning, we clean porcelain tile floors in homes and businesses across New York every day. Our team knows exactly what works, and what causes more harm than good. We put together this guide to share the same methods our professionals use on the job, so you can maintain your floors between professional cleanings or tackle the task yourself with confidence. Below, you’ll find step-by-step instructions for routine cleaning, deep cleaning, and stain removal, plus tips for achieving a streak-free finish every time. Whether you’re dealing with kitchen grease, bathroom grime, or just everyday foot traffic, this guide has you covered with both DIY and store-bought solutions that actually deliver results. What you need before you start Having the right supplies on hand before you begin makes the entire process faster and more effective. Porcelain tile is dense and non-porous, which means it handles most cleaners well, but the wrong tools (think rough scrubbing pads or steel wool) can scratch the surface and leave permanent marks. Pulling everything together in one spot before you start means you won’t have to stop mid-clean to track down what you’re missing. Cleaning tools The tools you choose directly affect your results when you learn how to clean porcelain tile floors properly. A soft-bristle broom or dry dust mop is your first essential, since loose dirt and grit need to come up before any wet cleaning starts. For mopping, a flat microfiber mop outperforms a traditional string mop because it picks up residue instead of pushing it around, and it leaves far less moisture sitting on the floor. Here’s what to have ready before you start: Soft-bristle broom or dry dust mop Flat microfiber mop with washable pads Two buckets (one for clean solution, one for rinse water) Soft-bristle scrub brush or old toothbrush (for grout lines) Microfiber cloths for drying and spot buffing Spray bottle for targeted stain treatment Cleaning solutions The type of cleaner you use matters just as much as your technique. Harsh chemicals like bleach-based products or highly acidic cleaners can strip grout and dull the tile’s finish over time. For routine cleaning, a pH-neutral floor cleaner is your safest and most effective option, available at most hardware or grocery stores. Avoid using vinegar on porcelain tile on a regular basis. While it cuts through grease, its acidity gradually breaks down grout and can dull polished tile surfaces with repeated use. You can also mix a simple DIY solution using a few drops of dish soap with a gallon of warm water. For isolated tough spots, a paste made from baking soda and water treats stains without damaging the surrounding tile or grout. Keep your chosen solution in a spray bottle or bucket so it’s ready the moment you pick up the mop. Step 1. Dry prep and spot-check the floor Before any water or cleaner touches your floor, dry prep removes the loose debris that would otherwise turn into muddy streaks the moment your mop hits the surface. This first step is the one most people skip when figuring out how to clean porcelain tile floors, and it’s exactly why streaks happen. Spending two to three minutes on dry prep protects your wet cleaning results from start to finish. Sweep or dust mop the entire surface Start at the far end of the room and work toward the door so you’re never walking over areas you’ve already cleared. Use a soft-bristle broom or a dry microfiber dust mop and move in overlapping strokes to capture dust, hair, and grit along the edges and in corners. Grout lines trap fine particles, so run your broom at a slight angle across the floor to dislodge what’s sitting in the gaps before it mixes with your cleaning solution. Skipping this step means dragging grit across wet tile, which can leave micro-scratches on polished porcelain surfaces over time. Spot-check for sticky or dried-on residue After sweeping, walk the floor and look for hardened spills, dried food, or sticky patches that won’t lift with a mop alone. Use a plastic scraper or the edge of a credit card to loosen dried material without scratching the tile. Mark those spots mentally so you can pre-treat them before mopping. Dried food or grease: pre-treat with diluted dish soap Scuff marks: rub with a damp microfiber cloth Sticky residue: apply a small amount of baking soda paste Step 2. Mop for a streak-free everyday clean Once your floor is prepped and dry, wet mopping removes the remaining film of dust, oils, and everyday residue that dry cleaning leaves behind. The technique matters here just as much as the cleaner. Rushing through this step or using too much water is the most common reason people end up with streaks even after a full clean. Mix your solution and prep your mop Fill one bucket with warm water and your chosen pH-neutral cleaner mixed according to the package directions, and keep the second bucket filled with plain clean water for rinsing your mop pad between passes. Wring your microfiber mop pad until it’s damp but not dripping, since excess water pools in grout lines and leaves behind a hazy residue once it dries. A mop that’s too wet is the single biggest cause of streaks when learning how to clean porcelain tile floors. Mop in sections using the two-bucket method Work in small sections of about four to six square feet, moving the mop in a figure-eight or overlapping S-pattern to lift dirt rather
Is a Professional Cleaning Service Worth It? Calculating the Real ROI in 2026
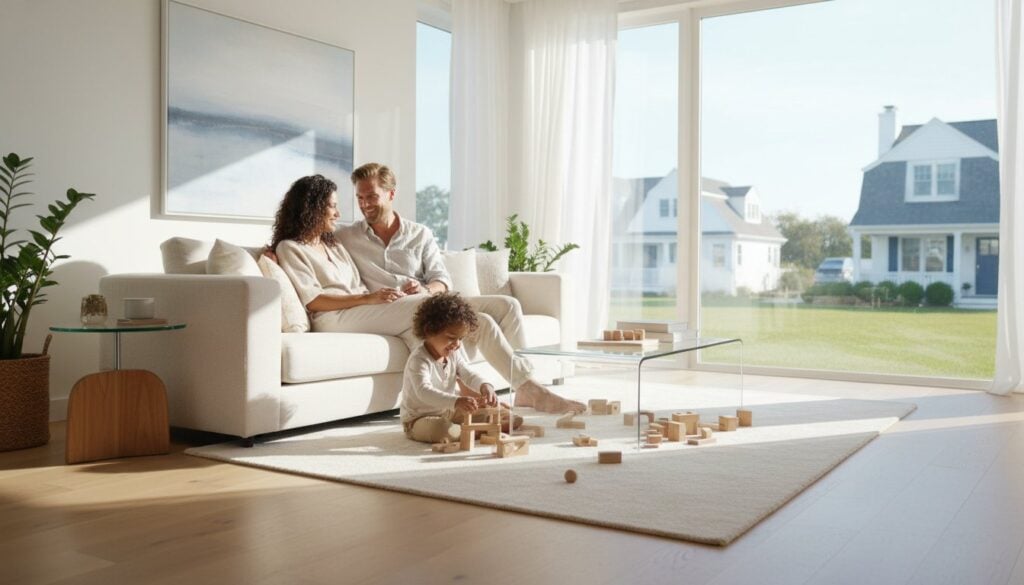
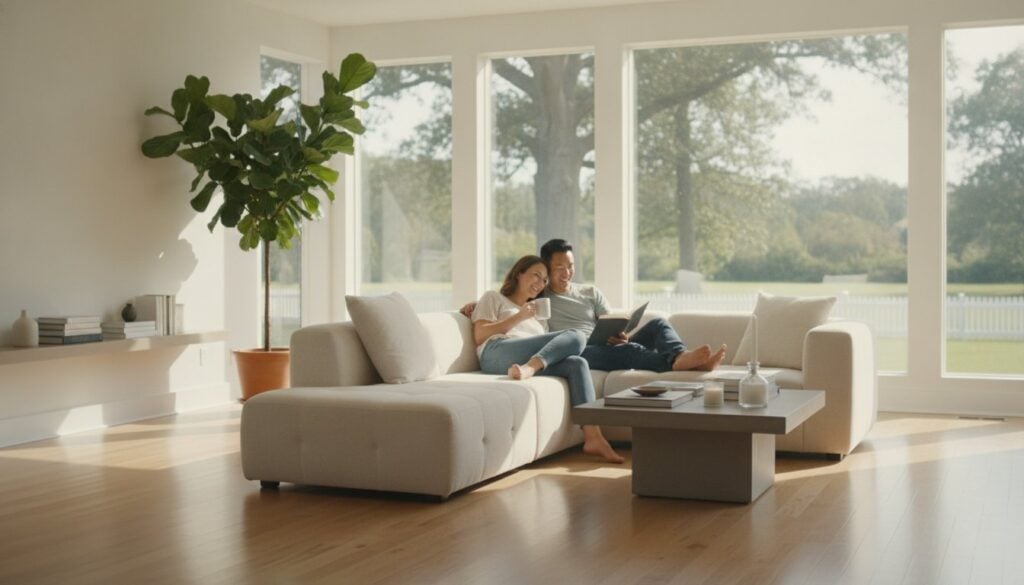
Your weekend isn’t just a line item on a budget; it’s the most expensive asset you own. When you spend your Saturday scrubbing baseboards, you’re trading hours of rest for labor, leading many homeowners to ask: is a professional cleaning service worth it in 2026? It’s natural to feel a sense of “cleaning guilt” when the house isn’t perfect, yet the thought of spending your limited free time on chores feels like a secondary job. You likely want a pristine home, but the inconsistent results of DIY efforts often leave you feeling more drained than satisfied. You’ll discover how to evaluate the true value of professional cleaning by weighing time, health, and mental clarity against the actual cost of service. We’ll move beyond the surface level to look at the real return on investment for your lifestyle and your peace of mind. This guide breaks down the latest market trends and psychological benefits to help you decide if reclaiming your time is the smartest investment you can make this year. Key Takeaways Learn how to calculate the true opportunity cost of DIY chores to see how reclaiming your time enhances your professional and personal productivity. Understand how specialized equipment, like HEPA vacuums and micro-fiber technology, creates a healthier indoor environment that standard tools can’t match. Evaluate the financial impact of home preservation to determine if a professional cleaning service is worth it for protecting your property’s long-term value. Identify high-stakes situations, including post-construction or vacation rental transitions, where meticulous professional standards are a non-negotiable requirement. Discover the quiet satisfaction of a tailored cleaning plan that evolves with your lifestyle to provide lasting mental clarity and comfort. Table of Contents Evaluating the Hidden Costs of DIY Cleaning vs. Professional Services The Professional Difference: Why Specialized Equipment and Expertise Matter Calculating the Financial ROI: Is the Price Tag Justified? Strategic Cleaning: When to DIY and When to Call the Pros The AlphaLux Experience: Elevating the Standard of Clean in New York Evaluating the Hidden Costs of DIY Cleaning vs. Professional Services Defining whether a service is “worth it” requires a shift in perspective. It isn’t merely a calculation of dollars spent against a dust-free shelf. True value is found at the intersection of your time, your physical energy, and the quality of the final result. When homeowners ask if is a professional cleaning service worth it, they’re often actually asking if their own time is worth protecting. Many people view household chores as a cost-free activity, but this ignores the heavy “weekend tax” that many professionals pay. If you spend your Saturday morning scrubbing tile instead of resting, you’re paying for that cleanliness with your only opportunity to recover from the work week. The mental load of an unfinished to-do list creates a persistent background stress that many don’t realize they’re carrying until it’s gone. There are documented advantages of a maid service that extend beyond the aesthetic, primarily centered on the preservation of your mental and physical health. By delegating these tasks, you eliminate the chronic guilt of “getting around to it” and replace it with the relief of a consistently maintained environment. The Opportunity Cost of Your Time To find the real ROI, you must calculate your personal hourly value. For a New York professional, four to six hours of reclaimed time each week is a significant asset. An afternoon of uninterrupted focus can lead to career progress, creative pursuits, or deep family connection. If your professional rate exceeds the cost of a cleaning visit, you’re essentially losing money by doing the work yourself. Shifting from a “task-doer” to a “household manager” allows you to direct your expertise where it matters most. It’s a strategic move that treats your home as a high-functioning environment rather than a source of constant labor. The Physical and Mental Energy Drain Cleaning is physically demanding work. Deep scrubbing, heavy lifting, and repetitive motions cause fatigue that lingers long after the floors are dry. This exhaustion often bleeds into your professional life or social interactions. Beyond the physical toll, the mental energy required to track chores is immense. Decision fatigue is the psychological exhaustion that occurs when the endless cycle of micro-choices regarding cleaning supplies, schedules, and missed spots drains your cognitive reserves. Delegation provides the quiet satisfaction of knowing the details are handled by experts. It allows you to return to a space that restores you rather than one that demands more of your energy. The Professional Difference: Why Specialized Equipment and Expertise Matter While the emotional relief of a clean home is immediate, the technical superiority of a professional visit provides a deeper, more lasting value. When you evaluate whether is a professional cleaning service worth it, the conversation must move beyond the visible results to the technical standards of the work performed. A professional craft involves more than just a broom and a bucket; it’s a meticulous application of specialized tools and chemical knowledge. Most retail cleaning tools are designed for light, surface-level maintenance. In contrast, professional-grade equipment, such as industrial steamers and advanced microfiber technology, is engineered to lift and remove deeply embedded grime that standard household tools simply cannot reach. Expertise also extends to the chemistry of the products used. Many high-end New York residences feature delicate materials like Carrara marble, slate, or century-old hardwood. Using a generic, acidic cleaner on these surfaces can cause permanent etching or warping. A professional understands the necessity of pH-balanced solutions tailored to specific materials. This level of precision ensures that your home’s most valuable assets are preserved rather than damaged. Adhering to professional cleaning safety standards ensures that every surface is treated with the appropriate level of care and hygiene, protecting both the home and the people within it. Consistency is another factor that separates a professional service from DIY efforts. Personal cleaning is often reactive and “spot-based,” focusing only on the most obvious messes. A professional approach is proactive and checklist-driven. This systematic method ensures that every corner, from the top
Short Term Rental Cleaning Service: 6 Top Options (2026)
A single bad review about cleanliness can tank your Airbnb listing’s momentum overnight. For short term rental hosts, the gap between a five-star review and a one-star complaint often comes down to one thing: how well the space is cleaned between guests. Finding a reliable short term rental cleaning service isn’t just a convenience, it’s one of the most important operational decisions you’ll make as a host. At AlphaLux Cleaning, we handle turnover cleaning for rental properties across New York, so we understand exactly what hosts need: speed, consistency, and attention to every detail guests notice. That hands-on experience also means we know what separates a great cleaning partner from one that costs you bookings. Whether you manage one unit or a dozen, this guide breaks down six top cleaning service options for 2026, including national platforms, local providers, and tech-driven solutions. We’ll cover what each one offers, where they operate, and what to watch out for, so you can pick the right fit for your rental business without the guesswork. 1. AlphaLux Cleaning AlphaLux Cleaning is a professional cleaning company based in New York, serving residential and commercial properties with a focus on consistency and reliability. For short-term rental hosts, that focus translates directly into thorough, dependable turnover service that protects your listing’s reputation. What AlphaLux Cleaning does for short-term rentals The team delivers a complete short term rental cleaning service built around what guests actually notice. Every turnover follows a structured process with no steps skipped, covering: Full kitchen and bathroom sanitization Linen stripping and bed refreshing High-touch surface disinfection throughout the unit Hosts who follow a consistent cleaning process between guests earn more repeat bookings and fewer complaints. Where AlphaLux Cleaning operates AlphaLux serves rental properties throughout New York State, with strong coverage across Long Island and surrounding areas. Local crews know the region well and can accommodate tight turnover windows when back-to-back bookings compress your cleaning schedule. Your property stays in capable hands whether you manage a single apartment or multiple units across the state. Who should choose AlphaLux Cleaning AlphaLux is the right fit for hosts who want a vetted, insured, and background-checked team rather than an unknown cleaner from a marketplace. You get a dedicated professional service that treats your rental property with the same standard every visit. Hosts who prioritize eco-friendly, non-toxic cleaning products also benefit, since AlphaLux uses safe, effective solutions that protect both guests and the property itself. How pricing and estimates work AlphaLux offers free estimates, so you understand the full cost before committing. Pricing depends on property size and the type of service you need. The team builds a customized cleaning plan around your schedule, whether that means regular weekly turnovers, one-time deep cleans, or move-in and move-out cleanings when tenants change over. 2. Turno Turno is a technology-driven platform that connects short-term rental hosts with local cleaners through automated scheduling and turnover coordination tools. It’s designed specifically for hosts who want to manage their cleaning operations through a single dashboard rather than coordinating manually. How Turno handles scheduling and turnovers The platform syncs directly with your Airbnb or VRBO calendar, automatically triggering cleaning jobs when a checkout is detected. Your assigned cleaner gets notified without any manual input from you. Automated scheduling reduces the risk of missed turnovers when back-to-back bookings shift at the last minute. Cleaner marketplace and vetting basics Turno operates as a marketplace where independent cleaners list their short term rental cleaning service and hosts select from available options in their area. The platform provides ratings and reviews for each cleaner, but background check standards vary by individual provider rather than being enforced platform-wide. Who should use Turno This tool works best for tech-savvy hosts managing multiple properties who want automation built into their workflow. If you’re comfortable vetting individual cleaners yourself using reviews and platform ratings, Turno gives you strong operational control over your turnover process. How pricing and payments work Cleaners on Turno set their own rates, so pricing varies significantly by market and provider. Payments are handled through the platform, and you can negotiate custom rates directly with your assigned cleaner. 3. Merry Maids Merry Maids is a nationally recognized cleaning franchise with locations across the United States, including parts of New York. Their standardized processes make them a familiar option for hosts who want a professional service with a verifiable track record. What Merry Maids covers for vacation rentals Merry Maids offers standard residential cleaning that applies directly to vacation rental properties. Their teams work through a structured process covering the areas guests notice most: Full kitchen and bathroom cleaning Bedroom and living area refreshing High-touch surface wiping throughout the unit How to get consistent results across visits The franchise model means each local Merry Maids location operates under shared brand standards, giving you a predictable baseline of quality. Requesting the same team for each visit is the most effective way to build familiarity with your property’s specific layout and requirements. Consistent cleaner assignments reduce the chance of small but guest-noticeable details being missed during a tight turnover window. Who should consider Merry Maids Hosts looking for a well-known, established brand rather than an independent cleaner may appreciate Merry Maids’ accountability structure. They work best for hosts with standard residential units who need reliable recurring service rather than a specialized short term rental cleaning service built around STR-specific workflows. How pricing and estimates work Merry Maids provides custom quotes based on your property size and cleaning frequency. You can contact your local franchise location directly to discuss your rental’s schedule and specific requirements. 4. Vacay Clean AZ Vacay Clean AZ is a short term rental cleaning service based in Arizona, built specifically around the needs of vacation rental hosts. Their focus on STR-specific workflows sets them apart from general residential cleaning companies operating in the same market. What Vacay Clean AZ offers beyond standard cleaning Beyond basic surface cleaning, the team includes consumable restocking and property inspection checks as standard
Hypoallergenic Cleaning Services NYC: The Ultimate 2026 Guide to Allergy-Free Living

In New York City, the dust on your windowsill isn’t just “dirt.” It’s a complex cocktail of subway iron filings, microscopic soot, and urban allergens that standard wiping simply can’t touch. You might find yourself cleaning constantly yet still waking up with persistent respiratory irritation or a heavy feeling in your chest. It’s a common frustration for many residents who realize that a visually tidy home doesn’t always equate to a healthy one. Seeking out specialized hypoallergenic cleaning services nyc is the most effective way to address these microscopic triggers. True hypoallergenic care goes beyond the surface. It involves using HEPA filtration systems capable of capturing 99.97% of particles as small as 0.3 microns, ensuring that the very air you breathe is medically clean. By adhering to New York’s strict VOC regulations, which limit volatile organic compounds in bathroom and general cleaners to just 1%, these services remove irritants without introducing new chemical burdens. You deserve a home that feels like a sanctuary rather than a source of stress. In this guide, we’ll clarify the confusion between “green” and “hypoallergenic” labels and explain how technical interventions can improve your mental clarity. You’ll learn exactly what to look for in a meticulous, vetted professional to ensure your space is finally, fundamentally breathable. Key Takeaways Learn how NYC’s pre-war architecture traps century-old dust and why specialized interventions are necessary to break the cycle of “Old Building Syndrome.” Understand the technical distinction between standard green cleaning and professional hypoallergenic cleaning services nyc that prioritize human respiratory health. Identify the “essential oil trap” where organic scents act as hidden irritants, and learn how to select products that are truly free of volatile organic compounds. Discover the specific equipment standards, such as 4-stage HEPA filtration, required to capture microscopic urban triggers as small as 0.3 microns. Master the vetting process for cleaning partners to ensure your home is managed by professionals who treat health-focused cleaning as a meticulous craft. Table of Contents Understanding Hypoallergenic Cleaning in the NYC Urban Environment The Science of Allergen Removal: HEPA Filtration and VOC Mitigation Professional Hypoallergenic Services vs. Standard 'Green' Cleaning How to Choose an Allergy-Safe Cleaning Partner in New York AlphaLux Cleaning: Your Meticulous Partner for a Healthier NYC Home Understanding Hypoallergenic Cleaning in the NYC Urban Environment Hypoallergenic cleaning is far more than a marketing label. It’s a systematic, technical intervention designed to remove microscopic allergens like dust mites, pet dander, mold, and pollen from your living space. While standard cleaning focuses on what you can see, professional hypoallergenic cleaning services nyc prioritize what you can’t. In a city as dense as New York, your home is constantly bombarded by external pollutants that settle deep into the fibers of your environment. Addressing these triggers isn’t just about tidiness; it’s about reclaiming your health and mental clarity. Many New Yorkers live in beautiful pre-war buildings that unfortunately suffer from “Old Building Syndrome.” These historic structures often have hollow wall cavities and porous floorboards that have trapped century-old dust and debris. This legacy dust doesn’t stay put. It slowly migrates into your living areas, creating a persistent cycle of respiratory irritation. Compounding this is “NYC Black Dust,” a unique urban pollutant composed of subway iron filings, tire rubber, and industrial soot. This oily residue is incredibly fine, allowing it to bypass standard vacuum filters and settle into upholstery and rugs where it lingers for years. Why NYC Homes Need More Than Just ‘Standard’ Cleaning Living in a high-rise environment means you share more than just a wall with your neighbors. In these high-density buildings, allergens like pet dander and smoke travel easily through shared hallways and ventilation systems. Standard cleaning often fails to address the way HVAC systems circulate these urban pollutants through your apartment. A surface might look spotless, yet the air remains thick with microscopic triggers. True relief requires HEPA filtration technology capable of capturing particles as small as 0.3 microns. Without this level of precision, a cleaning routine is simply moving dust from one corner to another. The Health Benefits of Targeted Allergen Removal The transition to a medically clean home offers immediate physical and emotional rewards. By removing the specific triggers that cause nighttime coughing and congestion, you significantly improve your sleep quality. This reduction in asthma triggers and seasonal allergy symptoms allows your body to rest and recover fully. We call this the “AlphaLux Relief.” It’s the moment you stop worrying about the air in your bedroom and start enjoying the quiet satisfaction of a breathable sanctuary. When your environment is managed as a meticulous craft, domestic peace follows naturally. You move from a state of environmental anxiety to a lifestyle defined by comfort and reclaimed energy. The Science of Allergen Removal: HEPA Filtration and VOC Mitigation Effective allergen removal relies on physics rather than just fragrance. Many people assume a fresh lemon or pine scent means a home is clean. In reality, those scents often indicate the presence of Volatile Organic Compounds (VOCs) that can trigger the very respiratory issues you’re trying to avoid. True hypoallergenic cleaning services nyc rely on specialized equipment and materials that capture pollutants instead of redistributing them. This technical approach ensures that your home isn’t just visually tidy but is fundamentally healthier at a microscopic level. Microfiber technology plays a vital role in this process. Traditional cotton rags have round fibers that tend to push dust and allergens across surfaces. In contrast, advanced microfiber features split fibers that create a massive surface area. This structure allows the cloth to grip and hold onto microscopic triggers until they are properly laundered. For residents in multi-unit NYC buildings, preventing cross-contamination is equally critical. Using the same tools across different zones can migrate mold spores or pet dander from one room to another, undermining the entire goal of an allergy-free space. Medical-Grade Equipment vs. Household Vacuums Standard household vacuums often lack the seal integrity required to keep fine dust contained. As they pull in debris, they frequently exhaust microscopic particles
Deep Bathroom Cleaning Service: What’s Included & Cost
Your bathroom gets more daily use than almost any other room in your home or office, and it shows. Soap scum builds up on glass, grout lines darken, and mildew creeps into corners that a regular wipe-down never reaches. That’s exactly the problem a deep bathroom cleaning service is designed to solve. It goes far beyond surface-level tidying to strip away the grime that accumulates over weeks and months, restoring your bathroom to a genuinely hygienic, fresh condition. At AlphaLux Cleaning, we handle deep bathroom cleans across New York State for both residential and commercial clients. Our trained, background-checked teams use eco-friendly, non-toxic products that cut through buildup without leaving harsh chemical residue behind, because a truly clean bathroom shouldn’t trade one problem for another. It’s one of the most-requested services we offer, and we understand why. Still, if you’ve never booked a professional deep clean before, you probably have questions. What exactly does it include? How much should you expect to pay? Is it worth the cost compared to doing it yourself? This article breaks down every task typically covered in a professional deep bathroom cleaning, walks through realistic pricing, and helps you figure out when it makes sense to call in a pro versus handling things on your own. What a deep bathroom cleaning service includes When you book a deep bathroom cleaning service, you’re paying for systematic, top-to-bottom attention that covers every surface, fixture, and corner in the room. Professionals work from ceiling to floor, tackling built-up soap scum, mineral deposits, mildew, and embedded grime that a standard weekly clean simply doesn’t reach. The exact task list varies slightly by company and bathroom size, but most reputable services follow a consistent set of standards that define what a "deep clean" actually means in practice. A thorough deep clean typically takes two to four times longer than a standard cleaning visit, which reflects how much more work and product is actually required. Fixtures, surfaces, and hardware Your toilet gets the most intensive treatment of any fixture. Professionals scrub under the rim, disinfect the bowl, clean the tank exterior, wipe down the base and the areas around the floor bolts, and sanitize the seat, lid, and handle. The sink and vanity area receive similar attention: the faucet is descaled, the drain is cleared of buildup, and the basin is scrubbed rather than just wiped. Cabinet fronts, drawer handles, light switch covers, towel bars, and any exposed wall hardware also get wiped down and disinfected as part of the visit. Your shower and bathtub are typically the most time-consuming part of the job, which is why they’re often where the biggest visible difference shows after a deep clean. Professionals treat soap scum on glass doors or curtain rods, scrub the tub interior and walls, descale faucet heads and handles, and clean out the drain. Showerheads clogged with mineral buildup often receive a targeted soak or scrub to restore water pressure and flow, something most people skip entirely during their regular cleaning routine. Tile, grout, and hard-to-reach areas Grout lines are one of the clearest indicators of how thorough a cleaning actually is. Over time, grout absorbs soap residue, hard water minerals, and mold spores, turning from white or light gray to dark brown or black. A deep clean targets these lines specifically, using stronger agents and brush tools to lift embedded discoloration. Tile surfaces are also scrubbed rather than just wiped to remove the thin film of soap and mineral residue that leaves them looking dull even after a regular clean. Hard-to-reach spots get deliberate attention during a deep clean in a way they rarely do otherwise. This includes behind the toilet, around the base of fixtures, inside the track of sliding shower doors, along the caulking lines between the tub and wall, and in the corner where the wall meets the floor. These areas accumulate grime quickly but get skipped in most routine cleaning passes. Floors, drains, and finishing touches Your bathroom floor gets scrubbed and disinfected, not just mopped. Grout lines on tile floors receive the same treatment as wall grout. The area around the toilet base, which collects splatter and dust that standard mopping misses, is cleaned thoroughly. Drains in the shower, tub, and sink are cleared of hair and debris, and drain covers are removed and cleaned separately when accessible. Professionals also wipe down mirrors, clean the interior and exterior of the medicine cabinet, remove water spots from glass surfaces, and empty the trash. Some services include baseboard cleaning and vent covers as part of a deep bathroom clean, so it’s worth confirming the full task list when you book so you know exactly what you’re getting. What deep cleaning covers that regular cleaning misses A regular cleaning visit keeps your bathroom looking presentable between deep cleans, but it doesn’t come close to addressing everything. Most standard cleanings cover visible surfaces quickly: a wipe of the sink, a spray and swipe of the toilet bowl, a mop of the floor. That approach handles surface-level dirt, but the grime that causes odors, staining, and long-term damage lives in places a standard routine doesn’t touch. The difference between a regular clean and a deep clean isn’t effort. It’s the specific areas targeted and the amount of time spent on each one. The surfaces a standard clean skips Your regular cleaning routine likely hits the same spots every time, which means certain areas accumulate buildup for months without any real attention. The underside of the toilet rim, for example, develops dark mineral and bacteria deposits that never appear in a quick scrub. Sliding shower door tracks collect hair, soap residue, and mold that a surface wipe won’t remove. Caulking lines along the tub, grout joints on tile walls, and the gap between the toilet base and the floor are all areas that standard cleaning passes over consistently. These overlooked spots aren’t just cosmetic issues. Mold and mildew growing in grout or along caulking lines can spread to adjacent
The Ultimate Airbnb Turnover Cleaning Checklist for a 5-Star Guest Experience
Imagine the sinking feeling of opening a new notification only to find a three-star review because a guest found a single stray hair on the bathroom floor. It’s a frustrating reality for many hosts who juggle tight check-out windows and the constant pressure of maintaining a pristine environment. Mastering a professional airbnb turnover cleaning checklist isn’t just about removing dust; it’s about resetting the guest stage to an untouched state every single time. This level of precision transforms a routine task into a reliable craft that protects your reputation and your peace of mind. You likely understand that cleanliness is the primary driver of guest satisfaction, yet the stress of inconsistent results can feel overwhelming. We’ve designed this guide to help you replace that anxiety with a repeatable system for excellence. You’ll learn how to implement professional-grade standards that secure five-star reviews and maximize your rental income. We’ll walk through a comprehensive room-by-room breakdown, including the meticulous details that often go unnoticed but define a premium guest experience and lead to higher search rankings. Key Takeaways Learn to transition from a standard cleaning mindset to a professional hospitality reset that makes every guest feel like the first person to stay. Implement a meticulous, room-by-room airbnb turnover cleaning checklist to ensure no detail is overlooked during the critical check-out window. Eliminate “invisible” guest complaints by mastering odor neutralization and sanitization using safe, eco-friendly standards. Optimize your turnover logistics with a high-efficiency workflow, including the “Laundry First” strategy to ensure your property is always staged on time. Discover how professional Airbnb & Vacation Rental Cleaning services can help you reclaim your peace of mind and scale your rental business. Table of Contents The Hospitality Standard: Why Airbnb Turnover Cleaning is Different The Comprehensive Airbnb Turnover Cleaning Checklist Eliminating the 'Invisible' Complaints: Odors and Sanitization Mastering the Turnover Window: Efficiency and Logistics Scaling Your Rental Business with Professional Turnovers The Hospitality Standard: Why Airbnb Turnover Cleaning is Different A professional turnover is more than a simple chore. It is a meticulous hospitality reset designed to eliminate every trace of the previous guest. In the short-term rental market, success depends on the untouched effect. Your guests aren’t just looking for a tidy room; they want to feel like they are the first people to ever step inside your property. This psychological experience of absolute freshness is what drives the five-star reviews that sustain your business. Following a professional airbnb turnover cleaning checklist ensures that this high standard is met every single time, regardless of how tight the check-in window becomes. When a guest enters a pristine home, they experience an immediate sense of relief and mental clarity. This positive emotional response sets the tone for their entire stay, making them more likely to overlook minor issues elsewhere. Professional cleaning standards don’t just protect your property; they cater to the guest’s health and comfort, establishing a foundation of trust before they even unpack their bags. This level of intentionality is what separates a casual host from a high-earning professional. Standard Cleaning vs. Turnover Cleaning Standard residential cleaning focuses on the maintenance and preservation of a living space over time. In contrast, turnover cleaning is a specialized craft that combines deep sanitization with professional staging. While traditional housekeeping involves tasks like organizing personal belongings or deep-cleaning ovens on a monthly basis, a turnover requires a total reset of the guest stage. This includes restocking essentials, checking for forgotten items, and ensuring every linen is crisp and perfectly placed. It’s a rapid-response service that prepares the home for immediate occupancy. Unlike a standard recurring clean, the turnover must happen within a specific, often stressful, four-hour window. The True Cost of a 4-Star Review In the world of short-term rentals, a four-star review is often a signal of underlying issues that can damage your search ranking. Cleanliness is the most scrutinized category on platforms like Airbnb and VRBO. A single stray hair or a lingering odor can drop your rating, making your listing less visible to potential guests. High-performing hosts don’t view professional cleaning as an optional expense. Instead, they see it as an essential investment in revenue protection. Maintaining a consistent airbnb turnover cleaning checklist is the most reliable way to secure Superhost status and protect your long-term income. When your property consistently meets these hospitality standards, you build a reputation for reliability that justifies higher nightly rates and encourages repeat bookings. The Comprehensive Airbnb Turnover Cleaning Checklist Creating an exceptional guest experience begins the moment the key turns in the lock. The entryway, the bed, and the bathroom are your “First Impression Zones.” These areas dictate the guest’s internal narrative about your property. To maintain a perfect record, you must move beyond surface-level tidying. Utilizing a professional airbnb turnover cleaning checklist ensures that your team executes a systematic hospitality reset rather than a standard domestic clean. By adopting the high-standard techniques used by AlphaLux Cleaning, you can ensure every corner of your rental signals professional care and meticulous attention to detail. Kitchen and Dining Area Reset The kitchen must appear entirely unused. This requires sanitizing every appliance, including the interior of the microwave and the coffee maker reservoir. Check the refrigerator for any leftover food from previous guests and wipe down each shelf to remove sticky residue. Degrease the stovetop and polish the sink until it glows. Don’t forget the crumb tray in the toaster; it’s a frequently missed spot that can harbor old smells. Ensuring all dishes are spot-free and neatly organized provides the quiet satisfaction of a well-managed home. The Bathroom: The #1 Source of Complaints Bathrooms require a “Zero-Hair Policy.” This means inspecting drains, floors, and the space behind toilets with extreme scrutiny. Scrub the grout and use professional-grade solutions to remove water spots from glass doors or chrome fixtures. Polishing these surfaces to a mirror shine is a visual cue that the space is truly sanitized. To align with CDC cleaning and disinfecting guidelines, focus on high-touch surfaces like faucet handles