You’ve set aside time to clean, but halfway through the kitchen, you realize the bathroom hasn’t been touched, the living room still has yesterday’s clutter, and your energy is already fading. Sound familiar? Learning how to clean a house efficiently isn’t about working harder, it’s about working smarter with a clear system in place.
The secret to a spotless home in less time comes down to sequence and strategy. When you tackle rooms in the right order and use methods that eliminate backtracking, you can cut your cleaning time significantly without sacrificing results. No more wandering room to room wondering what to do next or re-cleaning surfaces you already wiped down.
At AlphaLux Cleaning, we’ve refined our approach through years of serving homes and businesses across New York. Our teams follow proven room-by-room systems that maximize efficiency while delivering the thorough clean our clients expect. In this guide, we’re sharing those same strategies so you can transform your cleaning routine, whether you’re preparing for guests, maintaining a weekly schedule, or just trying to reclaim your weekend. Below, you’ll find a practical, step-by-step plan that covers every major room in your home.
What efficient house cleaning really means
Efficient cleaning isn’t about speed alone. It’s about eliminating wasted motion and preventing rework by following a logical sequence that keeps you from cleaning the same surface twice. When you dust a shelf and then sweep the floor, you’re working efficiently. When you sweep first and then dust, you’ve just created extra work for yourself because dust falls to the floor you already cleaned.
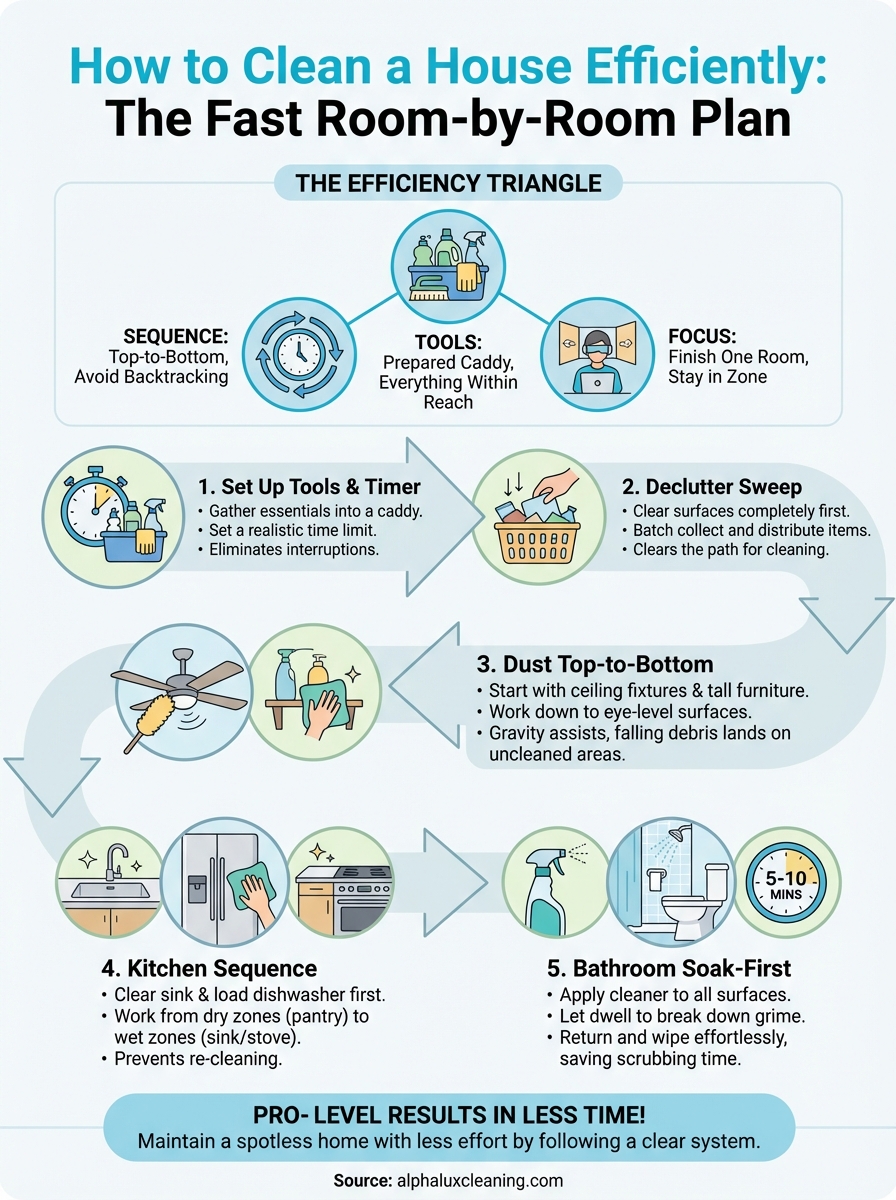
The efficiency triangle: sequence, tools, and focus
Three core principles form the foundation of how to clean a house efficiently. Sequence means tackling rooms and tasks in an order that prevents backtracking. Tools means having everything you need within arm’s reach so you’re not running to the supply closet every five minutes. Focus means staying in one room until it’s complete rather than bouncing between spaces and losing momentum.
You’ll notice professional cleaners carry a caddy with all their supplies and rarely leave a room mid-task. They understand that each room transition costs time and energy, so they minimize those breaks by working systematically. This same approach works at home when you prepare your supplies beforehand and commit to finishing each space before moving on.
Efficient cleaning eliminates unnecessary steps and keeps you moving forward without retracing your path.
Why the top-to-bottom rule saves time
Gravity works in your favor when you clean from ceiling to floor. Dust, crumbs, and debris naturally fall downward, so if you vacuum before you dust, you’ll end up vacuuming again. Start with ceiling fans and light fixtures, move to shelves and countertops, then tackle furniture surfaces, and finally address the floors last.
This vertical approach applies within individual tasks too. When wiping down kitchen cabinets, start with the upper doors and work your way down. Spray cleaner on lower surfaces while you’re wiping the upper ones to let the product break down grime while you work, another efficiency boost that professional teams use daily.
Batch similar tasks across rooms
Instead of completely finishing one room before starting another, you can group similar activities. Collect all the trash from every room in one pass. Strip all the beds at once if you’re washing linens. Gather dirty dishes from bedrooms, living areas, and offices in a single sweep before you start washing.
This batching method works especially well for dusting. You can move through your entire home with a microfiber cloth and hit every surface that needs attention without switching tasks. Your brain stays in "dusting mode" rather than constantly shifting gears, and you’ll finish faster than if you dust one room, vacuum that room, then move to dust the next. Save the vacuuming or mopping for after you’ve dusted everywhere, keeping that top-to-bottom principle intact across your entire home.
Step 1. Set up your tools and timer
Before you touch a single surface, spend five minutes gathering everything you need and setting your schedule. This preparation phase prevents the momentum-killing trips back to the supply closet that add 20 to 30 minutes to your total cleaning time. Professionals never start a job without their tools organized, and you shouldn’t either when learning how to clean a house efficiently.
Gather your cleaning caddy essentials
You need a portable container that holds all your supplies and moves with you from room to room. A bucket, tote, or proper cleaning caddy works perfectly. Stock it before you start so you’re not searching for products mid-task.
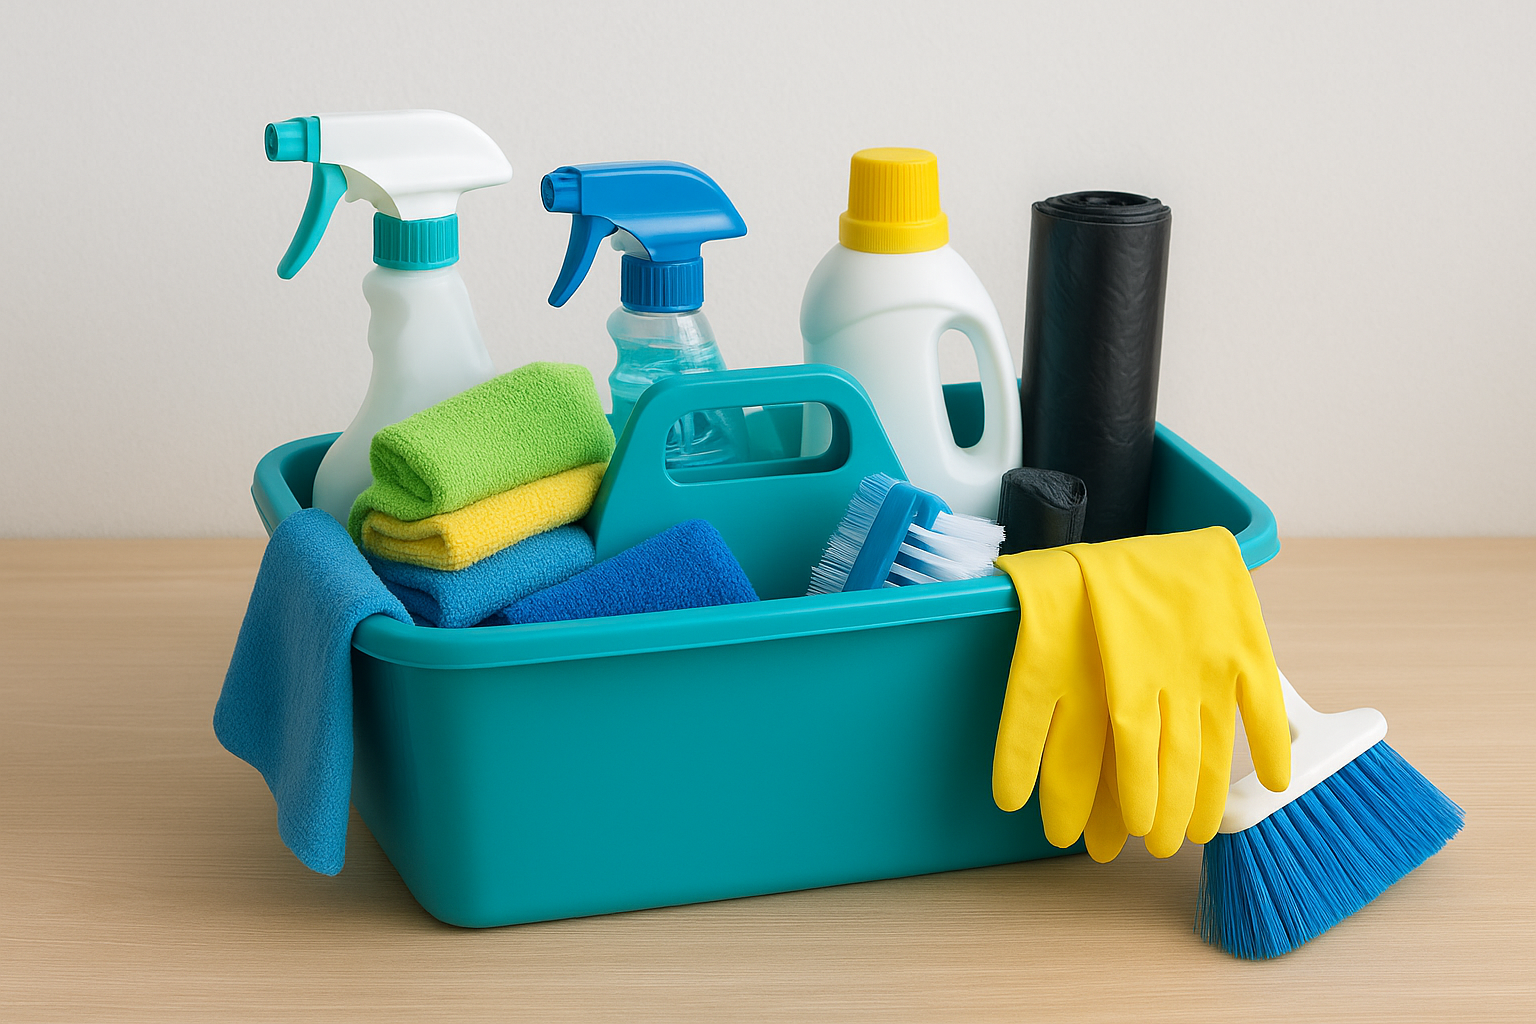
Your caddy should include:
- All-purpose cleaner and glass cleaner
- Microfiber cloths (at least three for different surfaces)
- Disinfectant spray for bathrooms and high-touch areas
- Scrub brush or sponge for tough spots
- Trash bags for collecting garbage as you go
- Rubber gloves to protect your hands
Keep a vacuum cleaner or broom and mop ready near your starting point. You’ll grab these tools when you reach the floor-cleaning phase in each room, but they don’t need to travel with your main caddy.
Gathering all your tools before you begin eliminates interruptions and keeps your cleaning flow unbroken.
Set a realistic time block
Look at your schedule and assign a specific duration to your cleaning session. If you have two hours, set a timer and divide that time across your home’s rooms based on size and need. Kitchens and bathrooms typically require more time than bedrooms or living spaces, so allocate accordingly.
Your timer creates urgency without stress. You’ll naturally work faster when you know the clock is running, and you’ll avoid perfectionism that wastes time on details that don’t matter. Most homes can be thoroughly cleaned in 90 to 120 minutes using the system outlined here, though your first attempt may take longer as you build the habit.
Step 2. Reset each room with a declutter sweep
Before you spray or scrub anything, walk through your home and remove everything that doesn’t belong. This declutter sweep takes five to ten minutes and dramatically speeds up your actual cleaning because you’re not working around piles of items, trying to clean under clutter, or wasting time deciding what to do with misplaced objects. You’re creating clear surfaces that can be cleaned quickly without interruption.
Why decluttering comes before cleaning
Trying to dust a coffee table covered in magazines, remotes, and cups means you’ll either clean around those items (leaving dirty spots) or move each one individually while you work (doubling your time). When you clear everything first, you can wipe the entire surface in one continuous motion. This applies to countertops, dressers, nightstands, and every horizontal surface in your home.
Decluttering also reveals hidden messes you might have missed. That stack of mail on the kitchen counter could be hiding crumbs or sticky residue underneath. The pile of clothes on the bedroom chair might be concealing dust that needs attention. A quick reset brings these areas into view so nothing gets overlooked during your main cleaning pass.
Clearing surfaces before cleaning lets you work faster and more thoroughly without obstacles in your path.
The five-minute room reset
Start at your home’s entrance and move through each space systematically. Grab a laundry basket or large bag to collect misplaced items as you go. Don’t stop to put things away properly yet, just gather everything that belongs in another room and keep moving. This is about speed and momentum.
Your reset checklist for each room:
- Collect trash and recyclables into your bag
- Gather dishes, cups, and food items for the kitchen
- Pick up clothes and place them in hampers or on beds
- Stack papers and mail in one designated spot
- Remove toys, tools, or random objects to appropriate locations
Once you’ve swept through every room, take your basket of collected items and distribute everything to its proper home in a single trip. This batching approach is essential when learning how to clean a house efficiently because it eliminates the back-and-forth that eats up your cleaning time.
Step 3. Dust and wipe top to bottom
Now that your surfaces are clear, you can move through each room with your microfiber cloths and cleaning spray to tackle dust and grime. This step follows the gravity-assisted approach that prevents you from re-cleaning areas you’ve already finished. Start at the highest points in each room and work your way down to ensure falling debris lands on surfaces you haven’t cleaned yet rather than surfaces you’ve already wiped.
Start with ceiling-level surfaces
Begin every room by addressing ceiling fans, light fixtures, and the tops of tall furniture like bookcases or wardrobes. Use a dry microfiber cloth or duster for these areas since most dust simply needs to be captured and removed rather than scrubbed away.
Your ceiling-level checklist:
- Ceiling fan blades (wipe both top and bottom surfaces)
- Light fixture covers and lampshades
- Crown molding and door frame tops
- Tops of cabinets and tall furniture pieces
- Curtain rods and window valances
Don’t worry if dust falls to the floor during this phase. You’ll address floors last, so any debris that drops now will be cleaned up in your final pass through the room.
Starting at the ceiling ensures gravity works with you instead of against you throughout your cleaning process.
Work down to mid-level areas
After handling the high surfaces, move to countertops, shelves, tables, and furniture at eye level or below. This is where you’ll switch from dry dusting to damp wiping for most surfaces. Spray your all-purpose cleaner directly onto your microfiber cloth rather than the surface to prevent oversaturation and reduce drying time.
Wipe each surface using overlapping horizontal strokes that cover the entire area systematically. Start at one end and work toward the other without skipping sections. For glass surfaces like mirrors or picture frames, use your glass cleaner and a separate cloth to avoid streaks from multi-surface products.
Pay special attention to high-touch areas that accumulate grime faster than other spots. Door handles, light switches, remote controls, and chair armrests need extra attention and often benefit from a quick spray of disinfectant after your initial wipe.
Step 4. Clean kitchen fast without rework
The kitchen demands a specific sequence because water, grease, and food particles create layers of mess that need attacking in the right order. When you understand how to clean a house efficiently, you realize the kitchen follows different rules than other rooms because of its unique combination of cooking residue, dirty dishes, and high-traffic surfaces. Your goal here is to avoid cleaning the same counter twice by handling wet tasks first and dry tasks last.
Clear the sink and load the dishwasher first
Your sink needs to be empty and functional before you can tackle anything else in the kitchen. Scrape and load dishes immediately into the dishwasher, or if you’re hand washing, fill one side of the sink with hot soapy water and let items soak while you work on other areas. This soaking breaks down food particles and grease without requiring you to scrub aggressively later.
Run hot water to clear any standing water or debris from the drain, then wipe down the sink basin with your all-purpose cleaner. A clean sink gives you a place to rinse cloths, dump dirty water, and handle other cleaning tasks without working around yesterday’s dishes.
Clearing your sink first creates a functional workspace for everything else in your kitchen cleaning routine.
Work from dry zones to wet zones
Start with areas farthest from water sources like the refrigerator exterior, then move to pantry doors, cabinet faces, and finally end at zones near the sink and stove. This prevents you from tracking water or cleaner across surfaces you’ve already finished.
Your kitchen surface sequence:
- Refrigerator and freezer doors (wipe handles and front panels)
- Cabinet doors and drawer fronts (spot-clean fingerprints and splatters)
- Countertops (spray and wipe in sections, moving items as needed)
- Stovetop and backsplash (address grease and cooking residue last)
- Small appliances (toaster, coffee maker, microwave exterior)
Finish by sweeping or vacuuming the floor to collect crumbs and debris, then mop using clean water and appropriate floor cleaner. Your kitchen is now reset and ready for your next meal prep without any surface needing a second pass.
Step 5. Clean bathrooms with a soak-first method
Bathrooms present unique challenges because soap scum, mineral deposits, and organic grime need chemical dwell time to break down properly. The soak-first method transforms bathroom cleaning from a scrubbing marathon into a quick wipe-down session by letting your cleaning products do the heavy lifting while you handle other tasks. This approach is central to how to clean a house efficiently because it eliminates the need to apply, scrub, rinse, and repeat on stubborn bathroom surfaces.
Spray everything and let chemistry work
Walk into your bathroom and apply cleaner to every surface that needs it before you touch a single scrub brush. Spray toilet bowl cleaner inside the bowl and under the rim, coat the shower walls and tub with your bathroom cleaner, and mist the sink basin and faucet fixtures. This entire application process takes under two minutes.
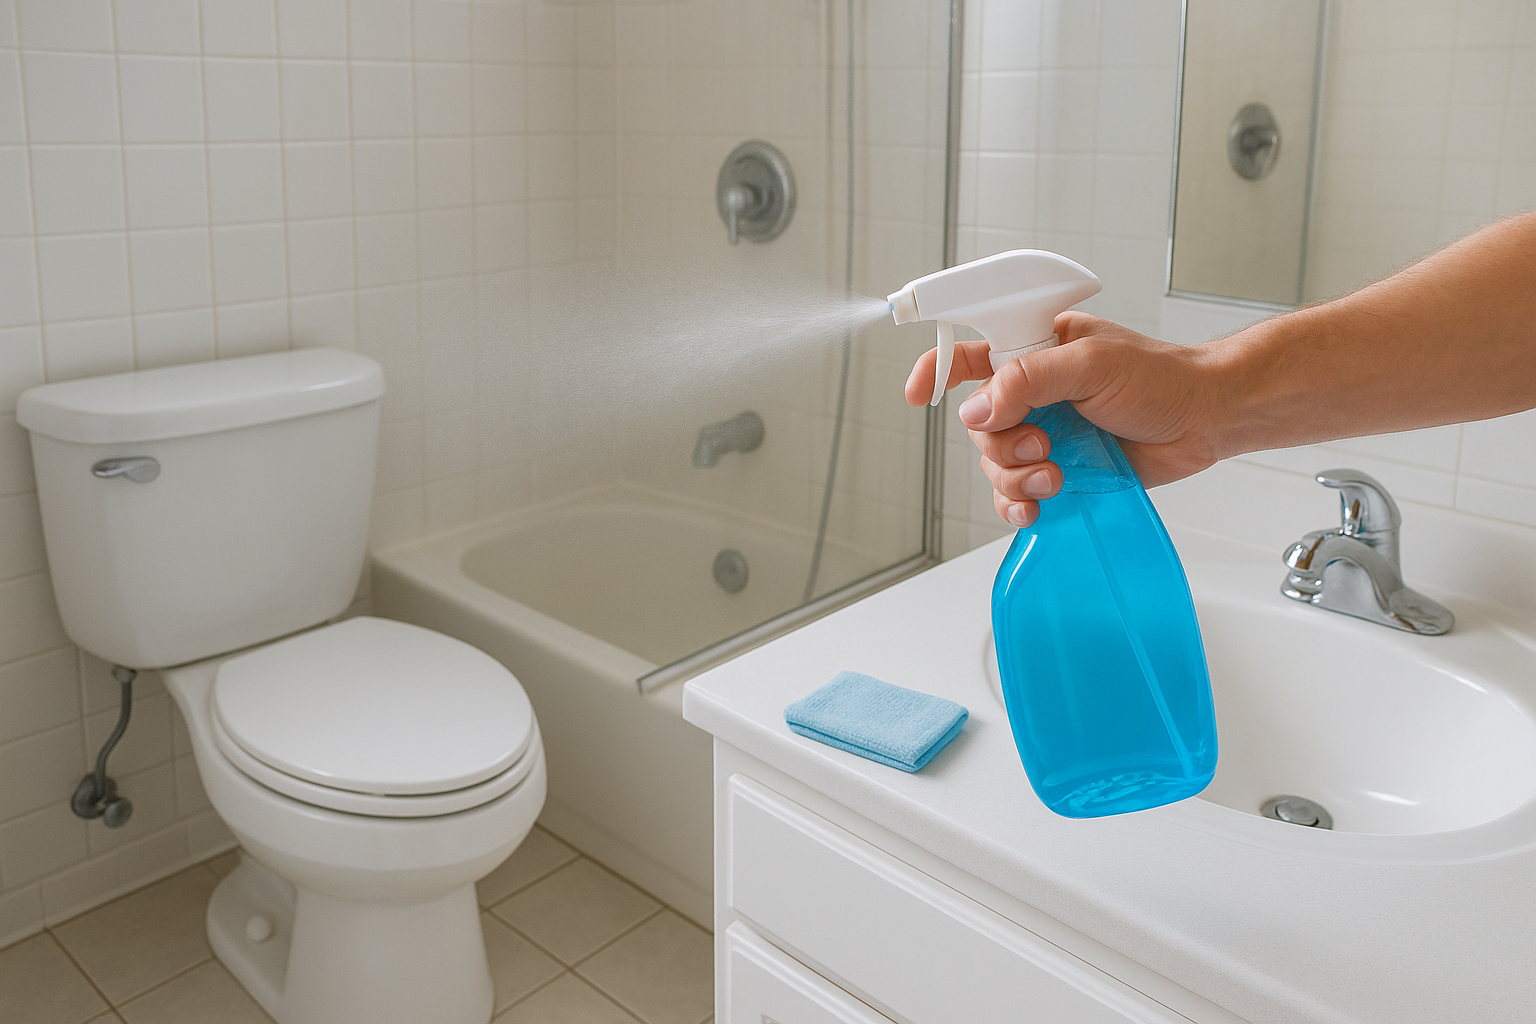
Your spray sequence:
- Toilet bowl interior (use a dedicated toilet cleaner)
- Shower walls, door, and tub (from top to bottom)
- Sink basin and fixtures
- Countertops and backsplash
- Mirror and glass surfaces
After spraying, leave the bathroom for five to ten minutes and move to another room or task. The cleaning products break down grime during this wait period, which means you’ll spend far less time scrubbing when you return. Hard water stains and soap buildup that normally require aggressive scrubbing will wipe away with minimal effort.
Letting cleaning products sit for several minutes dissolves buildup that would otherwise require intense scrubbing and wasted energy.
Return and wipe in reverse order
Come back to your bathroom and start with the surfaces you sprayed last, working backward through your list. Begin with mirrors and countertops using a clean microfiber cloth, then move to the sink and faucet. Use a scrub brush or sponge on the toilet bowl, wipe down the exterior, then finish with the shower and tub where your cleaner has had maximum time to work. Most surfaces will wipe clean with little pressure after the soak period, and you’ll finish the entire bathroom in under ten minutes.
When you want a pro-level reset
Following this system shows you how to clean a house efficiently using the same strategies professional teams rely on daily. You’ll maintain a consistently clean home with far less effort than random, scattered cleaning attempts. The room-by-room approach eliminates wasted motion and prevents the backtracking that turns a two-hour task into an all-day project.
Sometimes life gets busy and you need professionals to handle a deep reset or maintain your regular cleaning schedule. AlphaLux Cleaning serves homes and businesses across New York with customized cleaning plans that match your specific needs. Our trained teams use eco-friendly products and proven systems to deliver spotless results while you focus on what matters most. Whether you need weekly service, a one-time deep clean, or move-in preparation, we bring the same efficient approach outlined here to every job we handle.