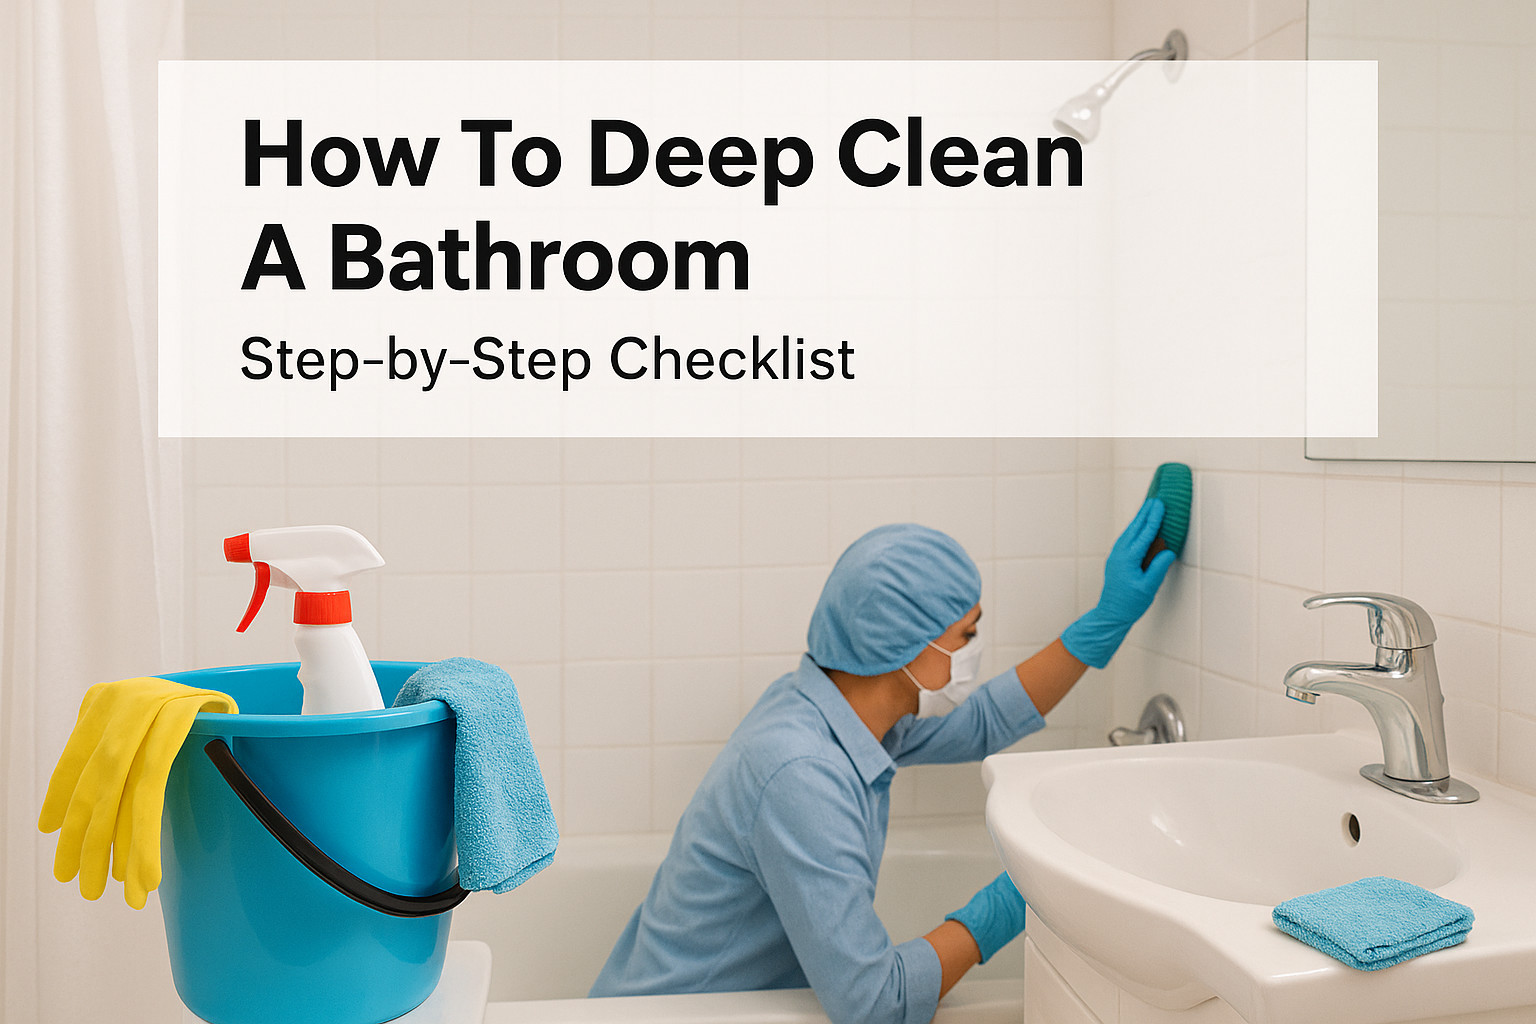
A quick wipe-down of the sink and a swirl of the toilet brush might keep things presentable, but it won’t tackle the grime hiding in grout lines, behind the toilet base, or inside exhaust fan vents. Knowing how to deep clean a bathroom means going beyond the surface, and it makes a real difference for both the look and the hygiene of your space.
At AlphaLux Cleaning, our teams deep clean bathrooms across New York every day, and we’ve learned exactly where dirt, mold, and soap scum like to hide. We built this guide to share that hands-on experience with you, whether you’re tackling the job yourself or deciding it’s time to bring in a professional crew.
Below, you’ll find a complete step-by-step checklist covering every surface, fixture, and frequently missed spot in your bathroom. We’ll walk through the supplies you actually need, the order that saves you time, and the pro-level techniques that leave a bathroom truly clean, not just clean-looking. Let’s get into it.
What to gather and how to stay safe
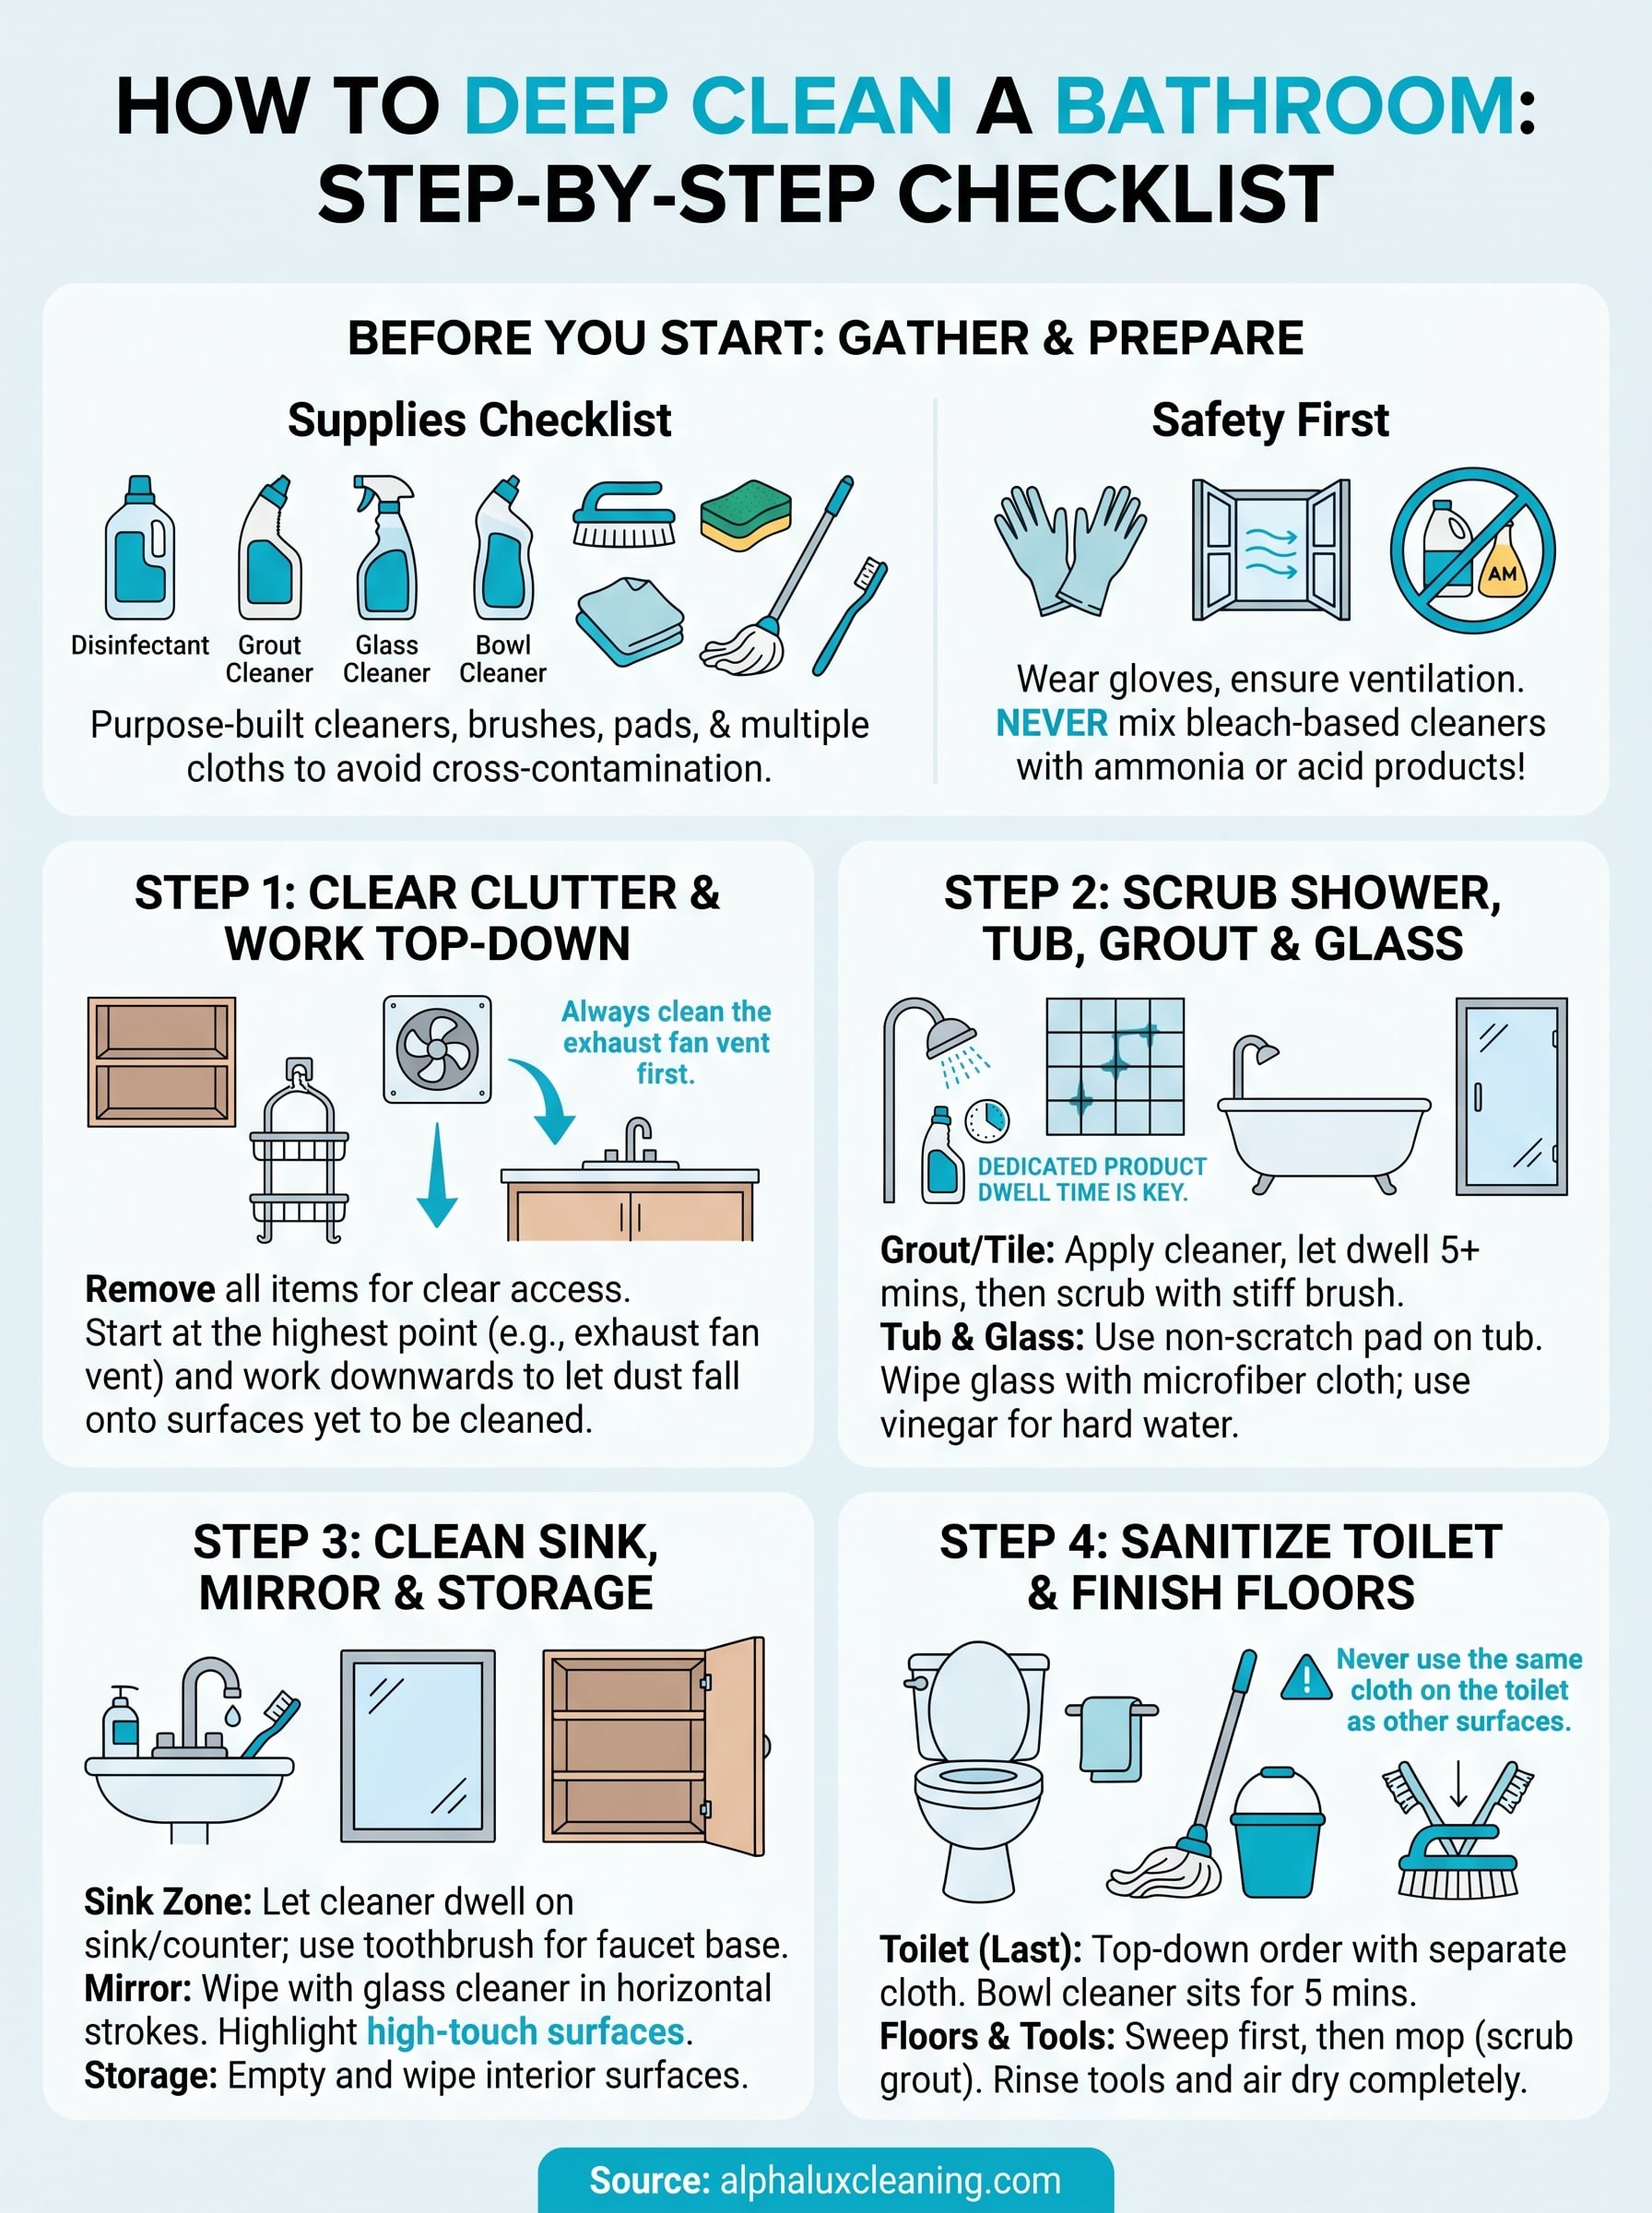
Before you start learning how to deep clean a bathroom, pulling together the right supplies saves you from stopping mid-job to hunt something down. Having everything within reach before you begin means you move through each step without losing momentum, and you give yourself a chance to confirm you have the right product for each surface.
The cleaning supplies checklist
Most of what you need is already in a standard grocery or hardware store. Focus on purpose-built products for each surface rather than one all-purpose spray, since grout, glass, and porcelain each respond differently to cleaners. Cheaper microfiber cloths work just as well as premium versions for this job. Here is what to gather:
- Disinfectant spray or wipes (for toilet, sink, and high-touch surfaces)
- Scrubbing brush with stiff bristles (for grout lines and tile)
- Non-scratch scrub pads (for tub and shower surrounds)
- Glass cleaner (for mirrors and shower doors)
- Toilet brush and bowl cleaner
- Microfiber cloths (at least three, to avoid cross-contaminating surfaces)
- Grout cleaner or a paste of baking soda and white vinegar
- All-purpose bathroom cleaner
- Mop or flat floor scrubber
- Old toothbrush (for caulk lines and faucet bases)
Protect yourself before you start
Cleaning products, especially those containing bleach or acid-based descalers, can irritate your skin, eyes, and lungs. Wear rubber gloves when handling any cleaning solution, and open a window or run the exhaust fan throughout the entire job. If you plan to use multiple products, check the labels first, since combining bleach and ammonia produces toxic fumes that are genuinely dangerous.
Never mix bleach-based cleaners with ammonia or acid-based products in the same space, even if you rinse between uses.
Ventilation matters more than most people expect during a deep clean. Keep a window cracked or your exhaust fan running throughout every step, and your cleaning products will perform better while fumes stay at a manageable level.
Step 1. Clear clutter and start top-down
Before you touch a single cleaning product, remove everything from countertops, shelves, and the shower. Pull out shampoo bottles, soap dishes, toothbrush holders, and any decorative items. Clearing the space gives you unobstructed access to every surface and prevents you from spreading grime around objects that are still sitting in place.
Work from the ceiling down
Once the clutter is gone, start at the highest point in the room and work your way down. This approach ensures that dust, debris, and drips fall onto surfaces you haven’t cleaned yet, rather than contaminating work you’ve already done. Begin with the exhaust fan vent, which collects significant dust buildup and is one of the most skipped spots in any bathroom deep clean.
Always clean the exhaust fan vent first. A clogged or dusty vent pushes airborne particles back into the room as you work below it.
Use a dry microfiber cloth or a vacuum brush attachment to wipe down the vent cover. Then move to the tops of cabinets, light fixtures, and window sills before you touch walls or lower surfaces. This top-down order is a core principle in how to deep clean a bathroom efficiently, and it cuts down on re-cleaning considerably because gravity does the work for you rather than against you.
Step 2. Deep clean shower, tub, grout, and glass
The shower and tub area holds more buildup than anywhere else in the bathroom. Soap scum, hard water deposits, and mildew accumulate on tile, grout, and glass faster than most people realize, so these surfaces need dedicated product dwell time to break down grime effectively.
Attack grout lines and tile walls
Spray your grout cleaner or apply your baking soda and white vinegar paste directly onto grout lines and let it sit for at least five minutes before scrubbing. Use your stiff-bristled brush in short, firm strokes along each line rather than scrubbing in circles.
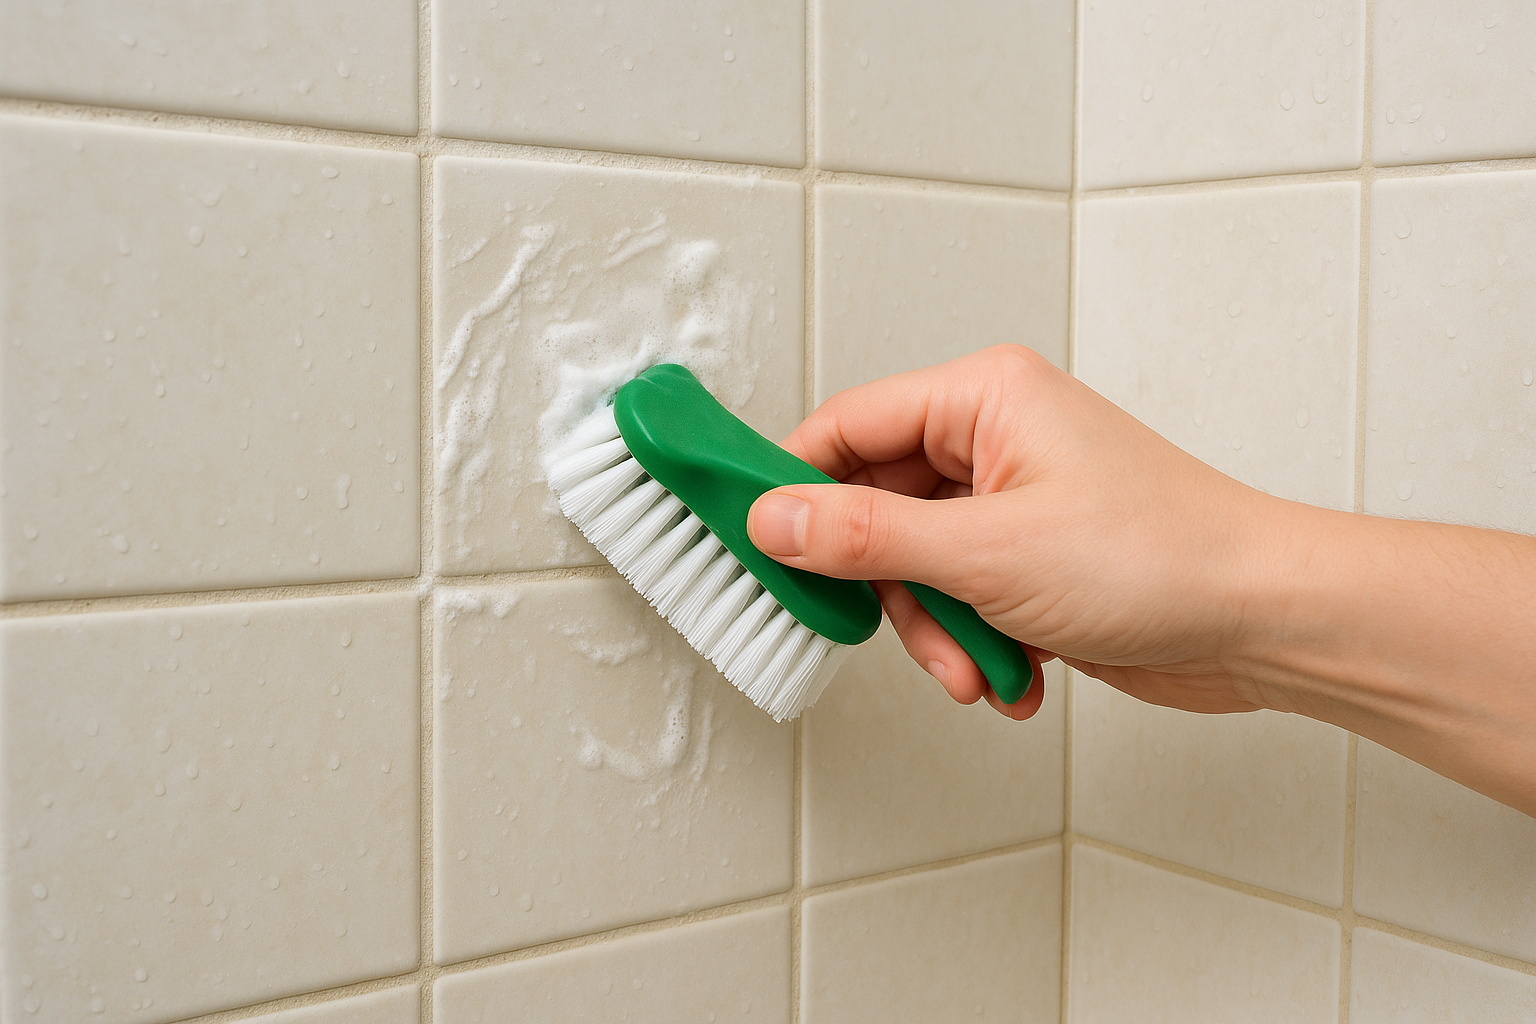
Apply grout cleaner before you move to any other shower surface, so it has time to work while you tackle the surrounding tile.
This focused approach is one of the most important parts of knowing how to deep clean a bathroom because grout harbors mold spores that a standard clean misses entirely. Work your non-scratch pad across tile walls in overlapping sections from top to bottom, rinsing as you go.
Scrub the tub and clear the glass
Apply your all-purpose bathroom cleaner to the tub surface, let it dwell for two minutes, then scrub with your non-scratch pad using firm circular strokes. Rinse thoroughly to avoid leaving a residue that attracts new buildup.
For glass shower doors, spray glass cleaner and wipe with a clean microfiber cloth in vertical strokes to prevent streaking. If you have hard water stains on the glass, apply undiluted white vinegar, let it sit for three minutes, then wipe clean before applying glass cleaner.
Step 3. Scrub sink, counters, mirror, and storage
The sink zone collects toothpaste splatter, soap residue, and hard water spots faster than most people notice. This part of knowing how to deep clean a bathroom matters because these are high-touch surfaces you interact with multiple times daily, and built-up grime here affects both hygiene and the overall feel of the room.
Clean sink, faucet, and countertops
Spray your all-purpose bathroom cleaner across the entire sink basin and countertop surface, then let it dwell for two minutes before scrubbing. Use your old toothbrush to work around the faucet base and drain opening, since buildup concentrates in those narrow gaps that a cloth can’t reach. Wipe down the full counter in one pass with a clean microfiber cloth, moving from the back edge toward the front to direct debris toward the drain.
Pay extra attention to faucet handles and the drain stopper, since these high-touch points carry more bacteria than the sink basin itself.
Wipe mirror and clear out storage
Apply glass cleaner directly onto a microfiber cloth rather than onto the mirror to prevent overspray from landing on the counter you just cleaned. Wipe in horizontal strokes from top to bottom for a streak-free finish every time.
Pull everything out of cabinet shelves and drawers, wipe each interior surface with a damp microfiber cloth, and check expiration dates on any products before returning them to their spot.
Step 4. Sanitize toilet, then finish floors and tools
The toilet is the last fixture you clean before hitting the floors, and that order matters. Cleaning the toilet last keeps cross-contamination in check, since you won’t carry toilet bacteria onto surfaces you’ve already sanitized. This sequence is a core part of knowing how to deep clean a bathroom the right way.
Clean the toilet from top to bottom
Start at the tank lid and work down. Spray disinfectant on the tank, lid, seat top, seat underside, and base, then wipe each surface with a dedicated microfiber cloth in that exact order. Apply your toilet bowl cleaner under the rim and let it sit for five minutes while you wipe the exterior.
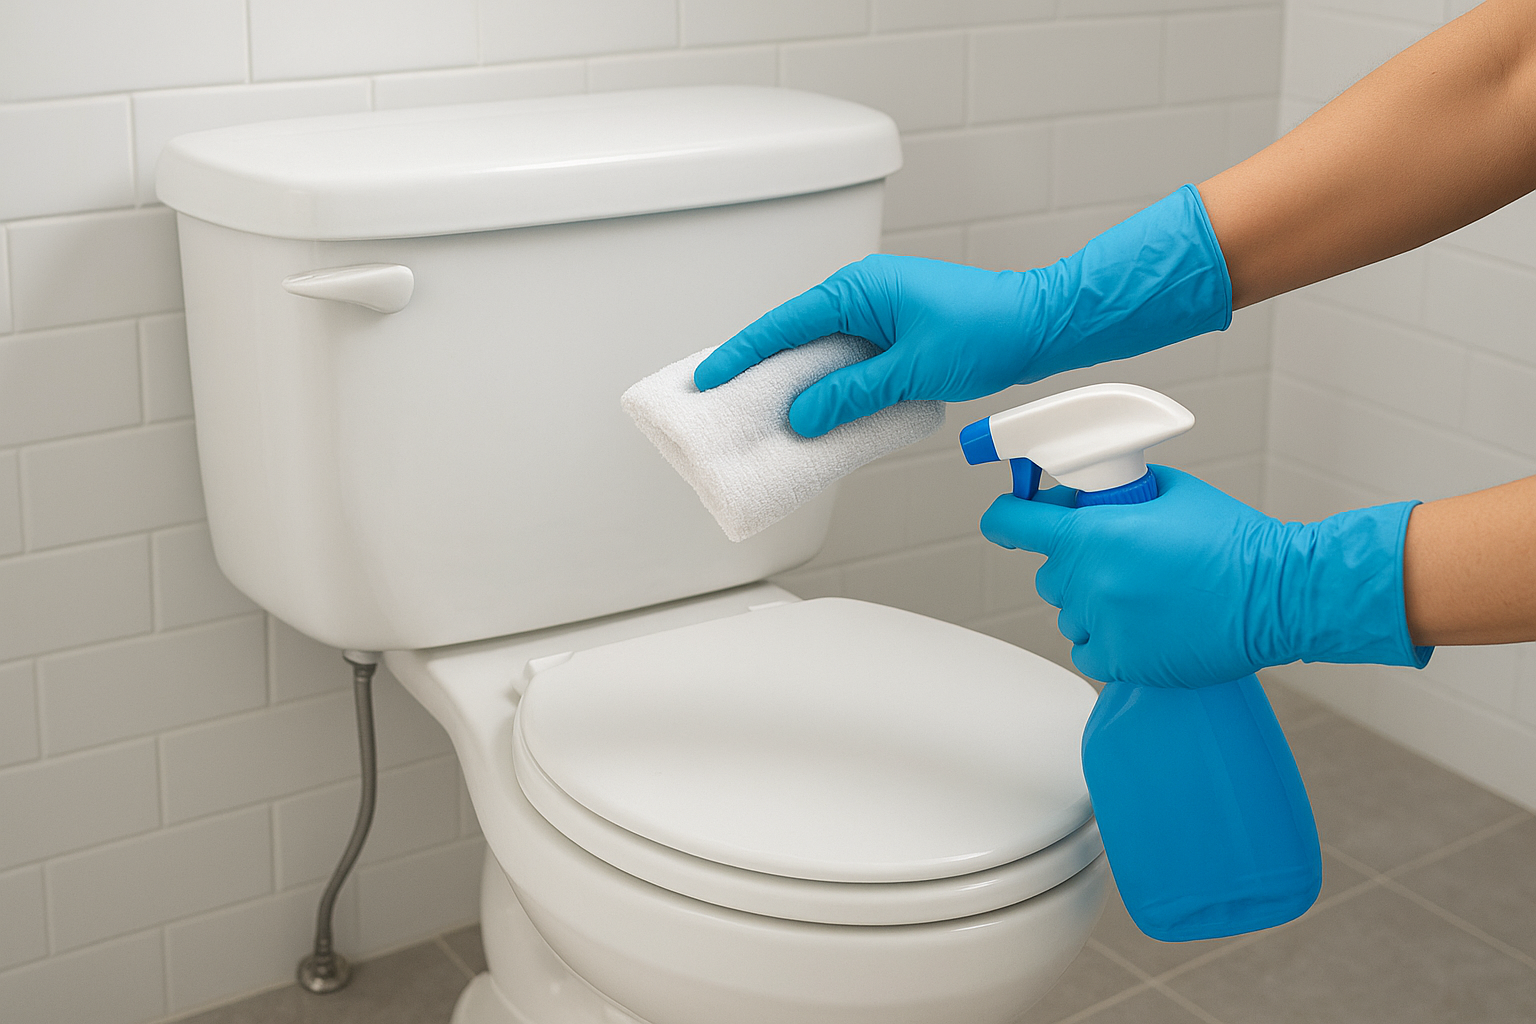
Never use the same cloth on the toilet that you’ve used anywhere else in the bathroom.
Use your toilet brush to scrub under the rim, around the bowl, and down toward the drain opening. Flush to rinse.
Mop floors and clean your tools
Sweep or vacuum the floor first to remove loose debris before any wet mopping. Apply your floor cleaner and mop in sections, working from the far corner toward the door so you don’t step over freshly cleaned tile. Pay close attention to grout lines on tile floors and use your stiff brush on any spots the mop head can’t reach.
Rinse all your brushes and cloths when you finish, and let them air dry completely before storing to prevent mildew growth on your cleaning tools.
Your bathroom deep clean, done
You now have a complete, repeatable process for how to deep clean a bathroom from ceiling to floor. Following the top-down order, giving products proper dwell time, and hitting frequently missed spots like grout lines, faucet bases, and exhaust fan vents is what separates a real deep clean from a surface wipe-down. Run through this checklist every four to six weeks and you’ll stop buildup before it becomes a bigger job.
Some bathrooms need more than a DIY session, whether that’s heavy mold on grout, stubborn hard water staining, or simply a schedule that doesn’t leave room for a two-hour scrub. That’s exactly where a professional crew makes a difference. If you’re in New York and want the job done right without clearing your weekend, book a professional bathroom deep clean with AlphaLux Cleaning and we’ll handle every detail for you.