Comprehensive Office Cleaning for Medical Offices in NYC: A 2026 Guide
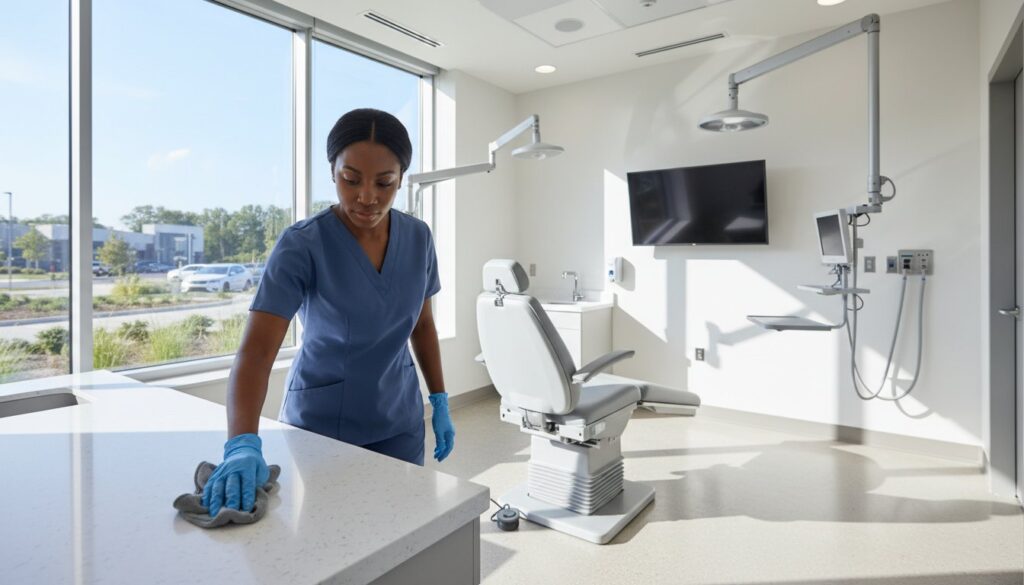
What if the difference between a thriving medical practice and one facing compliance violations comes down to a single overlooked cleaning protocol? In New York City, where healthcare regulations are among the strictest in the nation, 73% of medical facilities have faced citations related to inadequate sanitation practices in the past two years. You understand that maintaining a spotless medical environment isn’t just about appearances. It’s about protecting your patients, ensuring regulatory compliance, and creating a space where healing can truly happen. Finding reliable office cleaning for medical offices NYC that meets healthcare standards while providing the trust and consistency your practice deserves shouldn’t feel like an impossible task. This comprehensive guide will walk you through everything you need to know about professional medical office cleaning in 2026, from understanding specific healthcare cleaning requirements to selecting a dependable service provider who treats your practice with the precision and care it demands. You’ll discover the essential protocols, compliance standards, and proven strategies that transform your medical office into a pristine environment where both staff and patients feel confident and protected. Key Takeaways Medical facilities require specialized cleaning protocols that go far beyond standard office cleaning to protect patient health and ensure infection control. Professional office cleaning for medical offices NYC must comply with strict OSHA and CDC guidelines to maintain regulatory standards and avoid costly violations. Customized cleaning plans tailored to your specific medical specialty can dramatically improve patient satisfaction and staff productivity. Eco-friendly cleaning products in healthcare settings reduce chemical exposure risks while maintaining the highest standards of cleanliness and disinfection. Selecting an experienced medical cleaning company with proper certifications and insurance protects your practice from liability and ensures consistent, reliable service. Table of Contents Understanding the Importance of Office Cleaning for Medical Facilities Regulatory Compliance: Ensuring Your Medical Office Meets Standards Customizing Your Office Cleaning Plan for Medical Needs Eco-Friendly Practices in Medical Office Cleaning Choosing the Right Cleaning Company for Your Medical Office Understanding the Importance of Office Cleaning for Medical Facilities Medical offices face unique cleaning challenges that extend far beyond typical commercial spaces. Unlike standard office environments, healthcare facilities must maintain sterile conditions to protect vulnerable patients, prevent cross-contamination, and comply with stringent regulatory requirements. Professional office cleaning for medical offices nyc involves specialized protocols, medical-grade disinfectants, and trained staff who understand the critical nature of infection control. The stakes couldn’t be higher. A single oversight in cleaning procedures can lead to healthcare-associated infections (HAIs), which affect approximately 1 in 31 hospital patients on any given day according to the CDC. Medical offices, while lower-risk than hospitals, still serve immunocompromised patients who depend on pristine environments for their safety. Patient satisfaction scores directly correlate with facility cleanliness. Studies show that 94% of patients consider cleanliness when evaluating their healthcare experience, and 89% would choose a different provider if they perceived hygiene standards as inadequate. This connection between cleanliness and patient trust makes professional cleaning an investment in reputation and patient retention. Health and Safety Standards in Medical Cleaning Medical facilities must adhere to OSHA’s Bloodborne Pathogens Standard and CDC guidelines for environmental infection control. These regulations require specific cleaning frequencies, approved disinfectants with EPA registration numbers, and documented cleaning logs. Common pathogens like MRSA, C. difficile, and influenza can survive on surfaces for hours or days, making proper disinfection protocols essential. Cleaning staff require specialized training in medical waste handling, proper PPE usage, and understanding of high-touch surface priorities. The Role of Cleaning in Patient Trust Visual cleanliness serves as patients’ first indicator of quality care. Research from the American Organization for Nursing Leadership found that patients form opinions about care quality within 30 seconds of entering a facility. Clean waiting rooms, spotless examination tables, and fresh-smelling environments signal professionalism and attention to detail. Medical practices with superior office cleaning for medical offices nyc report 23% higher patient satisfaction scores and 18% better retention rates compared to facilities with standard cleaning approaches. The psychological impact extends beyond aesthetics. Patients associate cleanliness with competence, creating confidence in medical staff and treatment outcomes. This trust translates into better patient compliance, positive reviews, and valuable word-of-mouth referrals that drive practice growth. Regulatory Compliance: Ensuring Your Medical Office Meets Standards Medical facilities in New York City operate under strict regulatory oversight that directly impacts cleaning protocols. The Occupational Safety and Health Administration (OSHA) and Centers for Disease Control and Prevention (CDC) establish comprehensive standards that professional office cleaning for medical offices NYC services must follow without exception. These regulations aren’t suggestions. They’re mandatory requirements that protect both patients and healthcare workers from infectious diseases and environmental hazards. OSHA’s Bloodborne Pathogens Standard (29 CFR 1910.1030) requires specific decontamination procedures for all surfaces that may contact blood or other potentially infectious materials. This includes examination tables, equipment surfaces, and even seemingly innocuous areas like door handles and light switches. The CDC’s Guidelines for Environmental Infection Control in Health-Care Facilities provide additional layers of protection, mandating specific cleaning frequencies and approved disinfectants. Understanding OSHA and CDC Regulations OSHA regulations for healthcare cleaning focus on three critical areas: proper use of personal protective equipment, correct handling of contaminated materials, and documented training protocols. Environmental Services (EVS) protocols require cleaning staff to follow a systematic approach that eliminates cross-contamination risks. The CDC recommends using EPA-registered disinfectants with specific contact times ranging from 30 seconds to 10 minutes, depending on the pathogen and surface type. Best Practices for Compliance in Cleaning Maintaining compliance requires more than following a checklist. Professional cleaning teams must use EPA List N disinfectants proven effective against SARS-CoV-2 and other healthcare-associated pathogens. Color-coded cleaning systems prevent cross-contamination between different areas. For instance, red cloths are designated for restrooms, blue for patient areas, and yellow for isolation rooms. Documentation proves compliance during inspections. Every cleaning session requires detailed logs including time stamps, products used, and staff signatures. These records must be maintained for a minimum of three years according to OSHA requirements. Regular training updates ensure staff stay current with evolving regulations,
Post Remodel Cleaning Services Near Me: The Complete Guide to Reclaiming Your New Space
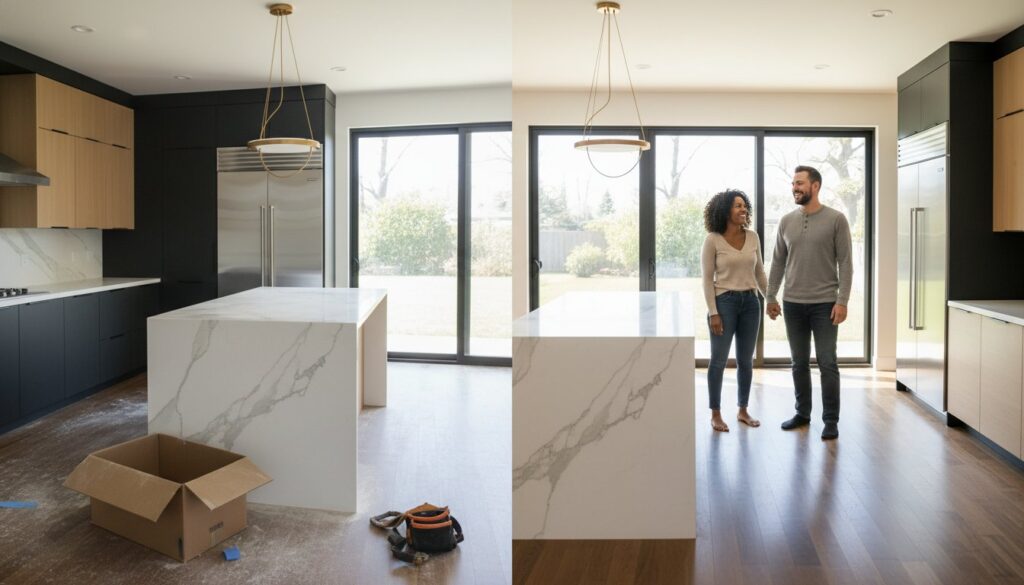
What if the dust settling in your newly remodeled home could rob you of the joy of your transformation? You’re not alone in feeling overwhelmed by the microscopic silica dust that clings to every surface or worrying about scratching your brand-new hardwood or marble floors. Many homeowners find themselves faced with a “broom clean” mess left behind by contractors, creating an unlivable space. That’s where professional post remodel cleaning services near me come into play. In this complete guide, you’ll discover how these services can transform your construction site back into a pristine, healthy home. We’ll explore how to reclaim your space, protect your investment, and breathe easier, allowing you to move back in immediately and enjoy the fruits of your labor. Get ready to turn your post-remodel chaos into a tranquil oasis. Key Takeaways Understand the importance of specialized post-remodel cleaning to eliminate hazardous construction debris and protect your home’s air quality. Explore AlphaLux’s unique 3-phase cleanup process, ensuring every corner of your newly renovated space is thoroughly addressed. Learn how to evaluate professional post remodel cleaning services near me versus DIY options to avoid costly mistakes and damage. Discover essential tips for timing your post-renovation cleaning in New York to ensure a smooth transition from contractor to clean home. Find out how AlphaLux Cleaning can provide a customized cleaning solution tailored to your specific renovation needs, delivering a truly pristine environment. Table of Contents Beyond the Surface: Why Post-Remodel Cleaning is a Technical Necessity The AlphaLux 3-Phase Post-Construction Cleanup Process Evaluating Professional Post-Remodel Services vs. DIY Preparing for Your Post-Renovation Cleaning in New York AlphaLux Cleaning: NY’s Premier Post-Remodel Partner Beyond the Surface: Why Post-Remodel Cleaning is a Technical Necessity The Science of Construction Dust Construction dust is insidious. Microscopic particles can settle on surfaces, making them invisible at first glance. However, they often reappear days after what might seem like a thorough wipe-down. Standard cleaning methods may push dust around instead of capturing it. This is where HEPA-certified vacuums become crucial. These machines are designed to trap 99.97% of particles as small as 0.3 microns, preventing harmful dust from circulating back into your home’s HVAC system. For families, especially those with allergies or respiratory sensitivities, the health implications of lingering construction dust can be severe. Conditions like asthma can be aggravated, leading to discomfort and potential health risks. Protecting New Finishes and Materials Newly installed materials require special attention. Surfaces such as fresh lacquer, unsealed stone, and new grout are particularly vulnerable to damage from abrasive DIY cleaning methods. When post-remodel cleaning is not handled by professionals, you run the risk of marring these delicate finishes. At AlphaLux, we understand that a home should feel as good as it looks. Our approach goes beyond surface appearance. We emphasize techniques that ensure your space not only looks pristine but feels clean, giving you peace of mind in your newly renovated environment. For those searching for post remodel cleaning services near me, consider the long-term benefits of professional cleaning. It’s an investment in your home’s health and longevity, ensuring that your beautiful new space can be enjoyed without the worry of hidden dangers. The AlphaLux 3-Phase Post-Construction Cleanup Process Transforming your newly remodeled space into a pristine environment requires more than just a casual clean. At AlphaLux, we follow a meticulous 3-phase post-construction cleanup process designed to ensure no detail goes overlooked. Our process is specifically tailored for those searching for “post remodel cleaning services near me,” providing a comprehensive solution that leaves your home not only looking clean but feeling clean. Phase 1 & 2: From Debris to Detail Phase one, the Rough Clean, is where we tackle the heavy lifting. Our team efficiently removes large debris, such as scraps of wood, nails, and other construction remnants. This initial step sets the stage for a more detailed cleaning process. In phase two, the Deep Clean, we focus on the often-overlooked areas that collect dust and grime. This includes: Safely removing stickers, protective films, and drywall mud splatter from surfaces. Cleaning inside cabinets, drawers, and closets where dust tends to accumulate. Wiping down walls and ceilings using specialized microfiber technology to ensure every corner is addressed. By the end of these first two phases, your space will be free of construction debris and the initial dust layers, making it ready for the final polish. The Final Touch: Polishing for the Reveal In the final phase, we complete the transformation with the Final Polish. This is the moment when your home is prepared for you to enjoy fully. Our expert team focuses on details that make a significant difference: Cleaning glass and mirrors to remove all streaks and construction film, enhancing clarity and shine. Buffing fixtures and hardware to achieve that signature “AlphaLux” shine, elevating the overall aesthetic. Conducting final air purification and HEPA vacuuming of upholstery and carpets to ensure an allergen-free environment. Throughout all phases, we prioritize your health and the environment by using eco-friendly, non-toxic products. This commitment to quality ensures that your new space has not only a fresh look but also improved air quality. When you choose AlphaLux for your post remodel cleaning needs, you can trust that every detail will be handled with precision and care. To learn more about how we can help reclaim your space, consider exploring our services. Evaluating Professional Post-Remodel Services vs. DIY After a remodel, the excitement of unveiling your transformed space can be overshadowed by the daunting task of cleaning up afterward. You may wonder whether to tackle this cleanup yourself or hire professional post remodel cleaning services near me. Here’s a comprehensive evaluation of both options. The Hidden Costs of DIY Cleanup While doing it yourself may seem economical at first glance, the hidden costs can add up quickly: Rental Costs: Industrial equipment like HEPA vacuums and floor scrubbers can cost between $50 to $150 per day. Specialty cleaning agents may also be necessary, which can add another $50 to $100 to your expenses. The “Re-Cleaning”
How To Clean A Stainless Steel Kitchen Sink In 6 Easy Steps
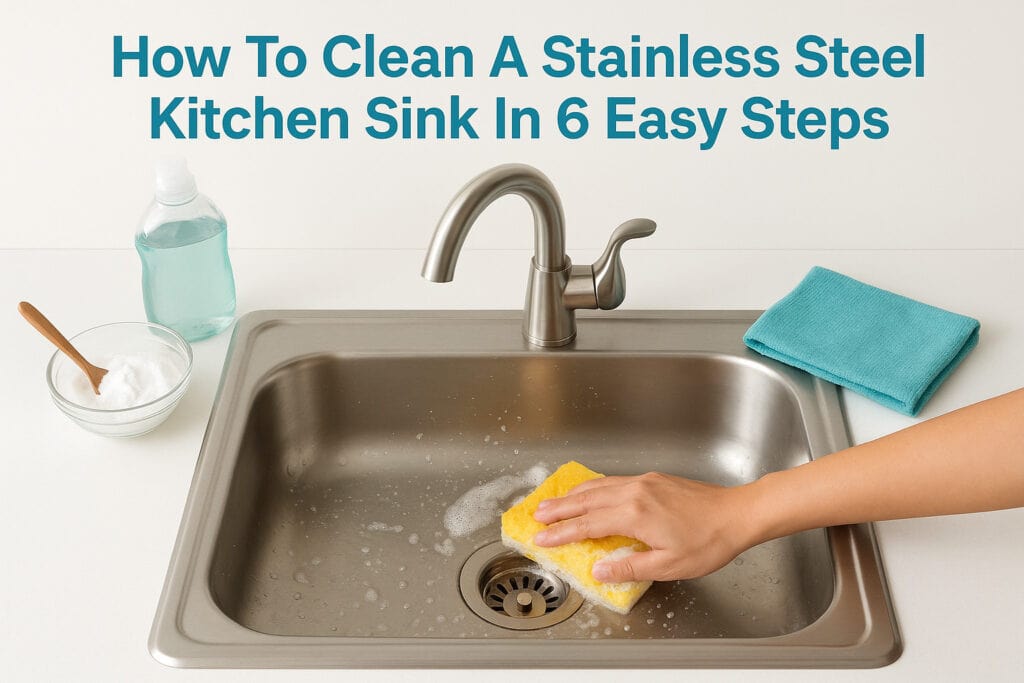
Your stainless steel sink handles a lot, dish duty, food prep, coffee dumps, and everything in between. Over time, water spots, soap residue, and stubborn stains start to dull that once-gleaming surface. If you’ve been wondering how to clean a stainless steel kitchen sink and actually keep it looking good, you’re in the right place. The process is simpler than most people think, and you likely already have what you need at home. A clean sink isn’t just about appearances. It’s one of the most heavily used surfaces in your kitchen, and bacteria love to settle into grimy buildup. Regular cleaning protects your household’s health and extends the life of the sink itself. But using the wrong tools or harsh chemicals can scratch the finish or cause permanent discoloration, so knowing what to avoid matters just as much as knowing what to use. At AlphaLux Cleaning, we clean kitchens across New York every day, and sinks are always part of the job. Our team knows what works, and what doesn’t, because we’ve handled hundreds of stainless steel surfaces in homes and businesses alike. Below, we’ll walk you through six straightforward steps to remove stains, restore shine, and keep your sink in top shape, plus share the products and techniques our professionals trust. What you need before you start Gathering your supplies before you start saves you time and keeps the process moving smoothly. You won’t need anything expensive or hard to find. Most of what it takes to clean a stainless steel kitchen sink is already sitting in your pantry or under your kitchen cabinet. Picking the right tools and products upfront also protects your sink’s finish, since the wrong choice can do more damage than the dirt itself. Cleaning supplies you’ll need The tools you choose matter more than most people realize. You want soft, non-scratch materials throughout the whole process to avoid leaving fine grooves in the metal that dull the finish and trap more grime over time. A few basic, inexpensive items are all you need. Here’s what to have ready before you begin: Item Purpose Baking soda Gentle abrasive that lifts stains and odors White vinegar Dissolves hard water deposits and mineral buildup Dish soap Cuts through grease and daily grime Mineral oil or baby oil Final polish that repels water and fingerprints Microfiber cloths or soft rags Scrubbing and drying without scratching Non-scratch scrubbing pad Soft sponge-style pad for tougher buildup Having all of this within arm’s reach before you start means you won’t leave a wet, soapy sink unattended while searching for supplies. What to avoid Knowing what to keep away from your sink is just as important as knowing what to use. Bleach and chlorine-based cleaners break down the protective layer on stainless steel over time, leading to pitting and permanent discoloration. Steel wool and rough abrasive pads scratch the surface in ways you cannot reverse, and those scratches collect grease and bacteria going forward. Keep these away from your sink entirely: Steel wool or any metal scrubbing pad Bleach or chlorine-based cleaning sprays Harsh drain cleaners left pooling on the sink basin Wet rubber mats or cast iron cookware sitting in the sink for extended periods, since both transfer rust onto the steel surface Step 1. Empty the sink and rinse clean Before you do anything else, clear everything out of the sink: dishes, sponges, drain stoppers, and dish racks. Leaving items in place while you clean means you’ll work around obstacles and miss spots, especially near the drain and along the sides where grime tends to collect. This first step in learning how to clean a stainless steel kitchen sink is the simplest, but it sets up everything that follows. Clear the drain strainer Once the sink is empty, remove the drain strainer and set it aside to clean separately. A loaded strainer will redeposit food debris and grease back onto your freshly cleaned surface the moment water runs through it. Rinse it under hot water and use your non-scratch pad with a drop of dish soap to scrub off any visible buildup before setting it to the side. Clean the drain strainer separately first so nothing ends up back on the surface you’re about to scrub. Rinse the full basin with hot water Turn on the hottest water your tap produces and rinse the entire basin thoroughly, including the sides, the faucet base, and the area around the drain. Hot water loosens surface grease and dislodges loose food particles before you apply any cleaning products, which means your scrubbing does real work on actual stains rather than sitting on top of loose debris. Give the basin a solid 30-second rinse and confirm that no visible particles remain before you move to the next step. Step 2 and 3. Make paste and scrub with grain These two steps are the core of the entire cleaning process. Baking soda paste does the heavy lifting on grease, discoloration, and light stains, while scrubbing with the grain ensures you work with the metal rather than against it, which keeps the finish intact. Step 2: Mix your baking soda paste Sprinkle a generous, even layer of baking soda directly over the entire wet basin. You don’t need to premix anything in a bowl. The moisture left from your hot water rinse combines with the baking soda on contact to form a light, workable paste right on the surface. Add a few drops of dish soap over the top for extra grease-cutting power before you start scrubbing. Let the paste sit for two to three minutes before scrubbing so the baking soda has time to break down grease and surface residue. Step 3: Scrub with the grain Stainless steel has a visible grain, a faint series of lines that run in one direction across the surface. Always scrub in the same direction as those lines, never in circles. Circular scrubbing cuts across the grain and leaves fine scratches that catch dirt and dull the finish
Move In Cleaning Cost Estimate: A Guide to Pricing in 2026

Imagine walking into your new home on moving day, only to find that the “broom clean” promise left by the previous owners is actually a layer of hidden dust and grime. It’s a common frustration; industry reports from 2024 indicate that 42% of homebuyers feel their new property requires immediate professional attention before they can truly settle in. Securing an accurate move in cleaning cost estimate is about more than just a number on a page. It’s about the peace of mind that comes from knowing your family is starting fresh in a space that doesn’t just look clean, but feels clean. You’ve already managed the overwhelming logistics of movers and paperwork, so you shouldn’t have to worry about hidden fees or a surface-level scrub that misses the details. We understand that you want a partner who handles the precision work so you can focus on your new beginning. This guide provides a transparent framework for how these services are priced in 2026, helping you avoid surprises and secure a high-end, healthy environment for your move. We’ll explore the specific factors that influence your final quote and provide a roadmap for finding a reliable team that treats your home with meticulous care. Key Takeaways Understand why specialized deep-sanitation for vacant properties requires a different pricing structure than standard recurring cleaning services. Identify the critical factors, such as square footage and property condition, that professionals use to provide a precise move in cleaning cost estimate. Learn the essential differences between “broom clean” move-out standards and the meticulous, labor-intensive sanitization required for a healthy start. Discover how to leverage online booking tools and transparency to ensure your personalized quote reflects the true needs of your new home. Explore how eco-friendly products and a higher standard of care create a living space that doesn’t just look clean, but truly feels clean. Table of Contents Understanding the Move-In Cleaning Cost Estimate Key Factors that Determine Your Move-In Cleaning Price Moving In vs. Moving Out: Comparing Service Costs How to Get an Accurate Estimate for Your Long Island Home Experience the AlphaLux Standard: Personalized Move-In Solutions Understanding the Move-In Cleaning Cost Estimate Moving into a new home in New York is more than a logistical transition; it’s the start of a new chapter. A professional move-in cleaning is a specialized deep-sanitation service performed on vacant properties to ensure the space is truly ready for its new occupants. This process is significantly more intensive than a standard house cleaning. While a recurring service maintains a tidy home, a move-in service prepares a blank canvas. To understand your move in cleaning cost estimate, you must first recognize that this task involves cleaning every inch of a property, including areas usually hidden by furniture or heavy appliances. The difference in pricing stems from the scope of work. In a 2023 industry report, professional cleaners noted that move-in projects require approximately 40 percent more labor time per square foot compared to routine maintenance. This is because every surface is accessible and requires individual attention. Exploring What is Professional Cleaning clarifies that this level of sanitation is about hygiene and safety, not just aesthetics. It’s about removing the biological footprint of the previous residents, from dander to microscopic dust, so your home doesn’t just look clean, it feels clean. A move in cleaning cost estimate reflects the peace of mind that comes with a fresh start. There is a profound psychological value in knowing that your kitchen counters and bathroom fixtures have been sanitized to a professional standard. This service transforms a house into a sanctuary, allowing you to focus on the joy of decorating and settling in rather than scrubbing floors. Why Move-In Cleaning is a Specialized Service This service focuses on total-room sanitation. Our professionals clean every vertical and horizontal surface, including the interiors of cabinets, drawers, and closets that are normally filled. We address the “blank canvas” of the home, reaching the dust that has settled on top of door frames and deep inside window tracks. Removing the previous occupant’s biological footprint is a priority. We use professional-grade disinfectants to ensure that kitchens and bathrooms are sanitized to a clinical standard before you unpack your first box. The Peace of Mind Premium in New York Property owners in Long Island and NYC maintain exceptionally high standards. For renters, a professional cleaning is often a strategic move to protect a security deposit. For buyers, it’s an investment in their new asset. The AlphaLux Standard represents our commitment to this high-pressure market. We provide vetted, fully insured professionals who understand the nuances of high-value NY real estate. According to a 2024 survey of New York homeowners, 88 percent of residents felt a significant reduction in move-day stress when they outsourced the deep cleaning to a trusted partner. Hiring experts ensures that the job is done right the first time, providing the quiet satisfaction of a pristine environment. Key Factors that Determine Your Move-In Cleaning Price Every home tells a story through its architecture and its history. Your move in cleaning cost estimate isn’t just a random number; it’s a reflection of the labor, precision, and specialized care required to make a space truly habitable. While square footage provides the foundation for a quote, the specific details of your new property dictate the final investment. Professionals look at the home as a series of tasks rather than just a total area. Size provides the baseline for any estimate. A larger home naturally requires more time to vacuum, mop, and dust. However, the number of rooms matters just as much as the total square feet. A 2,000-square-foot open-concept loft often costs less to clean than a 2,000-square-foot traditional home with four bedrooms, three bathrooms, and multiple hallways. Each additional door frame, light switch, and corner adds to the total labor hours required for a meticulous finish. Square Footage vs. Condition of the Home Condition frequently outweighs size when determining the final price. A small, 600-square-foot apartment that hasn’t been cleaned
7 Picks For The Best Mop For Hardwood Floors In 2026
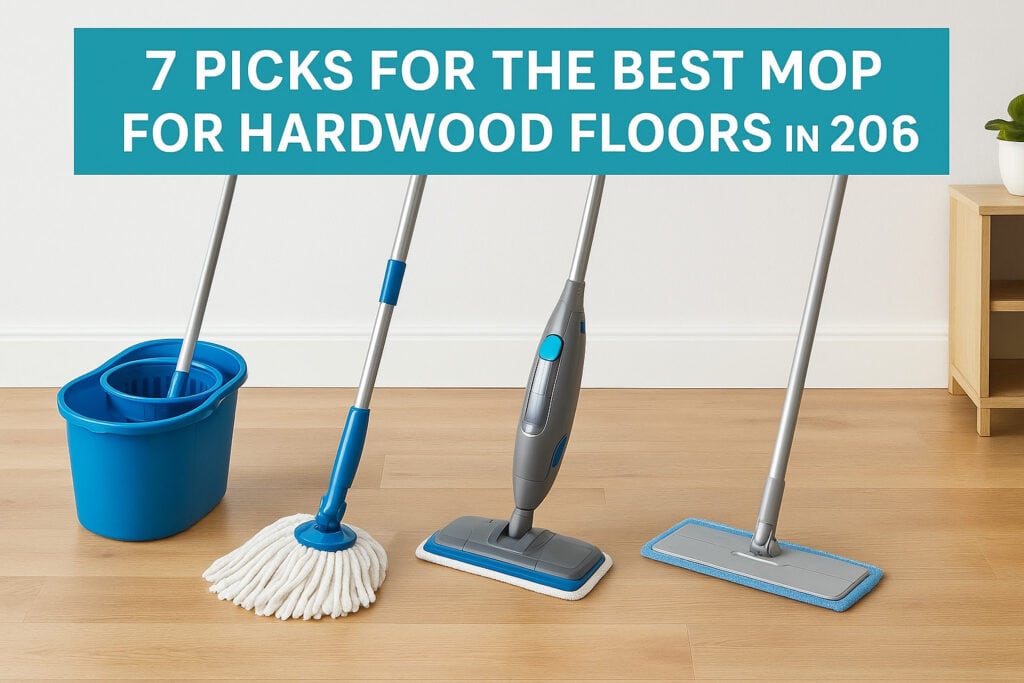
At AlphaLux Cleaning, we’ve mopped more hardwood floors across New York than we can count. That hands-on experience has taught our team exactly which tools protect the finish, pick up real dirt, and hold up after hundreds of uses. So when clients ask us for the best mop for hardwood floors, we don’t guess, we pull from what actually works on the job every single day. That’s why we put together this list of our top 7 picks heading into 2026. Hardwood is one of the most common flooring types we clean in both homes and offices, and it’s also one of the easiest to damage with the wrong equipment. Too much water, harsh pads, or cheap wring mechanisms can warp boards, dull finishes, and leave streaks that look worse than the dirt you started with. Choosing the right mop matters more than most people realize, and it can be the difference between floors that look freshly refinished and ones that slowly lose their shine. We’ve seen the damage firsthand, and we’d rather help you avoid those expensive mistakes before they happen. Below, you’ll find seven mops we trust based on real-world performance, build quality, ease of use, and how safely they treat hardwood. We broke down the pros and cons of each option so you can match one to your specific needs, whether that’s a quick weeknight clean or a thorough deep session. If you want floors that stay beautiful for years, picking the right tool is step one, let’s get into it. 1. AlphaLux Cleaning hardwood floor cleaning service Sometimes the best mop for hardwood floors is no mop at all. AlphaLux Cleaning is a professional cleaning service based in New York that handles both residential and commercial hardwood floors using the right tools, the right products, and the right technique every single time. If your floors need more than a quick pass or you want the job done without the guesswork, this option is worth serious consideration. What it is and how it cleans hardwood AlphaLux sends trained, background-checked cleaning professionals directly to your home or office. The team uses eco-friendly, non-toxic cleaning products that are safe for hardwood finishes and won’t leave behind residue, streaks, or moisture damage. Instead of flooding the surface with water, the professionals apply controlled, low-moisture methods that lift dirt and grime without putting your floor at any risk. When to choose it You should consider AlphaLux when your floors need a thorough deep clean that goes beyond what a standard mop can handle. It’s a strong fit for move-in and move-out situations, post-renovation cleanups, or recurring maintenance on high-traffic floors in offices and larger homes. If you have wide-plank hardwood, delicate finishes, or antique flooring, professional handling removes the risk of accidental damage from DIY tools. Pairing a periodic professional deep clean with your regular home mopping routine is one of the most practical ways to extend the life of your hardwood floors. What to watch out for Professional cleaning does require scheduling in advance, which means it won’t solve an immediate mess the same day. You also need to be present or make arrangements for access to your property, which adds a coordination step that a mop sitting in your closet doesn’t require. It’s a service, not a product, so the approach is fundamentally different from the other picks on this list. Price and ongoing costs AlphaLux offers free estimates and customizable cleaning plans, so pricing depends on the size of your space and how often you want service. One-time deep cleans and recurring weekly or monthly visits are both available. You can book online directly through alphaluxcleaning.com to get started. 2. O-Cedar EasyWring microfiber spin mop and bucket The O-Cedar EasyWring is one of the most recognizable mops on the market, and it earns that reputation through consistent, practical performance on hardwood floors. It combines a microfiber mop head with a foot-pedal spin mechanism that wrings the mop to your preferred dryness level, which is critical when you’re working on wood surfaces that can’t handle excess moisture. What it is and how it cleans hardwood Using a triangular microfiber head, this mop reaches into corners and along baseboards more effectively than round or rectangular alternatives. The spin bucket system lets you control exactly how wet the mop head gets before it touches your floor, giving you a genuinely damp clean rather than a soaking wet one. A drier mop head means less risk of moisture seeping into the seams between boards, which is where warping and swelling most often start. When to choose it This mop works well for regular weekly maintenance on medium to large hardwood floor areas. If you’re searching for the best mop for hardwood floors that handles everyday dust, pet hair, and light grime without a lot of setup, the EasyWring fits that job well. Keeping the mop head only slightly damp is the single most important habit for protecting a hardwood finish over time. What to watch out for The spin mechanism wears down with heavy use, and replacement heads become necessary every few months with frequent cleaning. Its bucket is larger than average, so storage space becomes a consideration compared to simpler flat mop options. Price and ongoing costs The mop and bucket set runs around $35 to $45. Replacement microfiber heads cost roughly $8 to $12 for a two-pack, making the long-term costs manageable. 3. Bona hardwood floor premium spray mop Bona has built a strong reputation specifically in the hardwood floor care space, and their premium spray mop reflects that focused expertise. Unlike general-purpose mops adapted for hardwood, this one is designed from the ground up with wood floors in mind. What it is and how it cleans hardwood The Bona spray mop uses a built-in refillable cartridge that dispenses Bona’s proprietary hardwood floor cleaner directly onto the floor in a controlled mist. A flat microfiber cleaning pad then picks up dirt, dust, and light grime without oversaturating the surface.
The Ultimate Deep Cleaning Checklist for Spring 2026: A Room-by-Room Guide

Did you know the EPA reports that indoor air levels of many pollutants are often 2 to 5 times higher than outdoor levels? After months of closed windows, your home has likely accumulated a hidden layer of winter dust that requires a professional-grade deep cleaning checklist for spring 2026 to resolve. We believe your home shouldn’t just look clean; it should feel clean. We understand that facing a full house of neglected corners feels overwhelming, especially when you’re unsure which eco-friendly products actually deliver the results you expect. You deserve the peace of mind that comes from a meticulous, healthy environment for your family. Our comprehensive framework is designed to remove the guesswork and provide a systematic plan for your seasonal refresh. We’ll guide you through an expert-approved, room-by-room guide that prioritizes indoor air quality and precision care. From reviving high-traffic areas to sanitizing hidden surfaces, this article ensures your home becomes a true sanctuary for the year ahead. Key Takeaways Discover how a holistic approach to home health can eliminate the pollutants accumulated during the New York winter, restoring your peace of mind and mental clarity. Follow our expert-approved deep cleaning checklist for spring 2026 to systematically refresh every room while focusing on high-impact areas that standard routines often miss. Learn to identify and remove hidden pathogens and VOCs using eco-friendly strategies that ensure your sanctuary feels as clean as it looks. Implement the “Zone Cleaning” method to tackle your home efficiently over a single weekend without the burnout of traditional deep cleaning. Determine when to utilize professional-grade steam extraction and industrial equipment to achieve a deeper level of hygiene than standard DIY tools can provide. Table of Contents Why the Spring 2026 Deep Clean is Essential for Home Wellness The Master 2026 Room-by-Room Deep Cleaning Checklist The ‘Invisible Clean’: Targeting Air Quality and Hidden Pathogens Expert Strategies for an Efficient Spring Clean When to DIY vs. Hiring a Professional Cleaning Company Why the Spring 2026 Deep Clean is Essential for Home Wellness The deep cleaning checklist for spring 2026 represents a significant evolution in how we maintain our living spaces. It is no longer just about scrubbing floors or dusting shelves; instead, it’s a holistic approach to home health and mental clarity. After a long winter of closed windows and heavy insulation, your home naturally accumulates a layer of stagnant energy and microscopic debris. At AlphaLux, we focus on the “AlphaLux feeling.” This is the moment you walk through the door and realize your home doesn’t just look clean; it feels restorative. This sensation of peace of mind is vital for your daily well-being and productivity. A professional-grade deep clean serves as a total reset for your environment. By removing the buildup of the previous year, you create a space that supports your health rather than taxing it. In 2026, the standard for a clean home has shifted. It’s about precision, care, and the quiet satisfaction of knowing every corner has been addressed with expert attention. This process transforms your house from a mere shelter into a pristine sanctuary where you can truly focus on what matters most. The New York Seasonal Shift: Combatting Northeast Allergens Residents across Long Island and NYC are preparing for a particularly intense transition this year. The 2026 pollen forecast indicates that tree allergen counts will peak 12 days earlier than the historical average, according to regional environmental projections. Throughout the winter, New York heating systems trap pollutants, pet dander, and dust mites within the ductwork and soft surfaces. These contaminants require more than a surface wipe to remove. While you can learn how to clean for basic weekly maintenance, the spring shift demands professional-grade extraction. Removing these particles is essential to prevent respiratory irritation and ensure your family breathes clean, filtered air as the weather warms. Essential 2026 Cleaning Kit: Modern Tools for Success Achieving a higher standard of clean requires the right technology. In 2026, the shift toward non-toxic, eco-friendly cleaning is a standard requirement for a healthy household. We’ve moved away from harsh chemicals that leave behind volatile organic compounds (VOCs). Instead, modern success relies on precision tools that deliver results without compromise: HEPA-13 Filtration: Standard vacuums often exhaust fine dust back into the room. HEPA-13 filters capture 99.97 percent of microscopic triggers as small as 0.3 microns. Advanced Microfiber: Split-fiber technology allows for the mechanical removal of 99 percent of bacteria using only water or mild, plant-based surfactants. Vapor Steam Sanitization: Using heat at 212 degrees Fahrenheit provides a high-level kill rate for germs on hard surfaces without the need for traditional bleach. Your deep cleaning checklist for spring 2026 should prioritize these professional-grade assets. By choosing surfactants derived from natural sources over aggressive acids, you protect your home’s surfaces and your family’s health simultaneously. This meticulous attention to detail ensures your environment remains a spotless sanctuary that supports a vibrant, healthy lifestyle. The Master 2026 Room-by-Room Deep Cleaning Checklist To achieve a home that doesn’t just look tidy but truly feels clean, you need a systematic strategy. Efficiency starts with the top-to-bottom rule. Dust naturally falls downward. Starting at the ceiling and working toward the floor prevents the frustration of re-cleaning surfaces you’ve already addressed. This deep cleaning checklist for spring 2026 focuses on high-impact zones that standard weekly routines usually miss. By breaking the home into specific zones, you avoid the mental fatigue that often stalls a spring cleaning project before it’s finished. The Heart of the Home: Kitchen and Dining Areas Kitchens are high-traffic areas where grime is often invisible but persistent. Degreasing the tops of cabinets and light fixtures is a critical first step. In these spots, airborne cooking oils act as an adhesive for dust; this creates a sticky film that standard dusting cannot remove. You should also pull out the dishwasher filter and clear the debris. Maintaining this filter every 3 to 6 months can extend the appliance’s functional lifespan by 3 to 5 years. Don’t forget the pantry. Removing every item
How To Clean A Stove Top: Glass, Gas, And Electric Steps
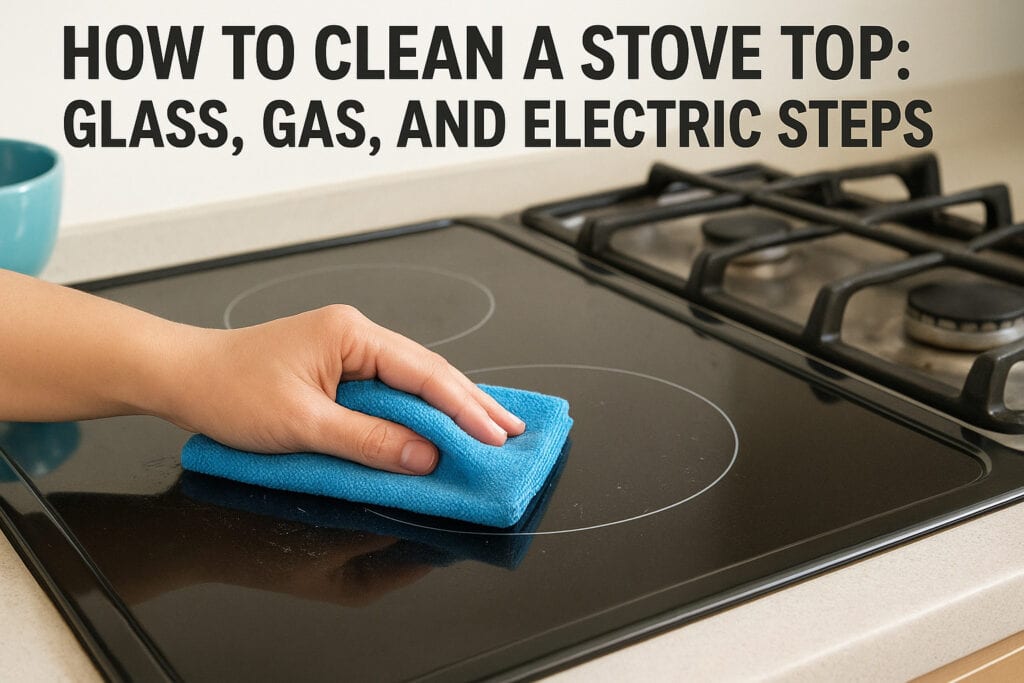
Your stove top handles more abuse than almost any other surface in your kitchen. Between splattering sauces, boiling-over pots, and grease that seems to bond permanently with the surface, it doesn’t take long for things to get ugly. Knowing how to clean a stove top the right way matters, because scrubbing harder isn’t always the answer, and using the wrong method can cause scratches or permanent damage to your specific surface type. The trick is that glass, gas, and electric stove tops each require a different approach. What works perfectly on a sealed gas burner could ruin a smooth glass cooktop, and vice versa. At AlphaLux Cleaning, we deal with every type of stove surface during our residential deep cleans across New York, and we’ve learned exactly which techniques and products deliver real results without causing harm. We’re sharing that hands-on experience here so you can get the same quality outcome at home. This guide breaks down the step-by-step cleaning process for all three stove top types, including DIY solutions using common household ingredients. Whether you’re tackling light daily buildup or stubborn, burnt-on grease that’s been there for months, you’ll find a method below that works. Let’s get into it, starting with what you’ll need before you touch a single burner. Before you start: stovetop type, safety, and supplies Before you start scrubbing, you need to know what type of stove top you have and what it can handle. Picking the wrong cleaner or tool is the most common reason people end up with scratched glass or corroded burner ports. This section covers everything you need to identify your surface, stay safe during the process, and gather the right supplies before you get started. Know your stovetop type first Your cleaning method depends entirely on your stovetop surface. Glass and ceramic smooth-tops require non-abrasive tools and specific cooktop cleaners to avoid etching or scratching the surface. Gas stovetops have removable grates, burner caps, and ports that each need separate attention. Electric coil stovetops have lift-out coils and drip pans that you clean independently from the rest of the surface. If you’re unsure which type you have, check the model number on the underside of a burner grate or inside the oven door and look it up in your owner’s manual. Stovetop Type Surface Material Key Cleaning Challenge Glass/Ceramic Smooth glass or ceramic Scratches easily; burnt sugar fuses to the surface Gas Metal grates and burner ports Grease buildup inside ports; heavy, greasy grates Electric Coil Metal coils and drip pans Baked-on spills that harden inside drip pans Safety steps before you clean Safety is not optional when you’re working around a stove. Always confirm the burners are completely off and the surface has cooled fully before applying any liquid or cleaner. For gas stovetops, make sure no gas is flowing by verifying all knobs are in the off position before you remove grates or burner caps. Never spray liquid cleaners directly onto control knobs or electrical components, since moisture can cause short circuits or damage the igniter on gas ranges. You should also keep the area well-ventilated if you’re using stronger cleaning agents. Baking soda mixed with vinegar produces a fizzing reaction that can irritate your eyes and nose in an enclosed space. Open a window or turn on your kitchen exhaust fan before you begin, and put on a pair of rubber gloves to protect your hands from prolonged contact with degreasers or acidic cleaners. Supplies you’ll need Gathering your supplies beforehand makes the whole process faster and keeps you from stopping mid-clean to hunt for something. Most of what you need to learn how to clean a stove top effectively is already in your kitchen or available at any grocery store. You don’t need expensive specialty products for most jobs, though a dedicated glass cooktop cleaner is worth picking up if you have a smooth ceramic or glass surface. Here’s a complete breakdown of what to have ready before you start: For all stovetop types: Dish soap Baking soda White vinegar Microfiber cloths (at least 2-3) Warm water Small soft-bristle brush or old toothbrush For glass/ceramic only: Plastic scraper or razor blade scraper designed for cooktops Bar Keepers Friend (powder form) or a dedicated glass cooktop cleaner Non-scratch scrubbing pad For gas stovetops: Degreaser or dish soap with a degreasing formula Large basin or sink deep enough to soak grates fully Wooden or plastic toothpick to clear clogged burner ports For electric coil stovetops: Scrubbing pad or fine steel wool for drip pans only Ammonia (optional, for heavily soiled drip pans used inside a sealed bag) Having everything within reach before you start means you won’t be standing at the sink with wet, greasy hands trying to remember where you put the baking soda. A few minutes of preparation saves a lot of frustration once the cleaning is underway. Step 1. Let the stovetop cool and clear loose debris The very first thing you need to do before learning how to clean a stove top properly is wait. Applying any cleaner, even plain water, to a hot glass or ceramic surface can cause thermal shock, which may crack the cooktop entirely. On gas stovetops, pressing a wet cloth onto a still-hot grate will bake the cleaning solution into the surface before you can wipe it away, making your job harder. Let the surface cool completely before you touch it. Why cooling matters before you clean Most people underestimate how long a stovetop stays hot after use. A glass or ceramic cooktop can hold heat for 15 to 30 minutes after the burners turn off, and cast iron grates on gas ranges retain heat even longer. Cleaning too soon doesn’t just risk burns; it can permanently set grease and food residue into the surface by cooking it further when you rub it in. Treat the cooling period as part of the cleaning process, not a delay. Starting too early almost always creates more work, not less. How to
Commercial Building Cleaning Services in Nassau County: The 2026 Business Owner’s Guide

If a prospective client walks into your lobby and catches the sharp, clinical scent of harsh chemicals, have you already lost their trust before the first handshake? You know that a pristine workspace is more than just a visual requirement. It’s a reflection of your brand’s integrity and your commitment to your team’s well-being. Since 2024, many local leaders have found that substandard commercial building cleaning services in Nassau County are the primary cause of workplace dissatisfaction and hidden operational costs. You deserve a partnership that eliminates the guesswork and those frustratingly unreliable staff schedules. This guide shows you how to select the highest standard of cleaning to ensure your facility doesn’t just look clean, it feels clean. We’ll explore how to build a customized cleaning strategy that fits your 2026 fiscal goals while prioritizing non-toxic, eco-friendly results. You’re about to discover a roadmap for a healthier, more professional environment that provides true peace of mind. This allows you to stop worrying about the dust and focus on what matters most: growing your business. Key Takeaways Learn how to define the modern standard for facility maintenance where cleanliness serves as your brand’s first handshake. Discover why premium vetting processes and the transition to non-toxic, eco-friendly products are essential for a healthy 2026 workspace. Explore specialized solutions for corporate hubs and medical facilities to ensure your commercial building cleaning services nassau county meet the highest sanitation requirements. Understand how to calculate the true ROI of a professional contract by linking cleaning frequency to long-term building longevity. Find out how to elevate your facility with precision and care so your environment doesn’t just look spotless but feels truly professional. Table of Contents The Standard for Commercial Building Cleaning Services in Nassau County Key Features of a Premium Commercial Cleaning Partnership Specialized Solutions for Nassau’s Diverse Commercial Sector Evaluating ROI: The True Cost of Commercial Cleaning in 2026 Elevate Your Facility with AlphaLux Cleaning The Standard for Commercial Building Cleaning Services in Nassau County In 2026, the benchmark for professional maintenance has shifted from basic tidiness to a comprehensive health and branding strategy. For Nassau County business owners, choosing The Standard for Commercial Building Cleaning means looking beyond the surface. A pristine facility serves as the silent first handshake your brand offers every visitor. It’s a physical manifestation of your values. While a “visible clean” was acceptable a decade ago, today’s high-stakes environment demands a “microbial and sensory clean.” This involves neutralizing invisible pathogens and ensuring the air quality feels fresh rather than sterile or chemically overwhelmed. Nassau County features a diverse business landscape, from the corporate corridors of Garden City to the luxury storefronts of Manhasset. This local diversity requires commercial building cleaning services nassau county that understand specific regional expectations. Excellence isn’t an option; it’s a requirement for staying competitive in a market where a 2025 consumer survey revealed that 92% of customers judge a brand’s quality based on the cleanliness of its physical location. We help you meet that demand with precision and care. Why Your Nassau County Building Needs a Premium Touch The impact of a meticulous environment on your bottom line is quantifiable. A 2025 workplace wellness report indicated that employees in professionally sanitized offices show a 15% increase in focus and a 20% reduction in sick days. In retail hubs like the Americana Manhasset, the sensory experience of a shop determines dwell time. When a space feels clean, customers relax and spend more. It’s about the quiet satisfaction of a spotless floor and the peace of mind that comes from knowing every touchpoint is safe. We don’t just clear dust; we curate an atmosphere of health and luxury. The Risks of Substandard Janitorial Services Opting for the lowest bidder often introduces hidden costs that far outweigh the initial savings. Substandard commercial building cleaning services nassau county can lead to several critical issues for your facility: Asset Depreciation: Harsh, “cheap” chemicals can permanently damage $10,000 stone floors or delicate custom upholstery found in high-end Nassau offices. Legal Liability: Using unvetted or uninsured crews exposes your business to massive risks. In 2024, the average settlement for a workplace slip-and-fall incident in New York exceeded $45,000. Operational Friction: Inconsistent service creates a “management tax.” You shouldn’t have to spend three hours a week following up on missed trash bins or dusty corners. A professional partner provides the reliability you need to focus on your core operations. When cleaning is handled with meticulous attention to detail, your facility management workflow becomes seamless. You deserve a partner that takes as much pride in your building’s appearance as you do, transforming a chore into an experience of comfort and health. Key Features of a Premium Commercial Cleaning Partnership Selecting a team for your facility requires more than a simple price comparison. A true partnership is built on the Key Features of a Premium Commercial Cleaning Partnership, which prioritize safety, health, and asset protection. In Nassau County, where commercial real estate values remain high, your cleaning provider must act as a steward of your investment. This means moving away from generic checklists and toward a service model that anticipates your building’s specific needs. We treat every client with respect, ensuring that your professional environment reflects the quality of your brand. The AlphaLux Vetting Process We believe that who enters your building is just as important as the work they perform. Every AlphaLux professional completes a comprehensive 7-step screening process, including deep federal background checks and verified professional references. Our team is fully insured and bonded, providing you with total peace of mind regarding your Nassau County assets. We provide specialized training for handling high-end surfaces, such as natural stone and sensitive server room equipment. Since 2024, our commitment to excellence has resulted in a 99% client retention rate for our commercial building cleaning services nassau county. Federal and state-level background verification for all staff Comprehensive liability insurance and workers’ compensation coverage Specialized training modules for medical and tech-heavy environments A 98.7% on-time arrival
Best Way To Clean Outside Windows: Streak-Free Steps
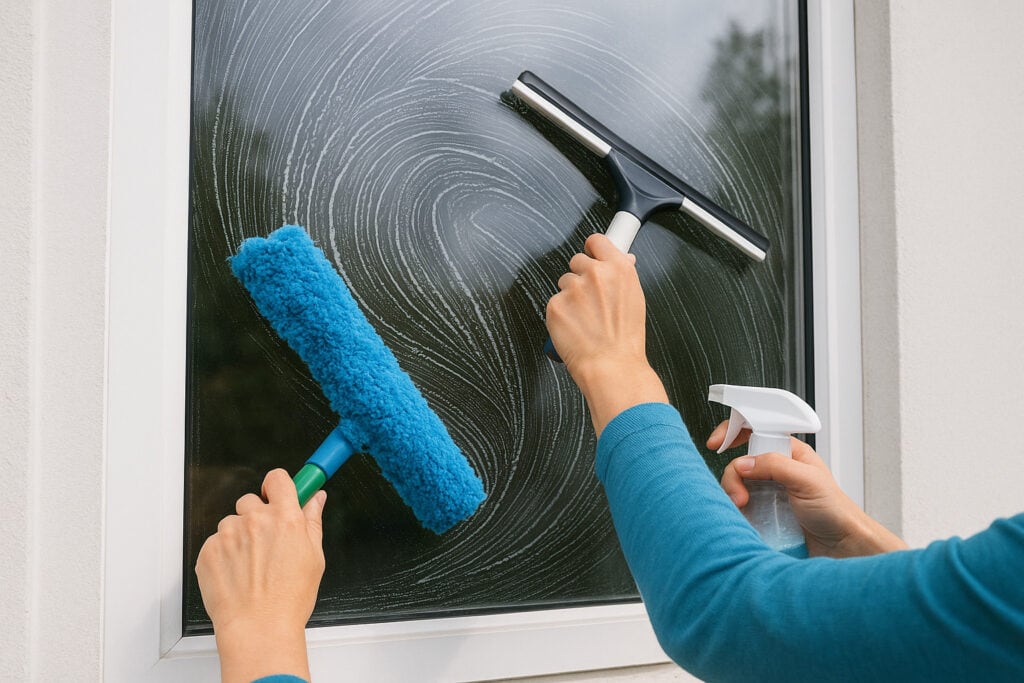
Exterior windows take a beating. Rain, pollen, hard water spots, and road grime build up fast, and once you notice it, it’s hard to unsee. Finding the best way to clean outside windows matters because the wrong approach leaves you with streaks, smears, or worse, scratched glass. The good news? You don’t need expensive equipment or a chemistry degree to get them looking clear again. At AlphaLux Cleaning, we handle exterior window cleaning across New York as part of our professional deep cleaning services. Our crews deal with stubborn buildup and hard-to-reach glass every day, so we know what actually works, and what wastes your time. This guide breaks down the tools, solutions, and step-by-step techniques for a streak-free finish on your outside windows. We’ll cover everything from ground-level panes to second-story glass, including DIY solutions you can mix at home. Whether you tackle it yourself or decide to call in a pro, you’ll know exactly what the job requires. What you need before you start Having the right supplies on hand makes the difference between a quick, clean job and a frustrating afternoon of rewashing the same pane three times. Before you figure out the best way to clean outside windows for your home, gather everything in one place so you’re not running back inside mid-job with wet hands. Cleaning solutions You have two solid options for a DIY window cleaning solution: dish soap and water, or white vinegar and water. Mix two teaspoons of liquid dish soap into a gallon of warm water for general grime. For hard water deposits or light mineral buildup, swap to a 50/50 mix of white vinegar and water. Avoid anything with ammonia if your windows have a low-E coating, since ammonia can break down the film over time. A vinegar-based solution handles most exterior glass well, but if your windows have a specialty coating, check the manufacturer’s specs before using anything acidic. Tools and equipment The tools you pick matter just as much as the solution. A rubber-blade squeegee is non-negotiable for streak-free results; an 18-inch blade covers ground-level windows fast, while a 10 or 12-inch blade gives you more control on smaller panes. Pair it with a microfiber scrubber wand to apply the solution without scratching the glass. Here’s a complete checklist of what to have ready before you start: Bucket (at least 2-gallon capacity) Dish soap or white vinegar Rubber squeegee (10-inch and 18-inch if possible) Microfiber scrubber wand or applicator sleeve Lint-free microfiber cloths for edges and corners Soft-bristle brush for frames and sills Extension pole for second-story windows Garden hose with a spray nozzle Rubber gloves For second-story glass, an extension pole that attaches to your squeegee is safer than climbing a ladder in most cases. If you do use a ladder, make sure someone spots you and that the feet sit on solid, level ground before you step up. Step 1. Pick the right day and prep the windows The conditions outside matter as much as your technique. Direct sunlight and high heat dry your cleaning solution before you can squeegee it off, which leaves streaks. Overcast days with mild temperatures between 50°F and 75°F give you the best shot at streak-free glass. Clean in shade or on cloudy days to keep the solution wet long enough to squeegee properly. Check the weather and timing Pick a dry, overcast day with little wind. Wind blows dust and pollen onto wet glass almost immediately. If an overcast day isn’t available, early morning or late afternoon works because the sun isn’t hitting the glass at a direct angle during those times. Avoid cleaning when you have: Full sun hitting the glass directly Wind over 10 mph Temperatures above 80°F or below 45°F Clear the area and prep the surface Before applying any solution, move obstacles like furniture, planters, or hose coils away from the window. Then do a quick dry wipe-down of the glass using a soft-bristle brush or dry microfiber cloth to knock off loose dirt, spider webs, and debris. Skipping this step turns surface dust into muddy streaks the moment your wet scrubber touches the glass. These two minutes of prep make every other part of the best way to clean outside windows process significantly faster. Step 2. Clean screens, tracks, frames, and sills first Washing the glass before cleaning everything around it is a common mistake. Dirty screens and frames drip debris back onto clean glass the moment you rinse them, forcing you to repeat work you’ve already done. Always handle screens, tracks, frames, and sills before you touch the glass itself. Remove and rinse screens Pull each screen out carefully and lay it flat on a clean surface like a driveway or patio. Use a soft-bristle brush dipped in soapy water to scrub both sides, then rinse with your garden hose. Before reinstalling, give each screen a full rinse and let it air dry completely so it doesn’t drip onto freshly cleaned glass. Never reinstall a wet screen over a window you’ve already washed. Scrub tracks, frames, and sills Tracks collect the most grime and often get skipped entirely. Use a small brush or old toothbrush to work dirt and debris out of the track grooves, then follow up with a damp microfiber cloth to wipe them clean. Scrub the frame and sill from top to bottom so loose material falls away from surfaces you’ve already cleaned rather than back onto them. This top-down order is a key part of the best way to clean outside windows because it prevents you from cleaning any surface twice due to drip-down contamination. Step 3. Wash the glass and squeegee for zero streaks Now that your frames and screens are clean, you can focus entirely on the glass. This step is where technique matters most and where the best way to clean outside windows separates a streak-free result from a frustrating redo. Work one window at a time so the solution stays wet long enough to squeegee
Feeling Overwhelmed by a Messy House? A Professional Guide to Breaking the Paralysis

Last Tuesday at 6:00 PM, Sarah stood in her kitchen and felt her heart race at the sight of three days of dishes and a mountain of unopened mail. If you’ve found yourself frozen in your own living room, you’re not alone; a 2023 study by the University of Connecticut found that removing clutter can directly reduce cortisol levels and improve focus. Feeling overwhelmed by a messy house isn’t a sign of failure. It’s a symptom of decision fatigue that traps you in a cycle of physical and mental exhaustion. We believe that a cluttered environment creates a loud, persistent mental noise that makes it impossible to truly rest. You deserve a space that supports your well-being rather than draining your energy. This guide provides a professional recovery plan to break the paralysis and help you regain your peace of mind. You’ll learn how to prioritize tasks with precision and implement expert strategies so your home doesn’t just look clean, it feels clean. We’ll walk through a five-step reset that transforms your living space back into a sanctuary of calm. Key Takeaways Identify the psychological roots of why you are feeling overwhelmed by messy house paralysis and how sensory overload impacts your cortisol levels. Discover the AlphaLux Method, a five-step recovery plan designed to silence mental noise by clearing the visual horizon first. Learn how to evaluate the opportunity cost of your time to determine when a professional reset is the most efficient path to peace of mind. Implement sustainable routines like the “Closing Shift” to maintain a pristine environment and prevent future clutter from accumulating. Understand the AlphaLux philosophy of creating a home that doesn’t just look clean, but truly feels clean and restorative for your well-being. Table of Contents Understanding ‘Messy House Paralysis’: Why You Feel Stuck The AlphaLux Method: 5 Steps to Reclaim Your Space Today DIY vs. Professional Cleaning: When to Outsource the Burden Sustainable Routines to Prevent Future Overwhelm Experience a Higher Standard: How AlphaLux Transforms Overwhelm Understanding ‘Messy House Paralysis’: Why You Feel Stuck If you find yourself standing in the middle of a room, unable to decide whether to pick up a stray sock or clear a coffee cup, you’re experiencing “Messy House Paralysis.” This isn’t a character flaw or a sign of laziness. It’s a state of executive dysfunction where your brain effectively shuts down due to sensory overload. For those living in the high-pressure environment of New York, the stakes are even higher. A 2012 study by UCLA’s Center on Everyday Lives of Families (CELF) discovered that women’s cortisol levels, the primary stress hormone, spiked significantly when they dealt with high densities of household objects. Feeling overwhelmed by messy house conditions is a physiological reaction to your environment, not a personal failure. To move forward, it’s helpful to distinguish between two different issues. Clutter refers to an excess of physical items that no longer serve a purpose or have a designated home. Mess represents a lack of organization or a temporary lapse in daily maintenance. You can organize a mess, but you must curate clutter. When both exist together, the visual noise creates a constant “to-do” list in your peripheral vision, draining your mental energy before your day even begins. At AlphaLux Cleaning, we understand that a home should be a sanctuary, not a source of chronic stress. The Psychology of the Messy Home Your brain thrives on order. Visual noise competes for your attention, making it difficult to focus on single tasks. This leads to decision fatigue, a documented psychological state where the quality of your choices deteriorates after a long session of decision-making. In a disorganized kitchen, deciding which dish to wash first becomes a complex cognitive burden. It’s the reason 80 percent of top-tier professional offices in Manhattan utilize minimalist design principles. These firms recognize that a clear space leads to a 15 percent increase in productivity. When you’re feeling overwhelmed by messy house environments, your brain is simply asking for the same professional clarity found in high-performing workspaces. Breaking the Shame Cycle Many New Yorkers fall into the “I should be able to do this” trap. You manage a demanding career and a complex social life, so you feel you should also manage a spotless home without help. This myth ignores the reality that a clean home is a foundation for health and peace of mind. There’s a specific tipping point where DIY efforts become counterproductive. If you’ve spent more than three weekends in a row trying to “catch up” without success, you’ve reached a stage where professional intervention is a logical, healthy choice. We believe your home shouldn’t just look clean; it should feel like a place where you can finally focus on what matters most. The AlphaLux Method: 5 Steps to Reclaim Your Space Today When you are feeling overwhelmed by messy house conditions, your brain often struggles to find a logical starting point. The AlphaLux Method is designed to bypass this mental paralysis by focusing on professional efficiencies rather than emotional attachment. This five-step framework shifts your environment from chaotic to controlled in a single afternoon, allowing you to experience the relief of a managed home. Step 1 & 2: Clearing the Visual Noise The first stage of reclaiming your home requires zero organization. Professionals begin with a 10-minute trash dash; you move through every room with a single bag, collecting only obvious refuse and recycling. This immediate action creates a psychological win within the first 600 seconds of your process. By removing the literal “noise” of empty packages or old mail, you clear the path for deeper work. The Visual Horizon is the eye-level area that dictates your stress levels. When counters, dining tables, and coffee tables are cluttered, your brain registers the entire room as a failure. Research into home environments suggests that clearing flat surfaces can reduce perceived stress by as much as 25 percent. Focus your energy here first. Don’t worry about the insides of drawers or the back