How To Remove Coffee Stains From Carpet With Vinegar & Soda
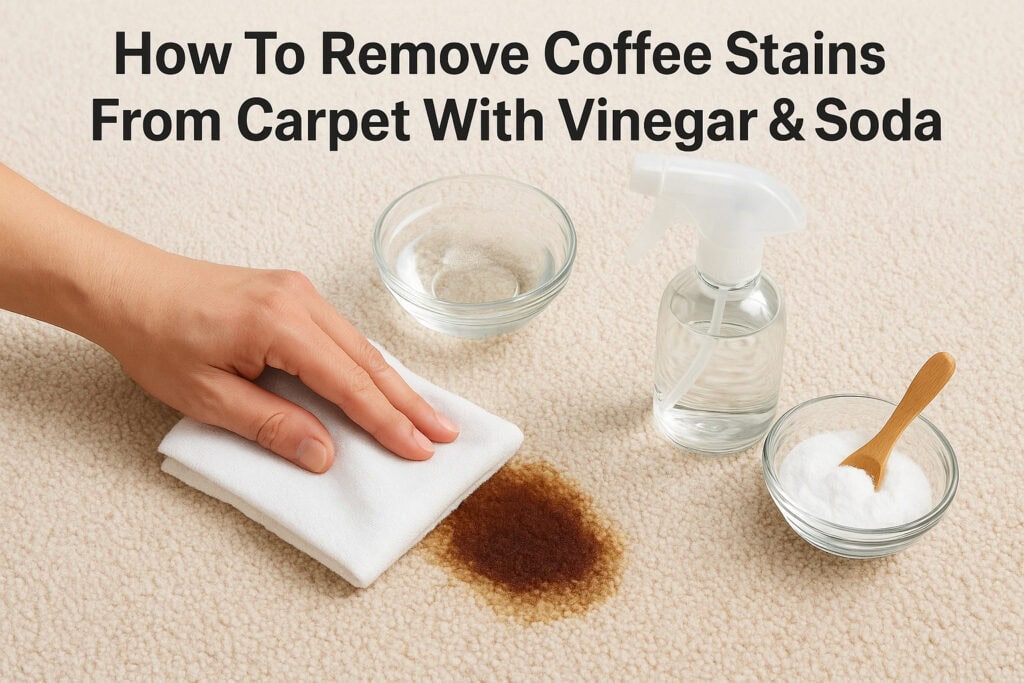
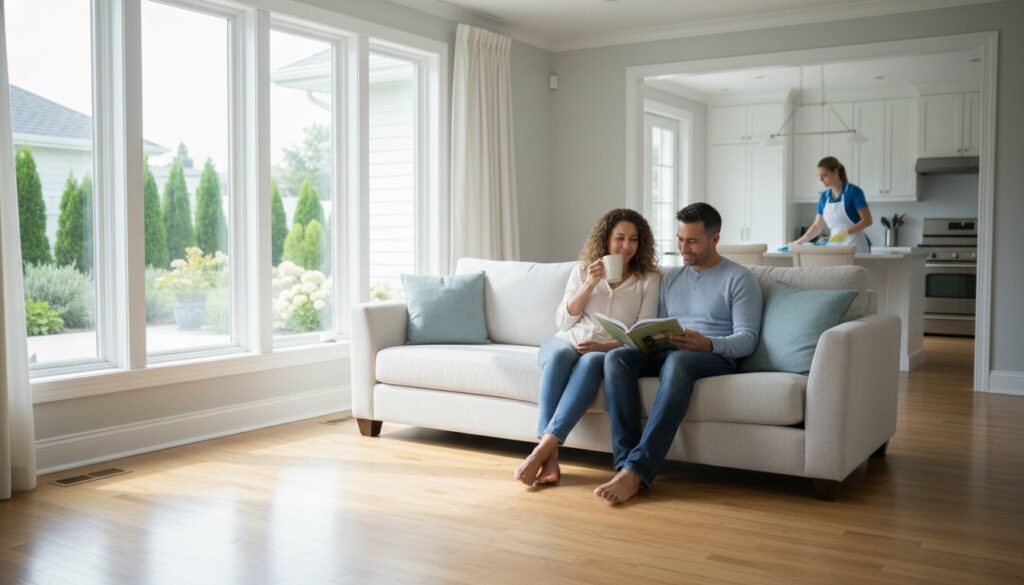
A tipped mug can turn your morning routine into a mini crisis, especially when hot coffee hits light-colored carpet. Knowing how to remove coffee stains from carpet quickly can mean the difference between a small cleanup and a permanent brown mark on your floor. The good news? You probably already have everything you need in your kitchen. Vinegar, baking soda, and dish soap are surprisingly effective at lifting both fresh and dried coffee stains from carpet fibers. No specialty products required. This guide walks you through the exact steps to tackle the stain yourself, whether it happened five minutes ago or five days ago. At AlphaLux Cleaning, we handle tough stains like these across homes and offices throughout New York every day. Our team uses professional-grade techniques combined with eco-friendly products to restore carpets that seem beyond help. But we also believe in empowering you with the knowledge to act fast when spills happen between cleanings. Below, you’ll find practical, proven methods you can use right now with what’s already in your pantry. What you need before you start Before you touch the stain, gather everything first. Running back and forth to the kitchen wastes precious time, and every extra minute allows the coffee to set deeper into the carpet fibers. Having your supplies ready means you can work through each step without interruption, which matters a lot when you are dealing with a fresh spill. The faster you act on a fresh spill, the easier it will be to fully lift it from the carpet. Your cleaning supply list You do not need anything exotic to handle this. Most of the items below are already sitting in your kitchen or bathroom cabinet, which is part of what makes this method so practical when you need to know how to remove coffee stains from carpet on the spot. Pull these together before you start: White vinegar (distilled, not apple cider) Baking soda (a fresh, open box works best) Dish soap (a mild formula, just a small squirt) Cold water (warm or hot water can set the stain permanently) Clean white cloths or white paper towels (white prevents dye transfer) A spray bottle (for even, controlled application) A soft-bristle brush or old toothbrush (useful for dried stains) A clean, dry towel (for the final blotting and drying step) Why white cloths matter Using colored towels or printed paper towels can transfer dye directly onto your carpet, especially if the fibers are light or synthetic. Always grab plain white materials when blotting so you can also track how much of the stain you are actually lifting with each pass. This one small choice prevents you from adding a second problem on top of the first. Your last prep step is to test the vinegar solution on a small, hidden patch of carpet before applying it to the stain. Inside a closet works well. Some carpet dyes are sensitive to acid, and a quick 60-second spot test confirms everything is safe to proceed before you treat the visible area. Step 1. Blot and rinse a fresh coffee spill The moment coffee hits your carpet, your first instinct might be to scrub it out fast. Resist that urge. Scrubbing spreads the stain wider and pushes the liquid deeper into the fibers, making it harder to fully lift later. Instead, start with controlled blotting and a quick rinse before you reach for any cleaning solution. Blot from the outside in Grab one of your clean white cloths and press it firmly onto the spill. Work from the outer edge of the stain toward the center, never the other way around. Moving inward keeps the stain from spreading into clean carpet fibers surrounding the spill. The outside-in blotting technique is the single most important habit you can build when learning how to remove coffee stains from carpet. Continue blotting with fresh sections of the cloth each time until you stop seeing coffee transfer onto the fabric. Switch to a new cloth if the first one becomes fully saturated. Apply cold water to dilute the stain Pour a small amount of cold water directly onto the stained area. Cold water dilutes the remaining coffee without bonding it to the fibers the way warm or hot water would. Blot again immediately with a dry cloth to absorb the diluted liquid. Repeat this rinse-and-blot cycle two or three times until the area looks noticeably lighter. Once the cloth picks up very little color, your carpet is ready for the next step. Step 2. Break down the stain with vinegar and soap Once the stain looks lighter from blotting, your carpet is ready for a cleaning solution. White vinegar cuts through the tannins in coffee that bind to carpet fibers, while a small drop of dish soap lifts the loosened residue to the surface where you can blot it away cleanly. Mix your vinegar solution Combine these ingredients in your spray bottle before applying anything to the carpet: Ingredient Amount White vinegar 1 cup Cold water 1 cup Dish soap 1 teaspoon Shake the bottle gently to combine everything. You want the soap evenly distributed, not foamy. Too many suds make the rinse step harder and can leave sticky residue deep in the fibers that attracts dirt later. Apply and blot the solution Spray the solution directly onto the stained area, enough to lightly saturate the fibers without soaking through to the carpet pad underneath. Let it sit for five full minutes so the vinegar can break down the coffee compounds before you touch it again. Letting the solution dwell for a full five minutes is what separates a partial clean from a thorough one when you learn how to remove coffee stains from carpet. Blot again with a clean white cloth, working inward from the outer edges. Repeat the spray-and-blot cycle until very little color transfers onto the cloth before moving to the next step. Step 3. Use baking soda to lift and deodorize After blotting out the
Chemical-Free Home Cleaning Services: The 2026 Guide to a Healthier Haven
What if the “clean smell” you’ve been taught to trust is actually a warning sign of hidden respiratory irritants? You likely strive for a spotless environment, yet the heavy scent of synthetic detergents often leads to immediate allergy flare-ups or concerns about children playing on treated floors. With indoor air pollutants often measuring 2 to 5 times higher than outdoor levels according to the EPA, chemical-free home cleaning services have become essential for New York families. At AlphaLux, we believe your home shouldn’t just look clean, it should feel clean and be safe for every family member. This 2026 guide reveals how professional non-toxic methods eliminate hidden toxins while delivering a deeper, more sustainable clean. You’ll discover how advanced eco-friendly standards ensure your living space feels genuinely fresh without any artificial residues or lingering odors. We will explore the specific techniques that transform your home into a healthier haven while providing the peace of mind you deserve. Key Takeaways Identify the hidden dangers of VOCs in traditional cleaners and learn how to recognize the new 2026 standard for a truly non-toxic home. Compare the sanitization power of hydrogen peroxide against bleach to see how chemical-free home cleaning services deliver superior results without the health risks. Discover the AlphaLux “Three-Tier” filtration methodology used to capture urban pollutants like subway dust and seasonal allergens unique to the New York area. Learn the essential steps of the “Detox Phase” to effectively remove years of chemical buildup and residue from your floors and surfaces. Understand how a professional, EcoLogo-certified approach ensures your haven doesn’t just look spotless but provides the lasting peace of mind of a home that feels truly clean. Table of Contents The Evolution of Chemical-Free Home Cleaning Services Chemical-Free vs. Traditional Cleaning: Performance Analysis The AlphaLux Methodology: A Higher Standard of Clean Transitioning Your New York Home to a Non-Toxic Environment Why AlphaLux is the Trusted Choice for Chemical-Free Care The Evolution of Chemical-Free Home Cleaning Services By 2026, the benchmark for residential sanitation has shifted from visual sparkling to verifiable biological safety. Modern chemical-free home cleaning services no longer rely on the harsh “melting” of grime with corrosive agents. Instead, the industry has adopted a holistic approach that prioritizes indoor air quality and surface longevity. For decades, consumers associated a sharp, synthetic pine or lemon scent with a job well done. We now understand those “clean” smells are actually Volatile Organic Compounds (VOCs) that contribute to indoor air pollution levels. A 2024 environmental study revealed that indoor air is often 2 to 5 times more polluted than outdoor air, largely due to traditional cleaning residues. AlphaLux Cleaning addresses this by utilizing Green cleaning methodologies that eliminate these toxic off-gassing risks entirely. The transition to non-toxic standards involves moving away from petroleum-based detergents. These legacy products leave behind a microscopic film that actually attracts more dust and allergens over time. By 2026, the focus is on total extraction. This evolution ensures your home doesn’t just look clean, it feels clean. We use professional-grade equipment and refined techniques to remove contaminants rather than simply neutralizing them with chemicals. This shift provides peace of mind for families, particularly those with pets or children who spend significant time on floor surfaces. The Science of Botanical Surfactants Botanical surfactants represent a massive leap in cleaning technology. These solutions use citric acid and corn-derived alcohols to break down complex lipids and proteins found in household messes. Citric acid acts as a natural chelating agent, dissolving mineral deposits and soap scum without etching delicate fixtures. Corn-derived alcohols provide a streak-free finish by dissolving grease on contact. These plant-based formulas maintain a balanced pH, which helps preserve the finish of stone and wood surfaces up to 15% longer than aggressive industrial cleaners. Essential oils like thyme and eucalyptus are integrated not for fragrance, but for their documented antimicrobial properties that disrupt bacterial cell walls naturally. Mechanical Action vs. Chemical Reaction The 2026 standard for chemical-free home cleaning services relies on the physics of mechanical removal. High-density, split-fiber microfiber is a game-changer in this field. These cloths are engineered with millions of tiny hooks that physically lift and trap 99% of bacteria and viruses from hard surfaces using minimal moisture. This process is supplemented by HEPA filtration vacuums that capture 99.97% of airborne particles as small as 0.3 microns. Our professionals also prioritize “dwell time,” which is the 5 to 10 minute window a botanical solution needs to sit on a surface. This patience allows the natural ingredients to work effectively, replacing the need for the violent chemical reactions found in traditional bleach or ammonia products. Chemical-Free vs. Traditional Cleaning: Performance Analysis Many homeowners believe that choosing chemical-free home cleaning services means sacrificing the deep-clean results of industrial solvents. This is a misconception that 2025 performance data has thoroughly debunked. When we compare sanitization levels, hydrogen peroxide at a 3% concentration is as effective as bleach for killing common household pathogens. Unlike bleach, which is corrosive and leaves toxic residues, hydrogen peroxide breaks down into simple water and oxygen. It’s a professional-grade solution that protects your family while delivering a spotless finish. The “Grout and Brightness” objection is another common hurdle. Traditional services often rely on harsh acids to whiten grout, but these chemicals actually eat away at the sealant over time. By 2026, advanced vapor steam technology has become the gold standard. Utilizing steam heated to 320 degrees Fahrenheit lifts deeply embedded dirt from porous surfaces without the need for corrosive agents. This method preserves the structural integrity of your tile work while achieving a level of brightness that chemicals can’t match. The hidden cost of traditional cleaning is the impact on your home’s air. Studies show that indoor VOC levels can spike by 500% during a standard cleaning session using ammonia-based products. To help families make safer choices, the EPA provides guidance on Identifying Greener Cleaning Products to mitigate these respiratory risks. Protecting your indoor air quality is a vital part of our commitment to your
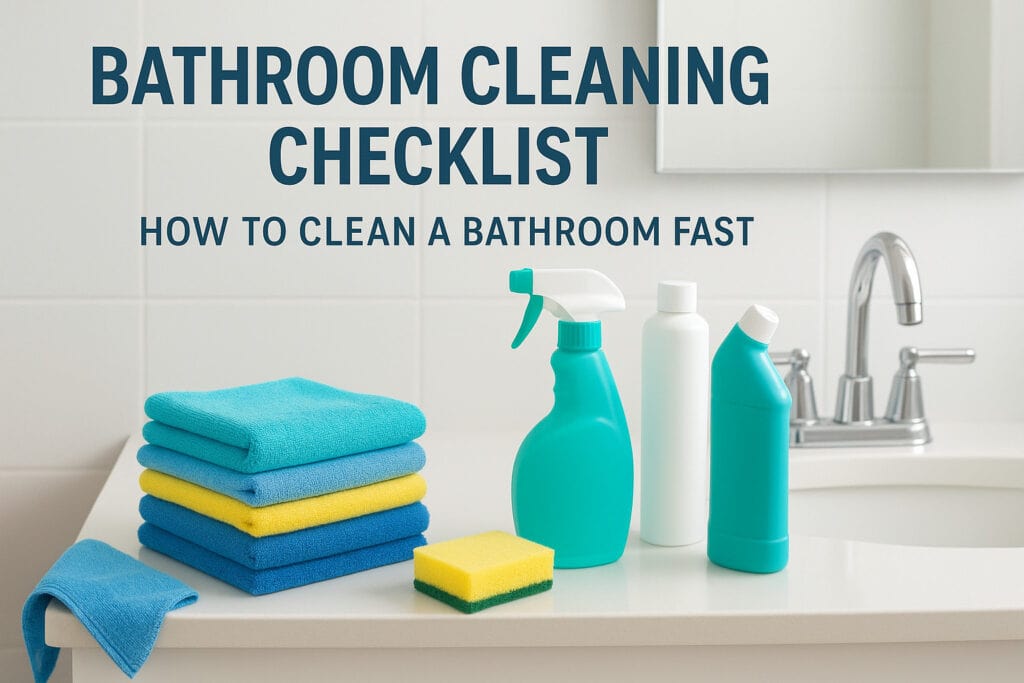
Bathroom Cleaning Checklist: Daily, Weekly & Monthly Tasks
A clean bathroom doesn’t happen by accident, it takes a system. Without a clear bathroom cleaning checklist, tasks pile up, grime builds in corners you forgot about, and what should be a 20-minute routine turns into a weekend project. The good news? Breaking it down into daily, weekly, and monthly tasks makes the whole process manageable, even for the busiest schedules. At AlphaLux Cleaning, we keep bathrooms across New York spotless for a living. Our trained professionals follow detailed, proven routines for every home and office we service, and we’re sharing that approach here. Whether you’re tackling your own bathroom maintenance or deciding it’s time to bring in help, this guide gives you the exact framework we trust. Below, you’ll find a complete task-by-task breakdown organized by frequency, so you always know what needs attention and when. 1. Book a professional bathroom deep clean in New York Sometimes your bathroom cleaning checklist can’t catch everything on its own. Hard-water deposits, grout discoloration, and built-up soap scum need more than a weekly wipe-down. A professional deep clean resets the baseline so your regular routine actually keeps up with the space instead of chasing it. What a professional deep clean covers A pro team goes further than surface wiping. They scrub grout lines, descale fixtures, disinfect the toilet base and behind the seat, and clean areas most people skip entirely during regular cleaning. Grout and tile line scrubbing Fixture descaling and polishing Full toilet disinfection including base and tank exterior Shower and tub deep scrub Exhaust vents, baseboards, and floor edges How to prep the space before cleaners arrive Clear personal items off counters and out of the shower before the team arrives. Remove toiletries, razors, and medications so cleaners can access every surface without handling your belongings. Taking 10 minutes to prep ahead of time keeps the job moving quickly and ensures nothing gets misplaced. How often to schedule professional bathroom cleaning For most households, a professional deep clean every one to three months keeps buildup from getting out of hand. High-traffic bathrooms, shared office restrooms, or homes with hard water may need monthly attention to stay ahead of visible grime and staining. A professional reset every few months makes your weekly routine noticeably faster and easier to maintain. Who benefits most from a pro clean Renters moving in or out of a property, homeowners prepping for guests, and office managers maintaining shared restrooms all get strong value from a professional service. You don’t need a severely neglected bathroom to justify it since preventing buildup costs far less effort than removing it later. What to ask before you book a service Before booking, confirm these key details with any cleaning company: Are cleaners background-checked and fully insured? Do they use eco-friendly or non-toxic products? What specific tasks and surfaces are included? Is there a satisfaction guarantee? AlphaLux Cleaning covers all of these for every client across New York. 2. Do a daily 5-minute bathroom reset A daily reset is the backbone of any solid bathroom cleaning checklist. Spending five minutes each morning or evening prevents grime from compounding, so your weekly clean takes far less effort. A consistent daily habit keeps your bathroom guest-ready without scheduling a full cleaning session. Clear counters and put items back where they belong Clutter builds quickly on bathroom counters. Return toiletries, hair tools, and personal items to their spots after each use to keep surfaces clear and ready to wipe. Wipe the sink and faucet after use Toothpaste residue and water splashes dry into stubborn spots fast. Keep a microfiber cloth under the sink and give the basin and faucet a quick wipe each day. Quick toilet touch-up for splashes and smudges Splashes and drips around the toilet seat and rim accumulate fast. A disinfecting wipe along the seat, rim, and handle takes under 30 seconds and prevents odor. Squeegee or wipe shower walls and doors Moisture left on shower walls leads to soap scum and mildew. Run a squeegee down glass doors and tile right after your shower to reduce buildup fast. Swap towels, empty small trash, and restock basics Damp towels harbor bacteria when left hanging too long. Swap them every two to three days, empty the small trash bin daily, and refill soap before it runs out. 3. Follow a weekly bathroom cleaning checklist Your weekly routine keeps buildup under control. Blocking 20 to 30 minutes once a week prevents grime from compounding between deep cleans. Clean in the correct order from top to bottom Work top to bottom so debris falls onto surfaces you haven’t cleaned yet. Start with mirrors, then move to fixtures and finally the floor. Disinfect high-touch points like switches and handles Light switches, door handles, and towel bars collect bacteria fast. Wipe each one with a disinfecting wipe or spray every week. Scrub and disinfect the toilet inside and out Apply toilet bowl cleaner under the rim first and let it sit while you clean the outside. Then scrub the bowl and wipe every external surface including the base. Letting cleaner dwell a few minutes before scrubbing makes disinfecting noticeably more effective. Clean the sink, counters, and backsplash Spray all counters and the backsplash, scrub the sink basin and faucet, then wipe everything down in one pass. Clean the shower or tub and rinse thoroughly Spray the walls, floor, and fixtures, scrub with a stiff brush, then rinse completely to remove all residue. Vacuum and mop the floors, then clean the trash can Vacuum first to remove hair and dust, then mop with a disinfecting solution. Wipe the inside and outside of the trash can to prevent odor. 4. Tackle monthly bathroom deep-clean tasks Your monthly tasks address what weekly cleaning can’t reach. Add these to your bathroom cleaning checklist to prevent the buildup that standard routines miss entirely. Remove soap scum and hard-water buildup Soap scum and mineral deposits collect on shower walls and around faucets over weeks. Spray a descaling solution or undiluted white
Airbnb Turnover Service Brooklyn: The 2026 Guide to 5-Star Guest Experiences
Last Tuesday, a Brooklyn host named Sarah opened her app to find a 3-star review because a guest discovered a single strand of hair on the bathroom floor. Despite her 4.8-star average, that one missed detail cost her three potential bookings for the upcoming holiday season. It’s a stressful reality when your current airbnb turnover service brooklyn lacks the meticulous attention to detail required for a 5-star experience. To achieve that premium feel, many hosts <explore T200 Percale Bed Sheets for hospitality>(https://linenplus.ca), as they offer the durability and comfort guests expect from a luxury stay. We understand that maintaining a high-end rental in neighborhoods like DUMBO or Brooklyn Heights requires more than just a quick wipe-down. You deserve a partner who treats your property with professional precision and care. This guide reveals how to choose a service that guarantees Superhost-level cleanliness and seamless guest transitions every single time. We’ll show you how to automate your linen management and ensure your property doesn’t just look clean, it feels clean. You will learn the specific criteria for vetting professional teams and how switching to non-toxic, eco-friendly products can increase your positive feedback rates by 22% in 2026. Key Takeaways Learn why the competitive Brooklyn market demands more than a surface-level clean to protect your nightly rates and Superhost status. Master the art of hotel-style bed staging and linen management to create a guest experience that feels as pristine as it looks. Discover the advantages of partnering with a dedicated airbnb turnover service brooklyn over marketplace apps for guaranteed reliability and peace of mind. Streamline your logistics with foolproof key exchange systems and inventory strategies that ensure seamless transitions for every guest. Understand how to elevate your rental by moving beyond visual cleanliness to achieve a sensory standard of comfort and professional care. Table of Contents The High Stakes of Airbnb Turnovers in Brooklyn Essential Features of a Premium Brooklyn Turnover Service Choosing Your Partner: Marketplace vs. Dedicated Cleaning Company The Brooklyn Host Checklist: Streamlining Your Logistics Elevate Your Brooklyn Rental with AlphaLux Cleaning The High Stakes of Airbnb Turnovers in Brooklyn Brooklyn hosts face a level of competition that differs significantly from Manhattan or the outer boroughs. With over 15,000 active listings in neighborhoods like Williamsburg and Bushwick as of early 2026, your property isn’t just a bed; it’s a brand. The success of that brand relies heavily on the quality of your airbnb turnover service brooklyn. There’s a direct, measurable link between your turnover standards and your bottom line. Data from 2025 shows that listings with a 4.9-star cleanliness rating command nightly rates 22% higher than those at a 4.7-star average. This premium reflects the value guests place on a space that feels cared for and professionally managed. Transitioning from basic cleaning to hospitality-grade staging is what separates high-earning hosts from the rest. It’s about precision and care. When you hire a professional airbnb turnover service brooklyn, you aren’t just paying for a vacuumed rug. You’re investing in crisp linen folds, curated amenity placement, and a fresh atmosphere that provides immediate peace of mind. This professional craft transforms the guest’s first impression from “this is a clean house” to “this is a luxury experience.” It moves the needle from mere maintenance to active revenue generation. The “Superhost” Standard in 2026 Guest expectations for hygiene have reached an all-time high. In 2026, guests don’t just want a space that looks tidy; they demand a scientifically clean environment. Professional turnover services now use botanical disinfectants and high-efficiency particulate air (HEPA) filtration to ensure every surface is safe. This level of detail is vital because Airbnb’s search algorithm prioritizes listings with consistent 5-star cleanliness ratings. While staying compliant with evolving short-term rental regulations in New York City, hosts must treat their cleaning process as a core business strategy. At AlphaLux, we believe your home shouldn’t just look clean; it must feel clean to the most discerning traveler. The Hidden Costs of Unreliable Turnover Help Relying on a casual individual cleaner might save $40 upfront, but the long-term risks are substantial. A single cleaning no-show can lead to a canceled booking, costing a Brooklyn host an average of $450 in lost revenue and platform penalties. Beyond the immediate loss, a cleanliness complaint on your profile can decrease booking inquiries by 35% for the subsequent three months. Professional turnover services provide the redundancy and insurance needed to protect your investment. We handle the logistical details so you can focus on what matters most: growing your portfolio and providing a welcoming home for your guests. Essential Features of a Premium Brooklyn Turnover Service A high-end airbnb turnover service brooklyn provides much more than a standard sweep. It creates an environment where guests feel immediate relief the moment they step through the door. To reach a 5-star standard in 2026, your cleaning partner must look at the property through a “guest-eye” lens. This means focusing on details that are often missed, such as the dust on top of the refrigerator, the grime in window tracks, or the fingerprints on the inside of the entryway mirror. A 2025 hospitality survey revealed that 93% of negative reviews in New York City cited “minor cleanliness oversights” as the primary reason for a four-star rating instead of five. Reliability is the cornerstone of this process. Every turnover follows industry-wide cleaning and safety guidelines to ensure the space is sanitized and safe for every new arrival. Beyond sanitization, a premium service manages the logistics of essentials. We proactively restock toiletries, coffee pods, and pantry basics so you never receive a midnight message about a lack of toilet paper. This level of care transforms a simple rental into a professional hospitality business. Precision Staging and Presentation First impressions happen in the first 10 seconds. We focus on “first-look” magic by implementing hotel-style bed staging and precision towel folding. Every pillow is fluffed to a specific volume; every throw blanket is draped to create a welcoming, lived-in luxury. By utilizing professional cleaning services, you
How Much To Tip A House Cleaner: Percent, Flat & Holiday Tips

You just got home to a spotless kitchen, fresh-smelling bathrooms, and floors you could eat off of. Your house cleaner knocked it out of the park. Now comes the part nobody taught you: how much to tip a house cleaner without overthinking it or accidentally underpaying. Tipping etiquette for cleaning services isn’t as standardized as, say, restaurant tipping. There’s no receipt with a suggested percentage at the bottom. That leaves a lot of room for guesswork, and most people either tip too little out of uncertainty or skip it altogether because they’re unsure what’s appropriate. Whether you’re tipping on a routine visit, a deep clean, or around the holidays, the “right” amount depends on a few straightforward factors we’ll break down here. At AlphaLux Cleaning, we see this question come up constantly from our clients across New York. Our team of vetted, insured professionals takes pride in delivering a higher standard of clean, and we believe the people doing this work deserve clarity around fair compensation. In this guide, we’ll cover percentage-based tips, flat-fee benchmarks, and specific scenarios like holiday bonuses and the difference between tipping independent cleaners versus agency employees. Why tipping house cleaners feels so unclear Most people figure out restaurant tipping by age 20 and never revisit the question. Cleaning services are a different story. There’s no POS screen asking you to select 15%, 18%, or 20%, and nobody pulls you aside to explain the expectations upfront. The result is that most customers genuinely don’t know where to start or what counts as appropriate, which is exactly why the question of how much to tip a house cleaner keeps coming up. No universal standard exists Unlike food service, the cleaning industry has no industry-wide tipping norm built into the transaction. Restaurants have decades of cultural conditioning behind them. Cleaning doesn’t have that history. Most cleaning companies don’t include a tip line on their invoices, and many don’t mention tipping at all during the booking process. That silence creates uncertainty, and uncertainty usually pushes people to either guess low or skip the tip entirely. Just because tipping isn’t prompted doesn’t mean the person doing the work doesn’t notice or appreciate it. Even when clients want to tip, they often don’t know the right moment. Do you hand cash to the cleaner directly? Leave it on the counter? Add it to an app payment? The absence of a clear method compounds the hesitation, and some clients wait so long trying to figure it out that they simply don’t follow through. Cleaning work sits in an unusual category House cleaning occupies a strange middle ground between skilled professional labor and personal service work. Plumbers and electricians don’t expect tips. Delivery drivers increasingly do. Cleaning sits somewhere in between, and that ambiguity leads to real confusion. The physical demands, the skill required to do the job well, and the trust involved in letting someone into your home all point to work that deserves more consideration than most people give it. Plenty of clients also underestimate what a proper clean actually involves. A thorough session covers floors, surfaces, appliances, bathrooms, and details most people skip in their own routines. That level of effort requires training, physical stamina, and consistency across every visit, none of which shows up clearly on a price quote or booking confirmation. Agency employees versus independent cleaners adds another layer When you hire through a cleaning company, you might wonder whether your tip actually reaches the person who did the work or gets absorbed somewhere along the way. That’s a reasonable question. Some agencies take a cut of tips, while others pass the full amount through to the cleaner. Not knowing which applies makes people hesitant to tip at all, even when their intentions are good. Independent cleaners present a more direct path since the money goes straight to them. But clients sometimes assume the higher flat rate they pay removes the need for a tip. That assumption doesn’t always hold up. Independent cleaners price their services to cover operating costs, not to account for the kind of gratuity that reflects genuine appreciation for exceptional work. The rate covers the job; the tip communicates something beyond that. Standard tip amounts by service type The amount you tip should match the scope and effort of the job. Routine cleaning, deep cleaning, and move-in/move-out jobs all involve different levels of work, and your tip should reflect that difference. Knowing the standard benchmarks by service type gives you a clear starting point instead of guessing. Routine cleaning visits For a standard recurring clean, 15 to 20 percent of the service cost is the most commonly cited range. If you pay $120 for a biweekly clean, that puts your tip between $18 and $24. Many clients round to a flat $20 for simplicity. Regular tipping on routine visits signals consistent appreciation and tends to build a stronger working relationship with your cleaner over time. Tipping every single visit isn’t required if budget is a concern. Some clients tip every other visit or once a month for ongoing service. What matters most is that your tip is intentional and reflects genuine appreciation for work done well, not a reflexive gesture you tack on without thinking about it. Deep cleaning sessions Deep cleans take significantly longer and require considerably more physical effort. When the job involves scrubbing grout, cleaning inside appliances, or getting into corners that haven’t been touched in months, the tip should go up accordingly. A range of $20 to $50 is reasonable for a deep clean, depending on the size of your home and how intensive the work was. If the job took several hours and your home looks dramatically different afterward, a flat $30 to $50 communicates clearly that you noticed the extra effort. Move-in and move-out cleans Move-in and move-out cleaning ranks among the most labor-intensive work a cleaner takes on. Empty properties require full top-to-bottom attention, often including areas the previous occupant ignored entirely. For jobs like these,
Recurring Cleaning Service Long Island: The 2026 Buyer’s Guide to a Perfect Home
What if your Saturday morning didn’t start with a heavy vacuum cleaner, but with a quiet coffee overlooking the Long Island Sound or an early trip to the Hamptons? You likely believe your home should be a sanctuary for rest, yet the reality of modern life means many residents lose over 12 hours every month to repetitive scrubbing and dusting. It’s frustrating to settle for inconsistent results from independent cleaners or worry about the safety of the products used around your family and pets. You deserve a reliable partner that values your time as much as you do. This 2026 guide shows you how to reclaim your weekends and maintain a pristine environment with a recurring cleaning service long island homeowners trust for its precision and care. We’ll explain how to find a vetted team that uses eco-friendly methods so your home doesn’t just look clean; it feels clean. We will cover everything from customized scheduling to the specific quality markers that provide total peace of mind, allowing you to finally focus on what matters most. Key Takeaways Learn how a proactive maintenance plan provides relief from the demanding Long Island lifestyle while prioritizing your home’s health and your personal peace of mind. Discover how to select the ideal cleaning frequency based on your household size and pet ownership to ensure a consistently pristine environment that feels as good as it looks. Calculate the true return on investment for a recurring cleaning service long island by comparing the hidden costs of DIY chores against the value of your reclaimed time. Use our essential checklist to identify high-priority zones and customize a cleaning plan that addresses your specific needs with professional precision and care. Understand the AlphaLux standard of eco-friendly luxury and how a professional partnership allows you to stop managing chores and start focusing on what truly matters. Table of Contents Why Long Island Homeowners are Switching to Recurring Cleaning Services in 2026 Choosing Your Frequency: Weekly, Bi-Weekly, or Monthly Cleaning? Evaluating the ROI: Is a Recurring Cleaning Service Worth the Cost? The Essential Checklist for Customizing Your Recurring Cleaning Plan Experience the AlphaLux Standard: Your Recurring Cleaning Partner Why Long Island Homeowners are Switching to Recurring Cleaning Services in 2026 Long Island homeowners are redefining what it means to maintain a home. In 2026, a recurring cleaning service long island is no longer viewed as an occasional luxury. It’s a proactive, scheduled maintenance plan designed for residential health and long term property preservation. We see it as a lifestyle management tool. It allows families to reclaim their weekends from the endless cycle of scrubbing and dusting. The “Long Island Grind” is a significant factor in this shift. With the average commute on the LIRR or the Long Island Expressway often exceeding 75 minutes daily, DIY cleaning has become an impossible burden. Professionals in Nassau and Suffolk counties are working longer hours than ever. When you finally arrive home, the last thing you want to do is pick up a mop. A recurring plan ensures that your home remains a sanctuary rather than a second job site. We distinguish our approach through the AlphaLux Standard. Most standard cleaning companies focus on “visual-only” results, which means they tidy up what is immediately visible to the eye. AlphaLux goes deeper. We focus on how a home feels. A home that feels clean has purified air, sanitized touchpoints, and a sense of order that reduces cortisol levels. It’s the difference between a house that looks okay and a home that breathes fresh energy into your life. The Difference Between Standard and Recurring Maintenance Understanding our house cleaning services is the first step toward a spotless home. Standard one-time cleanings are reactive. They happen when the mess becomes overwhelming. In contrast, a recurring cleaning service long island prevents the “dirt build-up cycle” entirely. In typical LI homes, dust and pet dander accumulate in HVAC vents and carpets within just seven days. Consistent visits remove these allergens before they can impact your respiratory health. Regular maintenance reduces indoor dust particulates by up to 80 percent, which is vital for the 1 in 5 New Yorkers who suffer from seasonal allergies. The “AlphaLux Signature”: Beyond the Visual Clean The AlphaLux Signature is a sensory experience. It starts with the absence of harsh, bleach-like odors. We use 100 percent non-toxic, eco-friendly products that are safe for your children and pets. You will notice the precision in the details, from the polished fixtures to the expertly vacuumed corners. Every member of our team is a vetted professional and fully insured, providing you with total peace of mind. We take pride in being a dependable partner. We handle the microscopic details so you can focus on what matters most to your family. Choosing Your Frequency: Weekly, Bi-Weekly, or Monthly Cleaning? Selecting the right schedule for your home isn’t just about cost. It’s about protecting your time and maintaining your property’s value. Every home on Long Island has a unique rhythm. Whether you’re managing a historic estate in Garden City or a modern retreat in Montauk, the goal is to reach the maintenance threshold. This is the specific point where your home stays consistently pristine without any daily effort from your family. Data from 2025 shows that 78% of dual-income households in Nassau County now outsource at least one major domestic chore to reach this balance. When you find the right recurring cleaning service long island professionals can ensure that dust and allergens never have the chance to settle. Your ideal frequency depends on three main factors. First, consider your household size. Homes with four or more residents typically require more frequent attention. Second, evaluate pet ownership. Two or more pets usually necessitate weekly visits to manage dander and floor debris. Finally, think about your lifestyle. If you host dinner parties twice a month, your needs will differ from someone who travels frequently for work. Weekly Cleaning: The Ultimate Luxury for Busy Families Weekly service is the gold standard
Bathroom Cleaning Checklist: How To Clean A Bathroom Fast
Knowing how to clean a bathroom doesn’t have to mean spending your entire Saturday scrubbing tile grout with a toothbrush. With the right approach, correct order of tasks, the right products, and a few smart techniques, you can get your bathroom sparkling in a fraction of the time most people spend on it. The bathroom is one of the most-used rooms in any home, and it collects grime, moisture, and bacteria faster than almost any other space. That’s exactly why we built AlphaLux Cleaning around the idea of making spaces across New York State genuinely clean, not just surface-level tidy. Our team handles hundreds of bathrooms every month, and we’ve learned what actually works versus what wastes your time. We’re sharing that real-world experience here. Below, you’ll find a complete bathroom cleaning checklist covering everything from quick daily upkeep to a full deep clean. We’ll walk you through the supplies you actually need, the best order to tackle each task, and the specific techniques our cleaning professionals use to get results fast. Whether you’re prepping for guests or just want a consistently fresh bathroom, this guide has you covered. What you need and the order that saves time Before you touch a single surface, having the right tools and a clear sequence locked in will cut your cleaning time significantly. Most people grab whatever is under the sink and start wherever feels obvious, which leads to re-cleaning surfaces you already wiped down and wasting 20 to 30 extra minutes per session. Getting organized before you start is the step that separates a fast, effective clean from a frustrating one. The supplies that actually matter You don’t need a cabinet full of specialty products to know how to clean a bathroom well. In reality, a focused set of about eight items covers every surface and situation you’ll encounter. Using too many products means you end up reaching for the wrong cleaner on the wrong surface, which either leaves residue behind or damages finishes over time. Here’s the complete supply list that gets real results: Item What it’s for All-purpose bathroom cleaner Sinks, counters, exterior toilet surfaces Toilet bowl cleaner (disinfecting formula) Inside of the toilet bowl Glass cleaner or diluted white vinegar Mirrors and any glass surfaces Stiff-bristle scrub brush Tile grout and toilet bowl Microfiber cloths (at least two) Wet scrubbing and dry buffing Grout brush or old toothbrush Tight corners and seams Mop or microfiber floor pad Tile floors Rubber gloves Hand protection throughout Microfiber cloths outperform paper towels on nearly every bathroom surface because they trap particles instead of pushing them around. Keep all of these in a single caddy or bucket so you carry everything in one trip rather than running back to the supply closet between tasks. The cleaning order that prevents double work The sequence you follow matters just as much as the products you use. Cleaning top-down is the rule that professional cleaners rely on: debris, dust, and spray mist all fall downward, so you always work from higher surfaces to lower ones. Mopping the floor first and then scrubbing the shower means you’re mopping again, which doubles your effort for no reason. Follow this order every single time: Declutter and dry dust – Remove items from counters, shake out rugs, sweep or vacuum loose debris off the floor Apply cleaners to soak – Spray the toilet bowl, tub, and tile with cleaner and let it sit while you move to other areas Clean mirrors and glass – Work top-down across every reflective surface Scrub the sink, vanity, and faucets – Wipe down counters and polish fixtures Scrub the shower and tub – Return to the areas where cleaner has been sitting and loosening buildup Clean the toilet – Start on the outside, then move to the bowl Wipe down high-touch spots – Light switches, door handles, and towel bars Mop or wipe the floor – Always the final step This sequence means you never re-clean a surface because you contaminated it with something you worked on later. AlphaLux Cleaning teams follow this exact order across every bathroom job in New York State, and it keeps average cleaning time well under an hour even in larger spaces. Step 1. Prep, declutter, and dry clean top-down Before any cleaning product touches a surface, you need to prep the room properly. Skipping this step is the most common mistake people make when trying to figure out how to clean a bathroom quickly. If you spray cleaner over a counter cluttered with soap bottles and hair products, you end up wiping around objects instead of under them, and you miss the grime that actually matters. Clear every surface first Start by removing everything from the counter, shower ledge, and bathtub rim. Set those items outside the bathroom or on a dry spot on the floor. Pull up any rugs or bath mats, shake them out, and leave them outside the bathroom until the floor is fully dry at the end. Turn on the exhaust fan or open a window now so moisture from cleaning products disperses as you work. Once surfaces are clear, flush the toilet once before applying any cleaning product. This removes standing water from the bowl and gives the cleaner a better surface to work on. It takes about three seconds and noticeably improves the result. Clearing every surface before you spray saves you from wiping the same spot twice, which is one of the biggest hidden time-wasters in any bathroom clean. Dry clean from ceiling to floor With the room cleared, wipe every surface dry before introducing any moisture. Grab a dry microfiber cloth or a duster and work from the highest points downward. Start with the top of the mirror frame and any shelving or light fixtures, then move to the tops of cabinet doors and the toilet tank lid. After dusting, sweep or vacuum the floor to pull up loose hair, dust, and debris before you mop. If you skip
Post-Construction Window Cleaning NYC: The Final Touch for Your Renovation
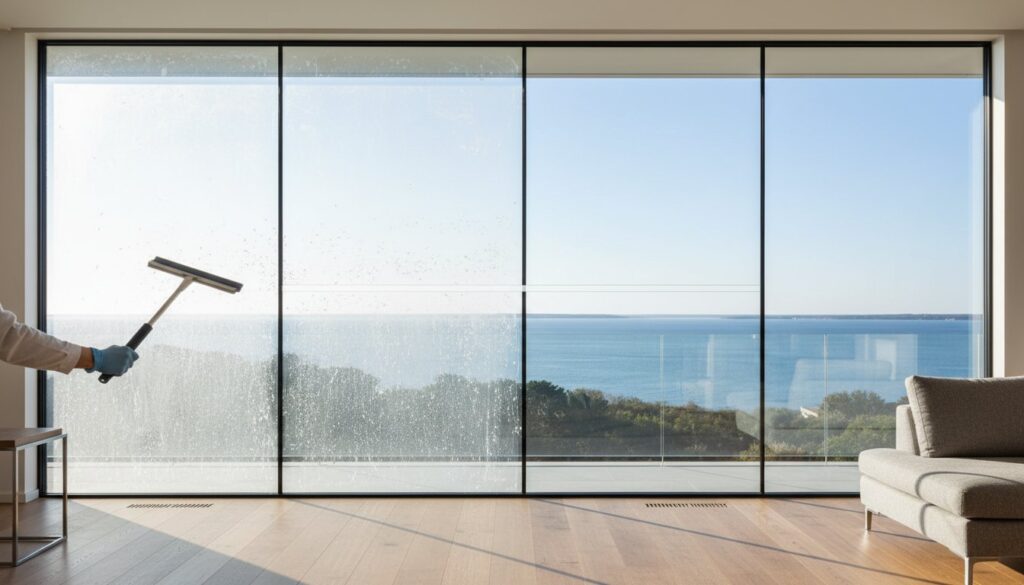
After 14 months of meticulous planning and a $250,000 investment in your Upper West Side brownstone, the scaffolding is finally down, yet the skyline remains hidden behind a stubborn layer of fine white dust. You might try to wipe it away yourself, only to find that silicone streaks and adhesive residue from manufacturer stickers are bonded to the glass. It’s a stressful moment because you know that one wrong move with a metal scraper could leave a permanent, costly scratch on your brand-new windows. Professional post construction window cleaning nyc is the essential final step that transforms a dusty job site into a polished home. We understand that you’ve worked too hard on your renovation to settle for anything less than perfection. You deserve a space that doesn’t just look finished but feels truly pristine. This article explains how specialized techniques safely remove construction debris without risking your new frames or glass. We’ll also cover the logistical benefits of hiring a fully insured team that understands the complexities of New York City buildings, ensuring your project concludes with the crystal-clear views you’ve been waiting for. Key Takeaways Understand why specialized post construction window cleaning nyc is vital to protect your investment from the unique debris and pollutants found in urban builds. Discover a meticulous three-stage approach that utilizes eco-friendly products to restore clarity while maintaining a healthy environment for your family. Learn why standard cleaning often leads to “ghosting” and how to avoid the high cost of replacing improperly treated high-rise glass. Identify the essential insurance and experience markers required to choose a provider capable of handling NYC’s diverse building regulations. Transition your property from a dusty construction site to a pristine home with a customized plan designed to provide ultimate peace of mind. Table of Contents What is Post-Construction Window Cleaning and Why is it Essential in NYC? The AlphaLux Precision Process: How We Restore Your View Why DIY or Standard Cleaners Fail at After-Builders Window Cleaning Choosing an NYC Post-Construction Window Cleaning Provider Experience a Higher Standard of Clean with AlphaLux What is Post-Construction Window Cleaning and Why is it Essential in NYC? Post construction window cleaning nyc is a specialized technical process designed to restore glass to its original, pristine state after a renovation or new build. Unlike routine maintenance, this service targets aggressive industrial residues that bond to the glass surface during the construction cycle. In a city like New York, where high-rise wind speeds often exceed 40 mph, abrasive grit and urban pollutants are forced into window tracks and frames. This specialized process goes beyond general cleaning methods by utilizing pH-neutral solutions and surgical-grade tools to lift debris without etching the surface. With AlphaLux Cleaning, your home doesn’t just look clean; it feels clean. The distinction is vital for NYC property owners. A window might appear clear from a distance, but microscopic construction dust can compromise indoor air quality and degrade mechanical hardware over time. We provide professional, reliable, and personalized care that treats your glass as a high-value asset. Standard cleaners often use aggressive techniques that cause permanent damage, leading to replacement costs that can exceed $2,500 per pane in luxury developments. Investing in professional post construction window cleaning nyc ensures your renovation ends with the quiet satisfaction of a perfect view. Common Post-Construction Debris on NYC Windows Silicone and Adhesive Residue: Protective films and manufacturer stickers often leave stubborn polymers behind. If these aren’t removed with specific citrus-based solvents, they attract city soot, creating dark, permanent smudges. Cement and Stucco Splatters: These alkaline materials bond chemically to the glass. Removing them requires a delicate balance of hydration and precision to prevent the grit from scratching the surface as it’s lifted. Fine Drywall Dust: These 10-micron particles settle deep into window tracks and sliding mechanisms. If left alone, they act as an abrasive, grinding down the hardware every time you open the window. The Hidden Risks of Tempered Glass Tempered glass is a standard safety feature in NYC buildings, but it carries a hidden risk known as fabricating debris. During the tempering process, microscopic glass particles can fuse to the surface. If an untrained cleaner uses a standard metal scraper, these particles are dragged across the pane, creating thousands of fine scratches. It’s a permanent mistake that ruins high-performance coatings. Our vetted professionals perform a meticulous assessment before the first squeegee stroke. We identify the glass type and use specialized techniques to protect your investment, providing the peace of mind you deserve after a long renovation. The AlphaLux Precision Process: How We Restore Your View Renovation projects in Manhattan and Brooklyn often leave behind a layer of fine, abrasive dust that settles on every surface. Our three-stage approach ensures your windows don’t just look clean, they feel clean. We begin with meticulous debris removal. This isn’t just about aesthetics. Following OSHA housekeeping standards is a critical safety step to ensure all construction waste and combustible scrap are cleared from the site before the deep cleaning begins. Our team removes heavy residue, stickers, and silicone before moving to the next phase. After the initial sweep, we perform a deep cleaning and final detailing. We don’t stop at the glass. Our team meticulously treats the entire window unit, including frames, sills, and tracks. In a typical 2,500 square foot NYC loft, construction dust can accumulate up to 0.4 inches deep in window tracks during a six-month renovation. We remove every grain to ensure smooth operation and a truly pristine finish. This is the AlphaLux Signature, a standard that transforms your space into a welcoming home where you can breathe easily. Specialized Tools for Scratch-Free Results We use surgical-grade stainless steel scrapers and fine bronze wool to remove paint flecks and plaster without damaging the glass. These tools are paired with specialized surfactants. These solutions lift abrasive particles away from the surface before we apply any pressure, preventing the micro-scratches common with standard cleaning methods. We finish every pane with microfiber detailing to achieve a museum-quality,
How To Clean A Bathtub: Fast, Deep-Clean Methods That Work
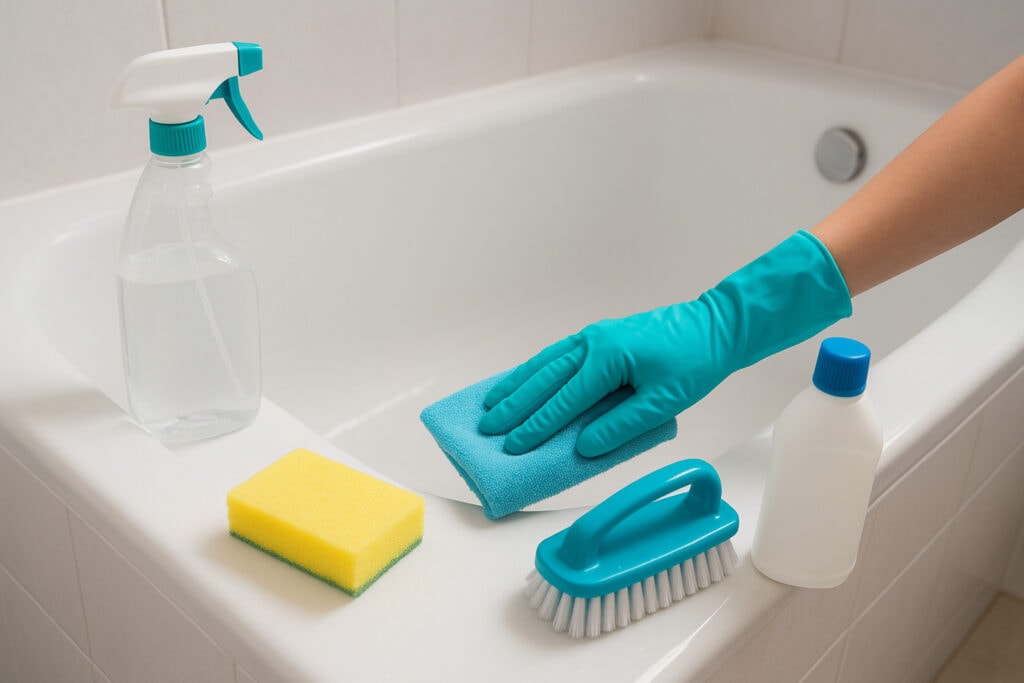
A grimy bathtub doesn’t just look bad, it can harbor bacteria, mold, and stubborn buildup that gets harder to remove the longer you wait. Whether you’re dealing with soap scum, hard water stains, or discoloration, knowing how to clean a bathtub the right way saves you time and keeps your bathroom looking its best. The trick is matching your cleaning method to the type of tub you have. Porcelain, acrylic, and fiberglass all respond differently to certain products and techniques. Use the wrong approach, and you risk scratching the surface or wasting effort on something that won’t work. At AlphaLux Cleaning, we handle bathtubs across New York homes every day, so we know exactly what cuts through grime and what methods actually deliver results. This guide breaks down everything from quick daily maintenance to deep-clean techniques for the toughest stains, including both DIY natural solutions and commercial products worth your money. What to know before you start Before you figure out how to clean a bathtub properly, you need to know two things: what your tub is made of and what tools you have on hand. Using the wrong cleaner on the wrong surface is the most common reason people scratch finishes or end up with dull, damaged tubs. A few minutes of prep work here saves you real frustration down the line. Know your tub material Your tub material determines which cleaners are safe and which ones will cause damage. Acrylic and fiberglass tubs are lightweight and common in modern bathrooms, but they scratch easily and cannot handle abrasive scrubbers or harsh chemical cleaners. Porcelain and cast iron tubs are more durable, but they can chip if you use anything too aggressive on the surface. If you’re unsure what your tub is made of, hold a magnet to the side. Cast iron will attract it; acrylic and fiberglass won’t. Tub Type Safe Cleaners Avoid Acrylic Dish soap, baking soda paste, mild spray Abrasive scrubs, bleach Fiberglass Mild soap, white vinegar solution Scouring pads, ammonia Porcelain Baking soda, hydrogen peroxide, diluted bleach Steel wool Cast Iron Mild dish soap, baking soda Heavy-duty acid cleaners Gather the right tools Having the right supplies ready before you start makes the whole process faster and more effective. You don’t need anything specialized; a non-scratch scrub brush, microfiber cloths, and a spray bottle handle most situations well. Non-scratch scrub brush or soft sponge Microfiber cloths or old cotton rags Spray bottle for DIY solutions Old toothbrush for grout lines and corners Rubber gloves to protect your hands Step 1. Prep the tub and loosen grime Starting with the right prep work is what separates a fast, effective clean from one that takes multiple rounds of scrubbing. Before you apply any cleaner, remove loose items from the tub (shampoo bottles, soap bars, loofahs) and rinse the surface with warm water. This wets the grime and makes it easier for your cleaner to penetrate right away. Warm water loosens the top layer of soap scum before you even apply a product, which cuts your total scrubbing time significantly. Apply your cleaner and let it sit The biggest mistake people make when figuring out how to clean a bathtub is rinsing off the cleaner too soon. Whatever product you choose, spray or apply it across the entire surface and let it sit for at least 5 to 10 minutes. That dwell time is what actually does the heavy lifting; it breaks down soap scum and loosens grime so you’re not scrubbing from scratch. Follow this application order for the best coverage: Spray from the top edges and work downward Focus on the waterline, corners, and drain area where buildup collects most Set a timer so you don’t rinse before the cleaner has done its job Step 2. Do a fast weekly clean A weekly cleaning routine takes less than 10 minutes and prevents the heavy buildup that makes deep cleaning necessary more often. If you stay consistent, you won’t need to figure out how to clean a bathtub from scratch every time; a light pass each week keeps grime from bonding to the surface. Cleaning your tub weekly cuts your deep-cleaning time in half because soap scum never gets the chance to harden. Your weekly cleaning checklist Stick to simple, fast steps that you can complete without breaking out heavy-duty products. A mild dish soap or an everyday bathroom spray is all you need for a routine pass. Run through this checklist every week to keep your tub looking clean between deeper sessions. Rinse the tub with warm water to loosen any fresh residue Apply a small amount of dish soap or mild bathroom cleaner across the surface Scrub with a soft sponge in circular motions, focusing on the waterline and drain Rinse thoroughly and wipe down with a dry microfiber cloth to prevent water spots Check the grout lines and corners with a quick swipe of an old toothbrush Step 3. Deep clean soap scum and hard water When weekly scrubbing isn’t cutting it, soap scum and hard water deposits need a targeted approach. These buildups bond to the surface over time, and you’ll need solutions that break down mineral deposits while cutting through layers of residue without damaging the finish. Knowing how to clean a bathtub at this level is mostly about dwell time and the right product pairing. A baking soda and white vinegar combination dissolves both soap scum and hard water stains without scratching your tub’s surface. Use the right solution for the buildup For soap scum, mix baking soda with a small amount of dish soap to form a paste. Apply it directly to the affected areas, let it sit for 15 minutes, then scrub with a soft brush in circular motions. For hard water rings, white vinegar works best. Spray it undiluted on the stain, wait 10 minutes, and scrub firmly before rinsing. Baking soda paste: mix with dish soap, apply to scum, wait 15 minutes White vinegar spray: apply
What Does a Move Out Cleaning Include? The Ultimate 2026 Checklist
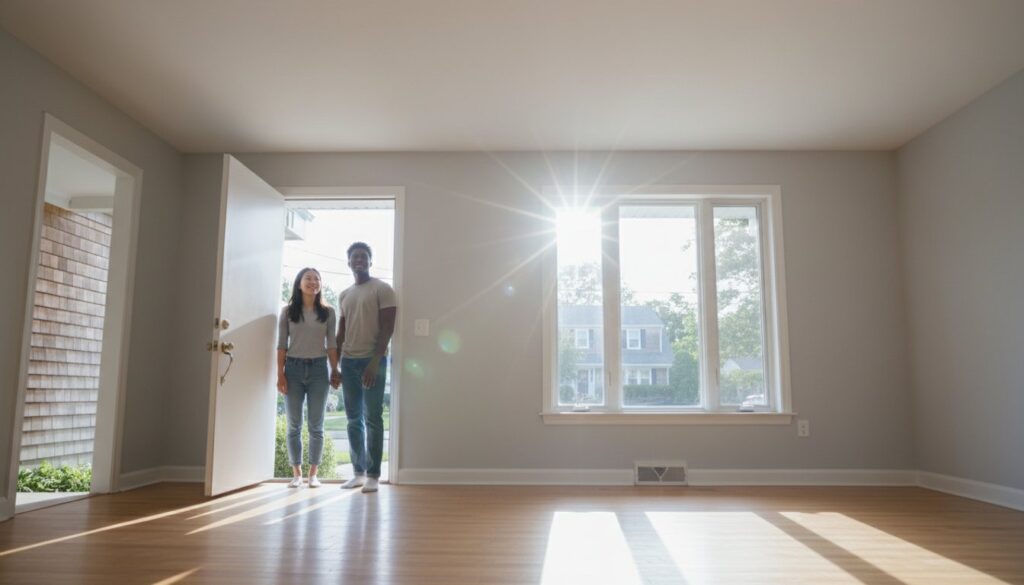
You have spent the last 14 hours packing boxes, only to realize your property manager is arriving at 9:00 AM for a final inspection. According to a 2024 survey of rental managers, 65% of security deposit deductions are the direct result of inadequate cleaning in areas like oven interiors and baseboards. It’s exhausting to wonder what does a move out cleaning include when you’re already physically drained. You deserve to focus on your new beginning rather than scrubbing tiles until midnight, yet the fear of losing your deposit remains a heavy burden. At AlphaLux Cleaning, we believe your home shouldn’t just look clean; it should feel clean. We’ve designed this guide to provide the precision and care needed to leave your property in pristine condition. You’ll discover our comprehensive 2026 checklist that breaks down every essential task, from sanitizing high-touch surfaces to deep-cleaning appliances. This clarity provides the peace of mind you need to close this chapter with confidence and focus on what matters most in your new space. Key Takeaways Learn why a standard “broom clean” rarely satisfies modern lease requirements and how to meet the higher expectations of 2026 landlords. Understand exactly what does a move out cleaning include with a detailed breakdown of deep-cleaning tasks for every room in your home. Gain the expertise to navigate the “reasonable wear and tear” debate and avoid common DIY mistakes that often lead to deposit deductions. Follow a proven two-step strategy to document your home’s condition and ensure the full return of your security deposit. Discover how professional, meticulous cleaning provides the peace of mind you need to focus on your new beginning. Table of Contents Understanding the Standard: What Does a Move Out Cleaning Actually Include? The Essential Room-by-Room Move Out Cleaning Checklist Deep Cleaning vs. Broom Clean: Meeting Landlord Expectations in NY Pro Tips: How to Ensure You Get Your Security Deposit Back Experience a Higher Standard of Clean with AlphaLux Understanding the Standard: What Does a Move Out Cleaning Actually Include? A move-out clean is a comprehensive, deep-level restoration of a property after all furniture and personal belongings have been removed. It’s the process of resetting a home to its original state. While many tenants believe a “broom clean” effort satisfies their legal obligations, this is often a costly misconception. In 2026, standard New York lease agreements frequently specify that properties must be returned in a condition that mirrors the initial move-in date, minus normal wear and tear. A simple sweep rarely meets this threshold. The primary objective is to create a blank slate. Every footprint, smudge, and lingering scent must be erased so the next resident feels they’re the first person to ever live there. Investing in a professional service isn’t just about aesthetics; it’s a strategic move to protect your security deposit. Statistics from local property management groups show that 85% of deposit disputes stem from cleanliness issues rather than structural damage. Understanding exactly what does a move out cleaning include ensures you meet these rigorous expectations from day one. The Difference Between Standard and Move-Out Cleaning Standard cleaning focuses on routine maintenance like dusting surfaces and vacuuming high-traffic areas. Move-out cleaning focuses on restoration. Once a room is empty, hidden dirt that’s been trapped behind sofas or under beds for years becomes visible. This scope includes vertical surfaces like walls, doors, and trim that are usually ignored during weekly chores. We ensure these areas are spotless; transforming a lived-in space back into a pristine environment that feels fresh and welcoming. Why Real Estate Agents and Landlords Demand Professional Results First impressions dictate turnover rates in the competitive New York market. A professionally cleaned unit can reduce vacancy periods by an average of 12 days. Landlords and agents prioritize these results because a “clean” feel builds immediate trust with prospective renters. Professional documentation also serves as your shield. Having a receipt from a vetted service provider provides tangible proof of your efforts. This makes it much harder for a landlord to justify unfair deposit deductions. It’s about providing peace of mind for both parties and focusing on what matters most during your transition. The Essential Room-by-Room Move Out Cleaning Checklist Understanding what does a move out cleaning include starts with recognizing that every inch of the property must return to its original state. It’s a meticulous process. This restoration transforms a lived-in space back into a pristine canvas for the next occupant. We focus on the precision and care required to satisfy even the most demanding landlords. This level of detail ensures you receive 100% of your security deposit back without unnecessary disputes or delays. Kitchen Deep-Cleaning Requirements The kitchen is the most labor-intensive room in any move-out project. It requires 100% degreasing of the range hood and filters to ensure fire safety and hygiene. Our professionals clean the interior and exterior of all four major appliances: the oven, fridge, freezer, and dishwasher. We scrub every one of the 15 to 25 cabinets and drawers found in a typical kitchen to remove crumbs and food stains. Sanitizing countertops and polishing the stainless steel sink provides a welcoming, fresh environment. Bathroom Sanitation Standards Bathrooms demand clinical precision to remove biological traces and hard water buildup. We perform deep scrubbing of tiles and grout to eliminate 100% of visible mildew and soap scum. Disinfecting toilets, tubs, and showers inside and out is a non-negotiable standard. We polish mirrors, glass doors, and chrome fixtures to a streak-free finish that glows. A spotless bathroom for New York inspectors requires zero visible biological residue and a mirror-like shine on every chrome fixture. This meticulous approach offers the peace of mind that your home doesn’t just look clean, it feels clean. Floors and General Surfaces The final layer of what does a move out cleaning include involves the total restoration of flooring and vertical surfaces. We detail every surface from the ceiling down. This includes wiping every light switch, window sill, and baseboard throughout the home. Vacuuming covers 100% of