6 Best Janitorial Services Near Me in New York (2026)
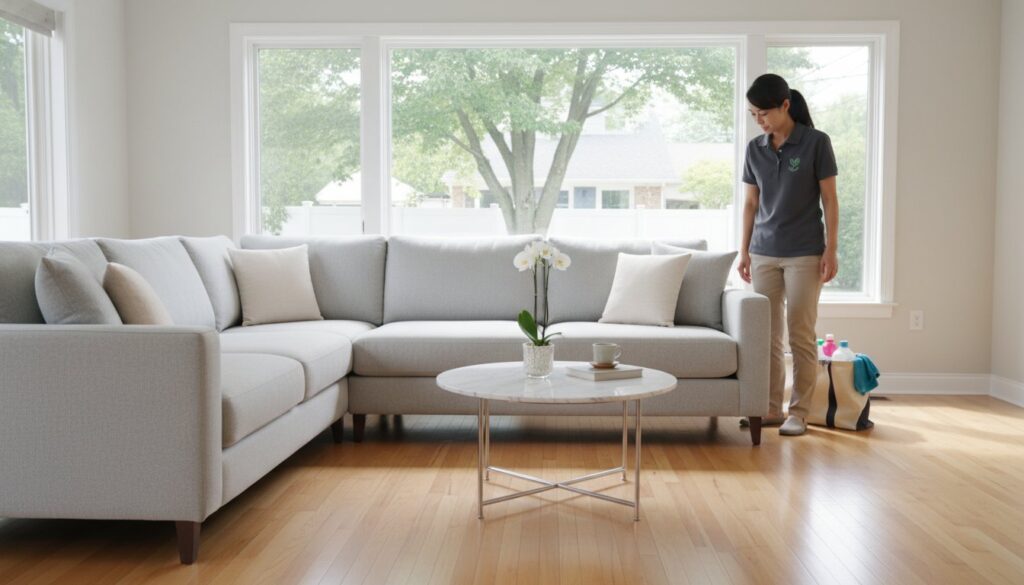
Finding reliable janitorial services near me is one of those tasks that sounds simple until you actually start comparing options. In New York, there’s no shortage of cleaning companies claiming to be the best, but the gap between a mediocre service and a great one can mean the difference between a building that looks clean and one that actually is. The right janitorial provider shows up consistently, uses safe and effective products, and adapts to your facility’s specific needs. Whether you manage an office, a retail space, or a multi-unit building, you need a team that treats your property like it matters, because it does. Factors like eco-friendly cleaning methods, staff vetting, and flexible scheduling should all weigh into your decision. At AlphaLux Cleaning, we’ve built our reputation across New York on exactly those standards, professionalism, thoroughness, and personalized service. We know what separates a solid janitorial company from a forgettable one because we hold ourselves to that higher bar every day. In this guide, we’ve rounded up six of the best janitorial services operating in New York right now to help you find the right fit for your space. 1. AlphaLux Cleaning AlphaLux Cleaning ranks at the top of janitorial services near me searches in New York for good reason. The company combines eco-friendly cleaning products, thoroughly vetted staff, and fully customized service plans into a single, dependable offering that works for both homes and commercial facilities. Where they operate in New York AlphaLux serves clients across New York state, with strong coverage on Long Island and the surrounding region. You can check availability for your specific location and request a free estimate directly through their website without any obligation or upfront cost. Best fit for AlphaLux is the right fit for clients who want more than a generic cleaning rotation. The company works particularly well for: Small to mid-sized businesses and office managers who need consistent, reliable results Homeowners and residents looking for scheduled recurring cleaning Anyone requiring move-in or move-out cleaning during a property transition Services and specialties AlphaLux covers deep cleaning, routine commercial maintenance, move-in and move-out cleaning, and one-time service appointments. Every plan gets built around your actual space and schedule, so you are not paying for tasks that do not apply to your facility. AlphaLux uses eco-friendly, non-toxic cleaning products on every job, which matters if your employees or clients have health sensitivities or if your business prioritizes safer, greener practices. Screening, training, and compliance Every AlphaLux team member goes through a thorough background check before joining the crew and completes comprehensive training before working independently. The company is fully insured, meaning your property stays protected and you carry no liability exposure on any visit. Scheduling and communication AlphaLux offers flexible scheduling, including weekly recurring plans and single-visit appointments for when you need a one-time deep clean. Booking is available online, and the team communicates clearly about timing and scope so you never have to chase down updates or wonder what was covered. Pricing and contract notes AlphaLux provides free estimates before any work begins, so you know exactly what to expect on costs. Pricing reflects the specific size and condition of your space, and their customized approach means you can adjust the scope of service as your needs change over time. 2. ServiceMaster Clean ServiceMaster Clean is one of the largest franchise-based commercial cleaning networks in the country, with decades of experience serving businesses across the United States. If you’re comparing janitorial services near me in New York, ServiceMaster’s name recognition and structured service model make it a common starting point for facility managers. Where they operate in New York ServiceMaster Clean operates through independently owned franchise locations spread across New York, covering major metro areas and suburban markets. Coverage and service quality can vary significantly between franchises, so confirming that a local branch actively serves your area before signing anything is worth the extra step. Best fit for ServiceMaster works best for mid-to-large commercial facilities that need structured, recurring maintenance programs. Healthcare offices, educational institutions, and larger office buildings tend to benefit most from their standardized approach. Services and specialties The company offers floor care, carpet cleaning, and disinfection services alongside routine janitorial maintenance. Their healthcare-focused cleaning protocols stand out as a notable specialty, built to meet stricter facility hygiene requirements. ServiceMaster Clean holds CIMS certification, an industry benchmark that signals a consistent and professionally managed operation. Screening, training, and compliance ServiceMaster franchises follow corporate-level training standards, and staff go through structured onboarding before taking on client accounts. Insurance requirements are set at the corporate level, though how individual franchises implement them can vary. Scheduling and communication Recurring maintenance schedules and custom service plans are available through your local franchise representative. Communication quality and response times depend on the individual franchise owner handling your account. Pricing and contract notes Pricing is quote-based and tied to your facility’s scope, with rates varying by location and the specific franchise serving your area. Long-term contracts are standard for ongoing commercial accounts, so reviewing terms carefully before committing makes sense. 3. Pritchard Industries Pritchard Industries is a regional commercial facility services company with deep roots in the Northeast. For businesses comparing janitorial services near me across New York, Pritchard brings a more localized, relationship-driven approach than many national franchise networks. Where they operate in New York Pritchard maintains a strong presence in New York City and surrounding areas, including major commercial districts and institutional facilities. Their geographic focus on the Northeast means their teams know the market and the types of buildings common across the region. Best fit for Pritchard works best for larger commercial properties and institutional clients, including office towers, universities, and healthcare facilities that need consistent, high-volume janitorial coverage on a regular schedule. Services and specialties The company covers routine janitorial maintenance, floor care, and facility management at scale. They also provide specialty cleaning for healthcare environments, where compliance and hygiene standards carry significant weight. Pritchard Industries has been operating for over
Hire a Cleaner for a Day in NYC: The Ultimate Guide to a Total Home Reset
What if your home didn’t just look tidy, but actually functioned as a sanctuary for your mental clarity? In a city as relentless as New York, it’s natural to feel a sense of mounting anxiety as household chores pile up alongside a demanding career. You likely want an immaculate living space, yet finding the time for a thorough, deep clean feels nearly impossible. When you choose to hire a cleaner for a day nyc, you’re making a strategic decision to reclaim your weekend and protect the longevity of your home. This investment goes beyond a simple surface wipe. It’s about a meticulous approach to hygiene that addresses everything from hidden dust to the specific care your high-end finishes require. We understand the importance of trusting who enters your private space and the necessity of using safe, effective methods. In this guide, we’ll show you how to maximize a full day of professional service to transform your environment from overwhelming to perfectly restored. You’ll learn how to prioritize tasks, ensure professional standards, and finally enjoy the quiet satisfaction of a truly maintained home. Key Takeaways Understand how a single eight-hour professional session can eliminate months of accumulated dust and hidden household clutter. Learn to distinguish between standard surface cleaning and intensive scrubbing to ensure your home reset is truly comprehensive. Discover why you should hire a cleaner for a day nyc through an insured company to guarantee reliability and professional-grade results. Master the art of preparing your space by focusing on decluttering, allowing your professional to focus entirely on deep-reaching tasks. Explore the benefits of choosing high-end services that utilize eco-friendly methods to support both your home’s longevity and your personal health. Table of Contents Why Hiring a Cleaner for a Day is the Ultimate NYC Home Reset Maximizing Your 8 Hours: What a Professional Day Cleaner Can Achieve Taskers vs. Professional Cleaning Companies: Making the Right Choice in NYC Preparing Your Home for a Full Day of Professional Cleaning Experience the AlphaLux Cleaning Difference: Premium Day Cleaning in New York Why Hiring a Cleaner for a Day is the Ultimate NYC Home Reset Choosing to hire a professional for a full workday represents a strategic shift in how you manage your living environment. When you hire a cleaner for a day nyc, you aren’t simply booking a quick sweep of the floors. You’re commissioning a concentrated six to eight hour professional session designed to eliminate months of accumulated neglect. New York City living creates a unique “backlog effect” where fine urban soot and hidden dust settle into the crevices of pre-war moldings and modern loft vents alike. This buildup often goes unnoticed during standard weekly tidying, yet it subtly degrades the air quality and aesthetic integrity of your home. Reclaiming your weekend is a matter of simple mathematics. A professional can often achieve in eight hours what might take an untrained individual two full days of intensive labor. By outsourcing this work, you trade a fraction of your resources for forty-eight hours of genuine rest and the quiet satisfaction of a restored space. This transition from a cluttered environment to a pristine one is a sensory experience that immediately sharpens your mental focus. A spotless home isn’t a luxury; it’s a vital component of a well-managed life. The Psychology of a Clean Space Physical clutter is rarely just a surface-level issue. It’s a persistent visual reminder of unfinished tasks that can significantly elevate cortisol levels and contribute to daily stress. A professional deep clean provides a “fresh start” feeling that resets your emotional baseline. An expert perspective on your living environment identifies areas that require specific attention, helping you transition from a state of low-level anxiety to one of profound relief. High standards in professional cleaning services ensure that every corner of your sanctuary supports your mental clarity. When a One-Time Service Beats Recurring Maintenance While recurring visits maintain a baseline, a full day of dedicated labor is often necessary for true restoration. This approach is ideal for seasonal transitions, preparing for houseguests, or recovering after a major life event. It allows for deep cleaning services that move beyond the “maintenance” mindset. Instead of simply keeping up with the mess, a day-long session focuses on restoration, returning every surface to its original, immaculate condition. This intensive care is what separates a standard house from a meticulously kept home. Maximizing Your 8 Hours: What a Professional Day Cleaner Can Achieve A full-day cleaning session represents a commitment to depth over speed. When you hire a cleaner for a day nyc, you’re securing a meticulous eight-hour window that allows for intensive scrubbing rather than a simple surface wipe. This duration is sufficient to address the “backlog effect” mentioned previously; it ensures that every corner of your home receives the attention it deserves. While a standard visit focuses on visibility, a full day targets the structural hygiene of your space. It’s the difference between tidying a room and restoring its original luster through disciplined, professional effort. The results vary based on the scale of your residence. In a studio or one-bedroom apartment, eight hours is often enough to achieve a museum-grade level of cleanliness. This includes the interiors of every cabinet and appliance. For a larger three-bedroom home, this time is typically allocated to a high-intensity reset of the kitchen, bathrooms, and primary living areas. This professional-grade approach relies on specialized tools like HEPA-filter vacuums and industrial steam cleaners. These tools remove microscopic allergens that domestic equipment simply cannot reach, protecting both your health and your home’s longevity. The Standard Day Cleaning Checklist An expert session follows a logical progression to ensure no detail is overlooked. In the kitchen, this includes degreasing cabinet fronts and cleaning the interiors of ovens and refrigerators. Bathrooms receive a total sanitization, focusing on mineral deposit removal and grout scrubbing. Living areas are addressed through high-dusting of light fixtures and the cleaning of window tracks, which are often neglected during routine maintenance. This level of precision is
Average Cost Of House Cleaning: 2026 Prices & Factors
Hiring a professional cleaning service is one of the easiest ways to reclaim your time, but before you book, you probably want to know what you’re actually going to pay. The average cost of house cleaning in 2026 ranges from about $120 to $300 per session, depending on your home’s size, condition, the type of cleaning you need, and where you live. That’s a wide range, and for good reason. A one-bedroom apartment getting a routine wipe-down is a completely different job than a four-bedroom house that needs a full deep clean before new tenants move in. Pricing reflects that difference. At AlphaLux Cleaning, we work with homeowners and businesses across New York state every day, so we see firsthand how these variables shape what clients pay, and where people often get surprised by unexpected costs or hidden fees. This guide breaks down current national averages, explains the specific factors that raise or lower your quote, and gives you a clear framework for evaluating what’s fair. Whether you’re comparing services or budgeting for recurring cleanings, you’ll walk away knowing exactly what to expect and how to get the most value from your investment. Why house cleaning prices vary so much If you’ve gotten two quotes for the same home and received completely different numbers, you’re not being given the runaround. Cleaning prices shift based on a combination of factors that are easy to overlook when you’re just trying to figure out the average cost of house cleaning in your area. Understanding these variables gives you a much better sense of what’s reasonable to pay and what’s a red flag. Location and local labor rates Where you live is one of the biggest price drivers. Labor costs in New York City are significantly higher than in a rural upstate town, even if the job is identical. Cleaning companies price their services based on what they pay their staff, which tracks local minimum wage laws, cost of living, and competition in the market. Urban areas with higher demand typically see base rates 20 to 40 percent above national averages. If you’re in a metro area like New York City or Long Island, expect your quotes to run on the higher end of any national range you find online. Cleaning frequency and service history How often a professional cleans your home directly affects what you pay per visit. A home that receives weekly or bi-weekly cleanings stays in a relatively maintained state, so each session takes less time and effort. A home that hasn’t been professionally cleaned in months requires much more work to reach the same baseline. First-time cleanings almost always cost more than recurring visits for exactly this reason. Most companies structure their pricing to reward regular scheduling. If you commit to a recurring plan, you’ll typically pay 10 to 20 percent less per visit compared to booking one-off sessions. That savings adds up quickly over the course of a year. Who you hire: individual vs. company There’s a meaningful price difference between hiring an independent cleaner and booking through a professional cleaning company. Independent cleaners often charge lower hourly rates because their overhead is minimal. However, they may not carry insurance or be bonded, and you take on more risk if something goes wrong or they cancel last minute. Professional companies charge more because they cover background checks, insurance, supplies, equipment, and staff training. That overhead protects you directly. If a cleaner gets injured in your home or something gets damaged, a reputable company has coverage to handle it. For most homeowners and businesses, the added cost is worth the security it provides. 2026 national averages and New York ranges The average cost of house cleaning nationally in 2026 sits between $120 and $300 per session for standard residential cleaning. That figure shifts based on the type of service, how large the home is, and regional pricing. To budget accurately, you need numbers that reflect both the national baseline and what local providers in your area are actually charging. National averages by service type Standard cleaning covers the basics: vacuuming, mopping, wiping down surfaces, and cleaning bathrooms and kitchens. Deep cleaning goes further, addressing baseboards, inside appliances, grout lines, and areas that standard visits skip entirely. Move-in and move-out cleaning is the most labor-intensive option, often requiring four to eight hours of work to bring a space to a spotless, ready-to-occupy condition. Service Type National Average Cost Standard cleaning $120 – $180 Deep cleaning $200 – $400 Move-in/move-out cleaning $250 – $500+ One-time cleaning $150 – $300 Deep cleaning typically costs 1.5 to 2 times more than a standard visit because it covers areas that routine cleaning skips entirely. What New York clients pay New York state pricing runs above the national average across the board, particularly in the metro area and on Long Island. Standard cleaning sessions in New York typically range from $150 to $250, while deep cleans often start at $250 and can exceed $450 for larger homes. These higher rates reflect local labor costs, insurance requirements, and the competitive market for trained cleaning professionals. Your location within the state also matters. A home in Manhattan will almost always generate a higher quote than a comparable property in a smaller upstate city, sometimes by 30 to 50 percent. Knowing these ranges helps you identify quotes that are either suspiciously low, which may signal cut corners, or inflated beyond what the service level justifies. Cost by home size, layout, and condition Square footage is the most consistent pricing factor cleaning companies use when estimating a job. Larger homes take more time, require more supplies, and often need additional staff to complete the work within a standard time window. When you ask for a quote, one of the first questions any cleaner will ask is how many bedrooms and bathrooms your home has, because those numbers directly determine how many hours the job will require. Square footage and price ranges The table below shows how the average cost
Cleaning Services for Busy Professionals in NYC: Reclaim Your Time in 2026
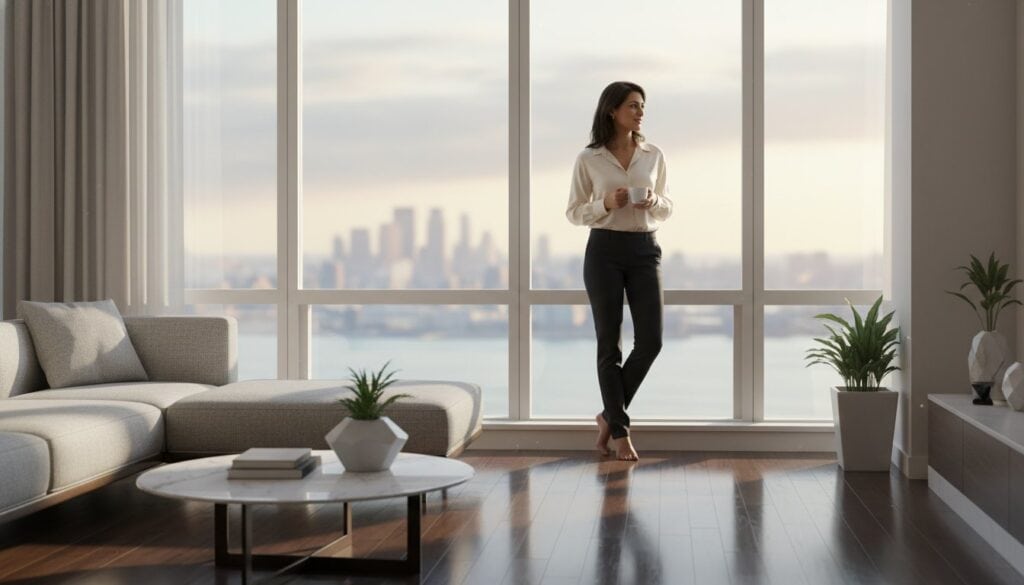
According to recent industry data, the global cleaning services market is projected to reach $482 billion in 2026, reflecting a major shift in how high-achievers manage their domestic lives. You likely understand the unique pressure of balancing a demanding Manhattan career with the need for a pristine, restorative home. It’s difficult to find the energy for deep maintenance after a week of complex decision-making, especially when you value the security and environmental health of your living space. Utilizing elite cleaning services for busy professionals nyc isn’t just a luxury; it’s a strategic way to buy back your mental bandwidth. We recognize that your time is your most valuable asset. This guide will help you discover how professional housekeeping and tailored cleaning routines can transform your apartment into a sanctuary that stays clean without your constant oversight. You’ll learn how to trade your Saturday chores for reclaimed weekends and the quiet satisfaction of a non-toxic, eco-friendly environment. We’ll explore the essential standards for elite care that provide both a spotless home and the mental peace you need to excel. Key Takeaways Understand why professional housekeeping is a strategic lifestyle investment that buys back your most valuable resource: time. Learn how to match your cleaning frequency to your specific travel and social schedule for a home that feels perpetually fresh. Identify the non-negotiable safety standards, from background checks to eco-friendly products, that protect both your privacy and your health. Discover how elite cleaning services for busy professionals nyc manage logistical details like doorman coordination to ensure a completely hands-off experience. See how a meticulously maintained environment transforms your daily routine and how to apply these same standards to your professional workplace. Table of Contents The Professional’s Dilemma: Why Cleaning is a Strategic Investment Tailored Solutions: Deep Cleaning vs. Recurring Maintenance The AlphaLux Standard: Meticulous Care for High-Performance Living Seamless Integration: Managing Your Service Without Lifting a Finger Reclaiming Your New York Minute: Start Your Journey to a Serene Home The Professional’s Dilemma: Why Cleaning is a Strategic Investment Living in the high-stakes environment of Manhattan requires a level of focus that few other cities demand. Your home shouldn’t be another item on a growing to-do list; it should be the engine room for your professional success. Many high-achievers view household maintenance as a simple chore, but the most successful New Yorkers recognize it as a strategic investment in their own productivity. By utilizing elite cleaning services for busy professionals nyc, you’re not just paying for a tidy kitchen. You’re delegating a low-leverage task to experts so you can focus on high-impact work. This shift moves cleaning from a basic necessity to a sophisticated lifestyle management tool that preserves your most valuable asset. The ROI of Reclaimed Time in Manhattan Time is the only non-renewable resource you possess. For an executive or a specialized professional, the math of DIY cleaning rarely makes sense. When you apply the fundamental principles of time management, you quickly see that spending four hours on a Saturday scrubbing bathroom tile is an inefficient use of your energy. That time is better spent networking at a gallery, attending a high-level briefing, or engaging in restorative rest that prevents burnout. Trading a morning of manual labor for a few hours of strategic thinking or personal connection is the ultimate life hack for career growth. It allows you to maintain your competitive edge without sacrificing your personal life. Mental Clarity and the Urban Sanctuary NYC apartments are often compact, which means even a small amount of clutter can lead to significant mental fatigue. A disorganized environment keeps the brain in a state of low-level tension, as every stray object represents an unfinished task. Professional maintenance acts as a psychological reset button. When you walk through your door after a grueling day in the city, the transition from chaotic streets to a pristine sanctuary should be immediate. This goes beyond a “visual clean” to create a true sensory sanctuary. It’s the quiet satisfaction of knowing every surface is sanitized and every detail is managed. A professionally maintained home reduces cortisol levels and provides the cognitive clarity needed to tackle the next day’s challenges. It’s the silent, essential foundation for your professional achievements. Tailored Solutions: Deep Cleaning vs. Recurring Maintenance Establishing a pristine environment begins with understanding the distinction between a foundational reset and ongoing upkeep. For those seeking cleaning services for busy professionals nyc, the initial step is often a comprehensive deep cleaning service. This isn’t merely a standard sweep; it’s a meticulous restoration of your space to its peak condition. By removing the accumulated dust and urban soot common in historic Manhattan buildings, you create a sterile slate that is significantly easier to maintain. In 2026, this baseline is also essential for indoor air quality, as it targets allergens and fine particulates that standard routines often miss. When to Schedule a Deep Clean A deep clean is most effective during major life transitions. If you’ve just completed a renovation or moved into a new luxury apartment, starting with a professional-grade baseline ensures your home is truly yours. Seasonal shifts also dictate the need for intensive care. NYC radiators are notorious for circulating fine dust during the winter, while summer humidity can affect air quality. Scheduling a deep reset before hosting high-stakes events or holiday gatherings ensures your home reflects your professional standards and personal attention to detail. The Consistency of Recurring Service Once the foundation is set, recurring maintenance prevents the “burnout” of your home environment. Many executives find that a weekly frequency is the only way to sustain that “just cleaned” sensory experience throughout a hectic work week. Career experts often suggest that you should outsource personal tasks that interfere with your focus or recovery. Choosing cleaning services for busy professionals nyc allows for a customized checklist. You might prioritize a high-use home office where clarity is paramount, or a kitchen that needs to be ready for evening meal prep without a second thought. Over time, a dedicated professional
Post Construction Cleaning Pricing: Rates, Factors & Examples
You’ve just wrapped up a renovation or new build, and now you’re staring at layers of dust, debris, and residue covering every surface. Before anyone can move in or get back to work, that space needs a thorough cleaning. But when you start researching post construction cleaning pricing, the numbers you find can vary wildly, and it’s not always clear what you’re actually paying for or why quotes differ so much from one company to the next. The truth is, post-construction cleaning costs depend on several specific variables, square footage, the scope of construction, the number of cleaning phases required, and more. Without understanding these factors, you’re either overpaying or hiring someone who cuts corners. Neither outcome is worth your time or money. Knowing what drives the price helps you compare quotes with confidence and set a realistic budget before you book. At AlphaLux Cleaning, we handle post-construction cleanups across New York for both residential and commercial properties, so we see the full range of what these projects involve and what they cost. In this guide, we’ll break down average rates per square foot, typical total project costs, and the specific factors that shape every quote, with real-world examples to give you a clear picture of what to expect. Why post-construction cleaning pricing varies Post-construction cleaning is not a one-size-fits-all service, and that’s exactly why post construction cleaning pricing can look so different from one job to the next. A small bathroom remodel and a full commercial office build-out require completely different levels of effort, equipment, and time. When you understand the core variables that push costs up or down, you can evaluate quotes more accurately and avoid surprises once the invoice arrives. The type and size of the project Square footage is the most straightforward driver of cost. The larger the space, the more hours your crew spends cleaning it. But the type of construction matters just as much. A new build typically generates more debris, drywall dust, and adhesive residue than a partial remodel, which means the cleaning crew needs more time and more specialized supplies to get the job done right. Commercial properties also tend to cost more per square foot than residential ones. High ceilings, industrial materials, and complex HVAC systems all add layers of difficulty that residential work rarely involves. The number of cleaning phases required, rough clean, final clean, and touch-up, also shifts the total based on project scope. The condition the site is left in How the construction crew leaves the site directly affects your cleaning bill. If subcontractors have already removed large debris and swept up bulk waste, your cleaning team can focus on the detailed work: wiping down surfaces, cleaning windows, and scrubbing fixtures. If the site is still covered in lumber scraps, plaster chunks, and packaging material, that rough-out phase takes significantly longer. The cleaner a site is when the cleaning crew arrives, the lower your final bill will be, so coordinating with your contractor on basic debris removal before the cleaners show up is worth the conversation. Timing also plays a role. Waiting too long after construction finishes allows dust to settle deeper into surfaces, grout lines, and vents, which makes the cleaning process more labor-intensive and can increase your total cost. Location and labor rates Where your property sits in New York plays a real role in what you’ll pay. Labor rates in New York City and Long Island are higher than in upstate markets, and that difference shows up in every quote. Cleaning companies operating in high-cost areas carry higher overhead costs, including insurance, vehicle expenses, and staff wages, and those costs get factored into your project price. Accessibility also matters. If your property sits on a high floor, has restricted parking, or requires specialized equipment to reach certain areas, expect the quote to reflect that added effort and logistical complexity. The more a job requires extra coordination, the more time your cleaning company needs to allocate to it. Typical rates and pricing models in 2026 When you start collecting quotes, you’ll notice that companies structure post construction cleaning pricing in a few different ways. Understanding these models helps you compare numbers accurately without getting lost in different formats. Most professional cleaning companies use one of two approaches: per square foot pricing or flat-rate and hourly pricing. Per square foot pricing Per square foot is the most common pricing model for post-construction work, and it gives you a straightforward baseline to work with. For residential properties, expect to pay between $0.15 and $0.50 per square foot, depending on the scope of work and your location. A 2,000-square-foot home could run anywhere from $300 to $1,000 for a standard final clean, with new builds sitting closer to the higher end of that range. Commercial properties generally cost more, ranging from $0.20 to $0.60 per square foot, with large-scale builds or complex layouts pushing the number higher. A 5,000-square-foot office space could land between $1,000 and $3,000 depending on the number of phases included and the site’s condition when the cleaning crew arrives. If a company quotes you a flat rate without assessing your square footage or site condition first, ask for a full breakdown before you sign anything. Flat-rate and hourly pricing Some companies offer flat-rate packages for smaller or clearly defined projects, such as a single-room renovation or a standard apartment turnover. These packages typically range from $200 to $600 and work well when the scope is predictable and contained. Hourly pricing is less common but still used, particularly for touch-up phases or added services beyond the original scope. Rates in the New York market typically run $40 to $75 per cleaner per hour. For larger crews or extended jobs, always request a maximum price estimate upfront so you stay in control of your total spend. What’s included in rough, final, and touch-up cleans Most post-construction projects involve three distinct cleaning phases, and understanding what each one covers helps you know exactly what you’re paying for
Airbnb Co-Host Cleaning Services: The Secret to 5-Star Turnovers in 2026
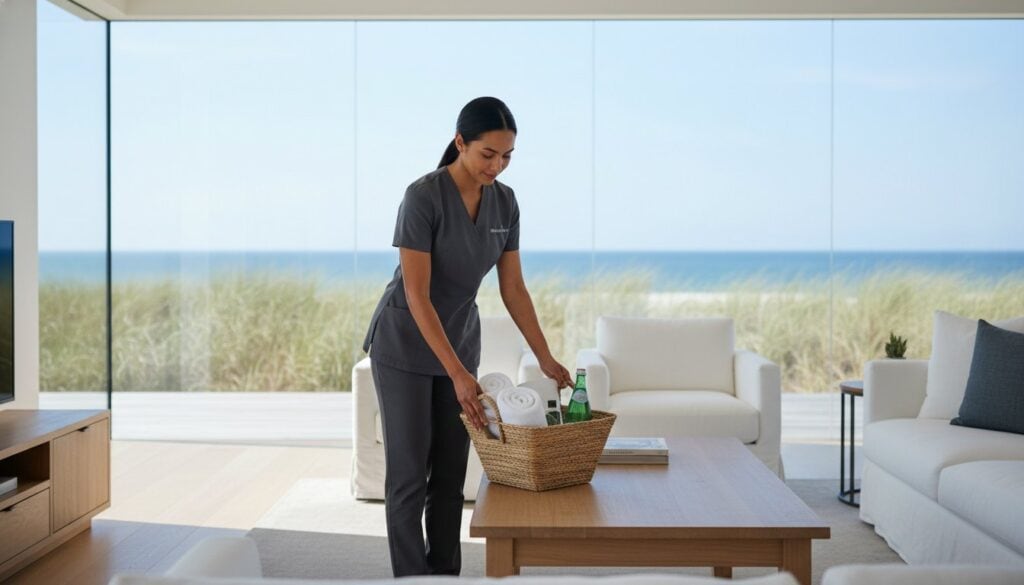
What if the most vital member of your hospitality team isn’t the person answering guest messages, but the professional ensuring every surface gleams before the next check-in? You likely agree that in the competitive 2026 rental market, a single missed hair or a dusty baseboard can instantly plummet your search ranking. It’s exhausting to manage the logistics of supplies and damage reporting from a distance while worrying if a cleaner will even show up. Integrating professional airbnb co-host cleaning services into your workflow is no longer a luxury; it’s the foundation of a truly passive, high-performing investment. We believe your peace of mind depends on a partner who treats your property with meticulous precision and care. This article will show you how specialized turnover solutions transform your rental into a stress-free asset that earns consistent 5-star reviews. We’ll explore current industry benchmarks, the impact of the new New York State registry requirements, and how a dedicated cleaning partner serves as your essential boots-on-the-ground advocate for every guest stay. Key Takeaways Discover the essential differences between basic housekeeping and the specialized role of airbnb co-host cleaning services in maintaining professional property standards. Identify the specific high-touch surfaces and aesthetic details that directly influence guest perceptions and lead to consistent 5-star reviews. Evaluate the critical benefits of professional reliability and insurance coverage compared to the operational risks of hiring solo cleaners. Learn how to navigate the unique logistical challenges of the New York and Long Island markets, from building access rules to seasonal Hamptons demand shifts. Understand how a dedicated cleaning partner protects your investment by handling meticulous damage reporting and supply management on your behalf. Table of Contents What Are Airbnb Co-Host Cleaning Services? The Anatomy of a 5-Star Turnover: What to Expect Professional Company vs. Solo Cleaner: Which is Right for You? Managing Turnovers in the New York & Long Island Market AlphaLux Cleaning: Your Premier Airbnb Co-Host Cleaning Partner What Are Airbnb Co-Host Cleaning Services? A professional co-host cleaning partner operates differently than a standard maid service. This hybrid role functions as a skilled cleaner, a meticulous property inspector, and a curator of the guest experience. While Airbnb has revolutionized how we travel, the platform’s success relies heavily on the physical condition of the property. Standard residential cleaning often overlooks the nuances of the short-term rental market; it usually focuses on surface-level dust rather than the high-stakes turnover window. This turnover window is the high-pressure period between 11:00 AM check-out and 4:00 PM check-in. Within these five hours, the home must be reset to a pristine state. Professional airbnb co-host cleaning services understand that this isn’t just about sweeping floors. It’s about being your eyes and ears on the ground. If a guest leaves behind damage or if a smoke detector is chirping, your cleaning partner identifies and reports these issues before the next guest arrives. This proactive approach prevents negative reviews and protects your investment. The Strategic Advantage of a Co-Host Partner Delegating these tasks to a dedicated partner significantly reduces your mental load. You no longer need to micromanage schedules or worry about missed check-ins. There is a direct correlation between meticulous cleanliness and the ability to command higher nightly rates. Guests are willing to pay a premium for a space that feels fresh and professionally curated. We move beyond simple visual cleanliness to create a sensory experience. The crisp scent of linens and the precise placement of amenities provide guests with a sense of relief and quiet satisfaction. Utilizing airbnb co-host cleaning services ensures your property meets these aspirational standards every single time. Cleaning vs. Co-Hosting: Understanding the Difference Standard cleaning focuses on the task of removing dirt, but co-host cleaning focuses on the guest journey. This involves detailed inventory management; your partner tracks supplies like coffee pods, toiletries, and paper products so you never run out. They also handle reporting, documenting the property’s condition after every stay. Achieving a “set it and forget it” investment model requires a partner you can trust implicitly to manage these complex details. This level of precision elevates the work from a simple task to a professional craft; it ensures your property remains a high-performing asset that guests feel lucky to inhabit. When your partner manages the details, you reclaim your time and peace of mind. The Anatomy of a 5-Star Turnover: What to Expect A 5-star turnover is an intentional process that bridges the gap between a guest’s expectations and their physical reality. While many hosts rely on general laborers from the gig economy, a professional partner understands that cleanliness is a sensory experience. It starts with deep cleaning high-touch surfaces that guests subconsciously inspect upon arrival. These items include: Remote controls and entertainment systems Light switches and thermostat dials Coffee machine handles and kitchen cabinet pulls Door handles and locksets Beyond the basics, airbnb co-host cleaning services provide a “hotel-style” aesthetic. This involves crisp, professional linen service and precise bed making that looks aspirational in photos and feels luxurious in person. Staging is the final layer of the turnover. It’s the art of creating a “welcome home” feeling through the thoughtful placement of pillows, towels, and local guidebooks. These finishing touches create a lasting first impression that sets the tone for the entire stay. Meticulous Standards for High-Traffic Rentals At AlphaLux Cleaning, our approach to professional cleaning services prioritizes both hygiene and guest wellness. We utilize non-toxic, eco-friendly products to ensure the environment is safe for every traveler, including those with sensitivities. Our teams pay specific attention to bathroom and kitchen sanitation; these are the two areas most likely to trigger a negative review if not handled with precision. Every sink, tile, and appliance is polished to a mirror finish to evoke feelings of trust and relief for your guests. The Inspection Process: Protecting Your Investment A turnover is also a critical maintenance check. Our professionals act as property inspectors who identify subtle wear and tear before it becomes a costly repair. We test appliances and electronics,
10 Kitchen Appliance Cleaning Service Options in New York
Grease buildup inside your oven, mystery smells coming from the fridge, a dishwasher that somehow makes things dirtier, kitchen appliances take a beating. Regular wiping helps, but it rarely gets to the grime that hides behind panels, under burners, and deep inside vents. That’s exactly where a kitchen appliance cleaning service comes in. These specialists break down the caked-on residue and buildup that normal cleaning routines miss, restoring your appliances to peak performance and hygiene. Dirty appliances aren’t just an eyesore. They can affect how your food tastes, reduce energy efficiency, and even become a health concern over time. Professional appliance cleaning addresses all of that, with the right tools, the right products, and the know-how to handle everything from commercial-grade range hoods to residential refrigerators without causing damage. At AlphaLux Cleaning, we provide thorough deep cleaning services across New York, including kitchens that need serious attention. We know what it takes to bring a space back to life, and we also know that sometimes you need a specialist. That’s why we put together this list of 10 kitchen appliance cleaning service options in New York to help you find the right fit, whether you need a one-time deep clean or ongoing maintenance for your home or business. 1. AlphaLux Cleaning AlphaLux Cleaning is a professional cleaning company serving New York state, with a strong focus on residential and commercial properties that need more than a surface-level clean. Their kitchen appliance cleaning service goes well beyond a standard wipe-down, targeting the grease, grime, and buildup that accumulates in and around your most-used appliances over time. What they typically clean AlphaLux handles the full range of kitchen appliances and surrounding surfaces that collect the most buildup. This includes ovens, stovetops, range hoods, microwaves, refrigerators, and dishwashers. Technicians pay close attention to interior surfaces, door seals, drip pans, vent filters, and the areas behind and underneath appliances where grease and debris tend to gather unnoticed. A thorough appliance cleaning doesn’t just improve hygiene, it can also extend the life of your equipment and improve energy efficiency. How the service works Booking with AlphaLux is straightforward. You can schedule your appointment online or request a free estimate directly through their website. Before cleaning begins, their team assesses the scope of work and confirms a plan that fits your space and priorities. AlphaLux uses eco-friendly, non-toxic cleaning products throughout the process, which makes their service a practical choice if you have children, pets, or sensitivities to harsh chemicals. Every staff member is background-checked, trained, and fully insured, so you don’t have to worry about who’s coming into your home or business. Who it fits best AlphaLux works well for homeowners, renters, and business owners across New York who want a reliable cleaning service that can handle kitchen appliances as part of a broader deep clean. Their customizable plans make them a strong fit if you need a one-time deep clean before a move, after a renovation, or ahead of a large gathering. They’re also a practical option for businesses and restaurants that need consistent maintenance without the hassle of managing an in-house cleaning crew. Pricing and availability in New York AlphaLux serves residential and commercial clients throughout New York state, with availability in Long Island and surrounding areas. Pricing is not fixed, since the cost depends on the size of your space, the number of appliances, and the condition of the kitchen. You can get a free, no-obligation estimate by visiting their website or contacting their team directly. For ongoing maintenance, they offer weekly and customized recurring plans that keep your kitchen clean without requiring you to schedule from scratch each time. 2. The Maids The Maids is a national franchise cleaning company with locations across the United States, including multiple sites in New York. They offer structured residential cleaning services that cover kitchens as part of both their standard and deep clean packages, making them a well-known option for homeowners who want a consistent, team-based approach. What they typically clean Their teams address kitchen appliances as part of a broader whole-home cleaning visit. This includes microwave interiors and exteriors, stovetop surfaces, the exterior of ovens and refrigerators, and visible grease buildup on range hoods. Keep in mind that deep interior oven cleaning may require booking their more intensive package rather than a standard appointment, so confirm the scope when you schedule. How the service works The Maids use a team-based model, typically sending a crew of four to complete the job. You book through their website or by calling your local franchise directly, and their 22-Step Healthy Touch Deep Cleaning System structures each visit consistently. This system covers your kitchen alongside the rest of your home, so you’re not getting appliance-only attention. A crew-based approach means your kitchen gets cleaned faster, but the focus stays on the whole home rather than individual appliance details. Who it fits best This option works best for homeowners who want recurring whole-home cleaning with kitchen appliance care built in. If you need a dedicated kitchen appliance cleaning service that focuses specifically on appliance interiors and hard-to-reach components, The Maids may feel broader than what you’re looking for. Pricing and availability in New York The Maids operate franchise locations throughout New York state, including Long Island and metro New York areas. Costs vary depending on your home’s size and location. You can request a free estimate on their website to get pricing specific to your address and cleaning needs. 3. Merry Maids Merry Maids is a nationally recognized residential cleaning franchise with locations spread across New York state. They offer structured home cleaning packages that include kitchen care, and their franchise model means service quality is generally consistent from one location to the next. What they typically clean Their teams cover standard kitchen appliance surfaces as part of home cleaning visits. This includes microwave interiors, stovetop grime, refrigerator exteriors, and visible grease on range hoods. The focus stays on accessible surfaces and everyday buildup, so if you
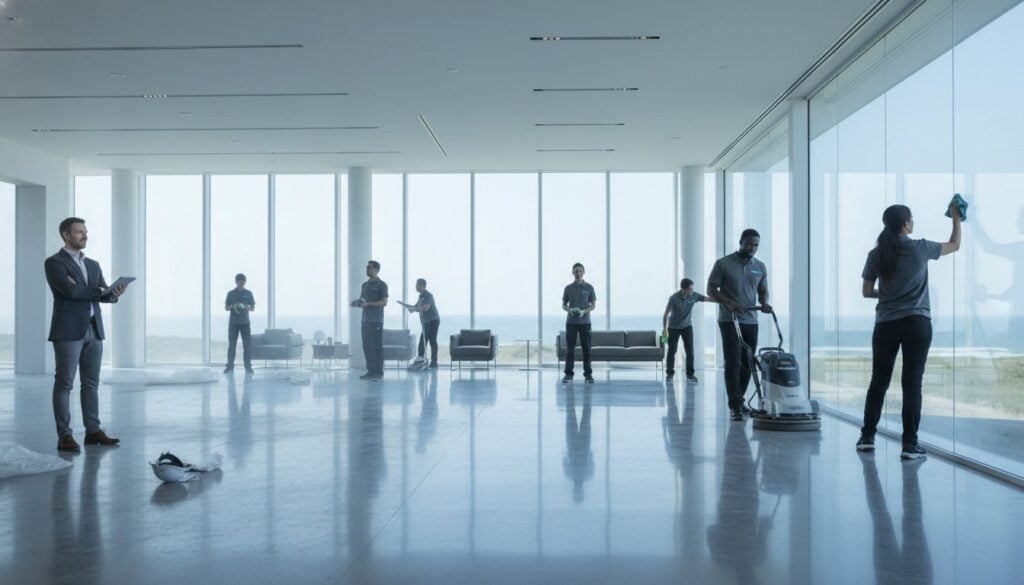
Office Deep Cleaning Services in Manhattan: The 2026 Executive Guide
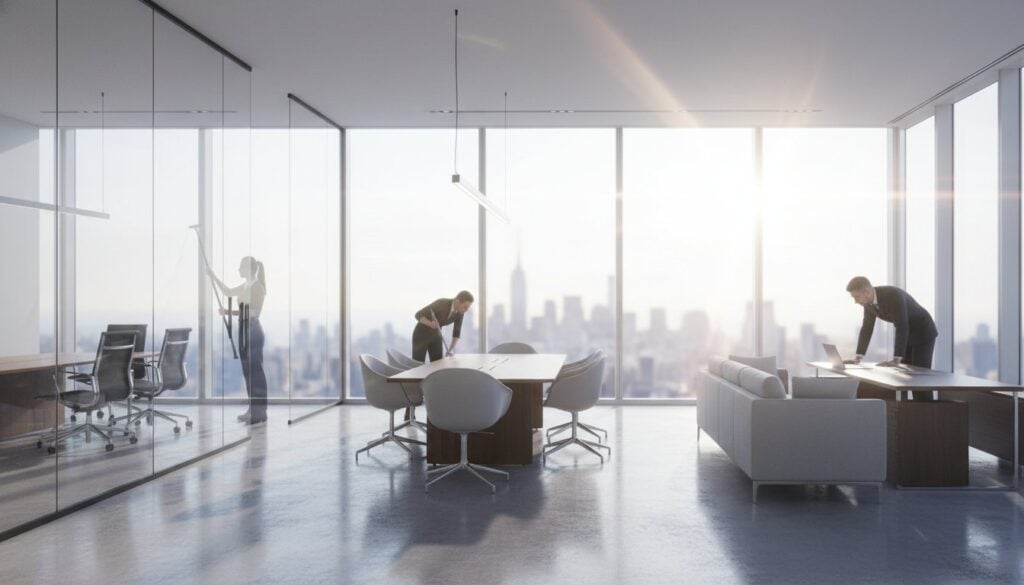
With Manhattan office vacancy rates reaching a five-year low of 13.1% in early 2026, the competition for top-tier talent has moved from the boardroom to the very air your team breathes. You likely realize that standard nightly sweeps can’t keep up with the persistent dust in Midtown high-rise HVAC systems, making specialized office deep cleaning services manhattan a necessity for health and clarity. Managing complex building logistics and strict COI requirements in the Financial District often feels like a second job for your operations team, taking focus away from your core business objectives. This executive guide explains how a meticulous approach to deep cleaning transforms your workspace into a pristine, high-performance environment that safeguards your brand’s reputation. You’ll discover how to navigate New York’s 2026 green cleaning regulations and implement seamless, data-driven sanitation schedules that reduce sick days without requiring constant manager oversight. We’ll show you how to achieve a “like-new” office that supports your team’s mental peace and professional excellence. Key Takeaways Understand why deep cleaning is a strategic investment in team health and productivity rather than a simple maintenance cost. Discover the meticulous process involved in office deep cleaning services manhattan, including the sanitization of boardroom tech and high-rise ventilation systems. Learn to distinguish between routine janitorial tasks and the intensive restoration required to maintain a truly pristine executive environment. Find practical solutions for managing Manhattan building logistics, including strict COI requirements and non-disruptive scheduling. Explore how a focus on the sensory experience of your office can improve employee mental clarity and reinforce your brand’s commitment to excellence. Table of Contents The Strategic Importance of Office Deep Cleaning in Manhattan The AlphaLux Cleaning Framework: What a Manhattan Office Deep Clean Includes Deep Cleaning vs. Standard Janitorial: The Critical Differences Navigating Manhattan Logistics: Planning Your Deep Clean The AlphaLux Difference: Why Manhattan Chooses Us The Strategic Importance of Office Deep Cleaning in Manhattan Deep cleaning is far more than an intensive version of your daily sweep. It’s a technical, comprehensive sanitization process that targets the hidden zones standard janitorial services never reach. For a comprehensive overview of cleaning standards, one can see how professional methods have shifted toward health-first outcomes. In Manhattan, the high-density environment means that pollutants and allergens accumulate rapidly within high-rise HVAC systems. Without intervention, these particles circulate through your entire floor, impacting every member of your team. Investing in office deep cleaning services manhattan is a strategic move that frames cleanliness as a vital component of a well-managed corporate life. It’s about providing your staff with the mental peace that comes from a healthy environment. When an office is meticulously maintained, it sends a clear message to current employees and potential recruits: their well-being is a priority. This level of care translates directly into higher morale and a stronger commitment to the firm’s mission. It transforms a routine maintenance task into an essential contribution to personal comfort and mental clarity. Beyond Aesthetics: The Health and Productivity Connection Research consistently shows a direct link between indoor air quality and cognitive performance. In the older commercial towers found across Manhattan, “sick building syndrome” can lead to increased absenteeism and sluggishness. Deep cleaning removes the microscopic irritants that standard cleaning misses, effectively refreshing the air your team breathes. AlphaLux Cleaning approaches this task with the understanding that a clean space produces a specific sensory experience. We connect the physical state of the room to the internal emotional states of your employees. When a workspace is truly sanitized, the resulting relief allows for deeper focus and renewed energy. Protecting Your Manhattan Brand Image In a city where reputation is everything, your office serves as a silent partner in every deal. High-value clients and partners notice the details. A pristine boardroom with spotless tech and polished finishes reinforces your brand’s attention to detail. Preserving premium materials like marble, glass, and hardwood requires the specialized techniques found in professional office deep cleaning services manhattan. These surfaces define luxury workspaces, but they’re easily damaged by improper care. A quarterly deep clean provides the necessary foundation for any successful commercial cleaning services nyc plan, ensuring your office remains a high-performance asset for years to come. The AlphaLux Cleaning Framework: What a Manhattan Office Deep Clean Includes The AlphaLux Cleaning Framework is a technical standard that elevates office maintenance into a professional craft. Unlike standard nightly sweeps, our office deep cleaning services manhattan focus on the restoration of every square inch. We begin with high-level sanitization of all high-touch surfaces. This includes lift buttons, handrails, and sensitive boardroom technology that often harbors bacteria. Precision is our hallmark. We ensure that tech equipment is treated with specialized, non-abrasive methods to maintain its functionality while achieving a clinical level of cleanliness. Kitchens and restrooms require a different level of intensity. We move beyond simple surface wiping to perform full-scale restoration. Our teams utilize steam cleaning and descaling to eliminate mineral buildup and deep-seated grime. This process ensures a level of deep disinfection that standard janitorial rotations simply cannot match. By maintaining a safe, clean workplace through these specialized protocols, you protect your team from the allergens and pathogens that thrive in high-traffic communal areas. The Vertical Clean: Vents, Walls, and Windows In the high-rise environment of Manhattan, “invisible dust” settles on vertical surfaces and ceiling-mounted hardware. We meticulously clean vents, light fixtures, and internal glass partitions to achieve an aspirational, streak-free shine. Sanitizing HVAC registers is a priority; it directly improves the office’s overall olfactory experience by removing the source of stale odors. This attention to detail ensures that the air feels as fresh as the space looks. If your executive suite requires this level of meticulous care, you might consider our specialized deep cleaning options to restore your environment. Deep Floor Care and Restoration Floors in premium Manhattan offices endure significant foot traffic and require more than a daily vacuum. Our framework includes hot water extraction for carpets to remove deep-seated pollutants and allergens. For tiled areas, we perform intensive grout scrubbing to restore
How To Clean Bathroom Floors In 30 Minutes (Tile & Grout)
Bathroom floors take a beating. Between moisture, soap residue, and daily foot traffic, tile and grout can go from sparkling to grimy faster than any other surface in your home. If you’ve been wondering how to clean bathroom floors without spending your entire afternoon on hands and knees, you’re in the right place, because it really only takes about 30 minutes when you know what you’re doing. At AlphaLux Cleaning, we’ve scrubbed thousands of bathroom floors across New York State, and our team has picked up a few things along the way. We know which methods actually cut through buildup, which products are safe for different tile materials, and where most people waste time without getting results. That hands-on experience is exactly what shaped this guide, so you can clean with confidence whether you’re tackling a weekly refresh or a long-overdue deep clean. Below, you’ll find a clear step-by-step process covering tile and grout cleaning, effective DIY and commercial solutions, and material-specific tips to avoid damage. We’ll also share the same techniques our professionals use to get bathroom floors looking (and smelling) fresh in half the time most people expect. What to gather first and what to avoid Having everything ready before you start is what keeps the 30-minute timeline realistic. If you stop mid-clean to hunt for a scrub brush or realize you’re out of the right cleaner, the whole process drags out. Gathering your supplies upfront takes about two minutes and saves you far more than that once you get moving. Think of it as the step that makes every other step faster. The supplies you need You don’t need a complicated kit to clean bathroom floors effectively. Most of what works well is straightforward: a stiff-bristle grout brush, a microfiber flat mop, a bucket, and your chosen cleaning solution. A pair of rubber gloves protects your hands, especially when you’re using any acid-based or disinfectant products. Here’s a quick reference list of what to have ready before you start: Broom or vacuum for dry debris removal Microfiber flat mop and bucket Stiff-bristle grout brush or an old toothbrush for tight corners Rubber gloves Spray bottle for targeted application Cleaning solution (details below) Dry microfiber cloths or a dry mop for the finishing pass For your cleaning solution, you have two solid options. A DIY mix of warm water and white vinegar in a 1:1 ratio works well for light buildup and routine maintenance on most ceramic and porcelain tiles. For tougher grime or sanitizing after illness, a pH-neutral tile cleaner or a diluted bleach solution (1 tablespoon of bleach per gallon of water) gets the job done without risking surface damage. What to avoid using Knowing what not to use is just as important when you’re learning how to clean bathroom floors properly. The wrong product can scratch, discolor, or permanently damage your tile or grout. Abrasive scrubbers like steel wool and powdered cleansers with harsh grit will scratch glazed tile surfaces over time, dulling the finish in a way that’s difficult to reverse. Never mix vinegar and bleach together. Combining them produces toxic chlorine gas, which is genuinely dangerous in a small, enclosed space like a bathroom. Also avoid using undiluted bleach directly on colored grout, since it will strip the pigment and leave uneven, faded patches. Stay away from oil-based soaps and wax-based cleaners on tile floors as well. These leave a slippery film that builds up with each application, making your floor harder to clean going forward rather than easier. Step 1. Clear the room and remove dry debris fast Before any liquid hits the floor, you need a clear, debris-free surface. Skipping this step is one of the most common mistakes people make when learning how to clean bathroom floors. Wet debris sticks, smears, and turns a simple mop job into a longer scrubbing session. Two minutes of prep here saves five to ten minutes once you actually start cleaning. Move everything off the floor Pull out the bath mat, the trash can, the scale, and anything else sitting directly on the tile. Don’t try to mop around obstacles because you’ll miss the edges and corners where soap scum and hair collect the most. Set everything outside the bathroom door so you have a completely open surface to work with. Items to move before you start: Bath mat and any fabric rugs Trash can and toilet brush holder Scale, step stool, or storage baskets Any bottles sitting on the floor near the tub or toilet A fully cleared floor means you won’t have to go back and redo patches you missed around objects. Sweep or vacuum before any liquid touches the tile Once the floor is clear, sweep or vacuum up all dry debris before you introduce any moisture. Hair, dust, and grit are much easier to remove when dry. The moment you add water, they clump together and drag across the tile, potentially scratching the surface and clogging your mop. A vacuum with a hard-floor setting works faster than a broom in tight spaces, but either tool gets the job done. Focus extra attention on the edges along the baseboard, behind the toilet base, and the corners near the door. Run your broom or vacuum head along the grout lines as well, since those channels trap more grit than the flat tile surface does. Step 2. Mop tile the right way and sanitize safely With the floor clear and dry debris gone, you’re ready to apply your cleaning solution. The key to mopping tile efficiently is working in small sections rather than soaking the entire floor at once. Oversaturating tile lets water seep into grout joints and under baseboards, which causes long-term moisture damage that no amount of scrubbing can fix. Apply your solution and mop in sections Pour your chosen solution into a bucket and wring your mop until it’s damp, not dripping. Start at the far corner of the bathroom and work your way toward the door so you’re
Mastering the Post Construction Cleaning Bid Proposal: A Comprehensive 2026 Guide
A winning construction bid is not a price list; it is a risk-mitigation document that proves technical precision. In the competitive New York City and Long Island markets, site superintendents aren’t just looking for the lowest number. They’re looking for a partner who understands that a single missed detail on a post construction cleaning checklist for contractors can delay a multi-million dollar handover. You’ve likely felt the frustration of losing a contract to a cut-rate, uninsured team, only to watch the project suffer from poor dust management and endless punch-list delays. It’s exhausting to see quality work undercut by those who don’t value the meticulous nature of the craft. We believe that your proposal should reflect the same level of care you put into the build itself. This guide provides a clear path to crafting professional bids that win high-value contracts and protect your hard-earned margins. You’ll learn a repeatable framework for 2026 that clarifies your scope of work and eliminates the risk of costly scope creep. By the end of this article, you’ll have the tools to communicate your value with confidence, ensuring every site you touch meets the highest standards of health, safety, and mental clarity. Key Takeaways Establish professional authority by treating your bid as a legally binding roadmap that defines clear expectations and protects your project margins. Utilize a comprehensive post construction cleaning checklist for contractors to separate the work into three distinct phases, preventing project delays and ensuring a flawless final handover. Identify hidden operational costs and logistical challenges through mandatory site visits, allowing you to price your proposal with technical precision. Navigate the complex landscape of NYC and Long Island compliance by securing the specific insurance and risk mitigation documents necessary for high-value commercial contracts. Accelerate the approval process by delivering a polished, digitally accessible proposal that reflects the premium quality of your cleaning services. Table of Contents Anatomy of a Professional Post Construction Cleaning Bid Proposal Defining the Three-Phase Scope: The Contractor’s Master Checklist Conducting the Site Visit and Pricing Your Proposal Compliance, Insurance, and Risk Mitigation in New York Finalizing and Delivering Your Bid with AlphaLux Quality Anatomy of a Professional Post Construction Cleaning Bid Proposal A professional bid is far more than a simple estimate of costs. It functions as a legally binding roadmap that establishes clear expectations between you and the project manager. Within the high-stakes environment of New York construction, your proposal serves as the first physical representation of your commitment to excellence. It bridges the gap between a chaotic job site and a pristine, habitable space. By utilizing a detailed post construction cleaning checklist for contractors within the bid itself, you eliminate ambiguity and ensure that every surface, from the ceiling vents to the baseboards, is accounted for before a single cloth touches a surface. First impressions are vital for firms operating in Long Island and NYC. A visually clean, branded cover page signals that you are a meticulous partner who values professional standards. This level of presentation distinguishes a dedicated cleaning service from a casual laborer. While a residential renovation might focus on fine dust removal in a kitchen, a large-scale commercial build requires a more rigorous approach to debris management and safety compliance. Transparency in your proposal builds immediate trust. When you clearly outline your process, you prove that your price is based on technical precision rather than guesswork. Executive Summary: Setting the Professional Tone Your executive summary should be a concise reflection of your company’s mission and specialized experience. It’s your opportunity to highlight your familiarity with the unique construction standards of the New York metropolitan area. We prioritize a service-oriented approach that emphasizes high standards and personal respect for the property. Mentioning your commitment to using eco-friendly, non-toxic cleaning agents isn’t just a trend; it’s a promise to protect the health and mental clarity of the building’s future occupants. This section should leave the reader feeling understood and reassured that their project is in expert hands. Contact Information and Project Logistics Clarity in logistics prevents the friction that often plagues the final punch-list phase. Your proposal must include site-specific details, such as the general contractor’s name and the exact project address. It’s essential to state the proposal’s validity period clearly. In an era where labor and material costs can shift, protecting your margins is a sign of a responsible business. Define the primary point of contact for both parties to ensure communication remains smooth and logical. This structure allows the site superintendent to manage complex details without the burden of chasing down information, framing your service as a vital component of a well-managed project. Defining the Three-Phase Scope: The Contractor’s Master Checklist A common mistake in bid proposals is treating the entire project as a single event. This “one and done” approach often leads to significant project delays because it ignores the reality of construction timelines. A structured post construction cleaning checklist for contractors should instead be divided into three distinct phases. By categorizing work this way, you can bill for each phase separately, which helps maintain a healthy cash flow throughout the project’s duration. This phased approach also ensures compliance with safety regulations like the OSHA Housekeeping Standard 1926.25, which requires that debris be cleared from work areas at regular intervals. Precision requires the right tools. We utilize specialized equipment like HEPA-rated vacuums to capture fine silica dust and industrial floor scrubbers to restore surfaces to their intended state. A truly professional bid addresses often overlooked extras such as deep cleaning window tracks and dusting interior HVAC vents. This level of detail establishes the professional cleaning services near me standard for detail work, ensuring the space is not just visually clean but truly healthy for occupancy. Phase 1: The Rough Clean Checklist The rough clean occurs after the heavy framing and electrical work are finished. This phase focuses on major debris removal to prepare the site for flooring, painting, and cabinetry. Tasks include removing large trash, scraping stickers from windows or appliances,