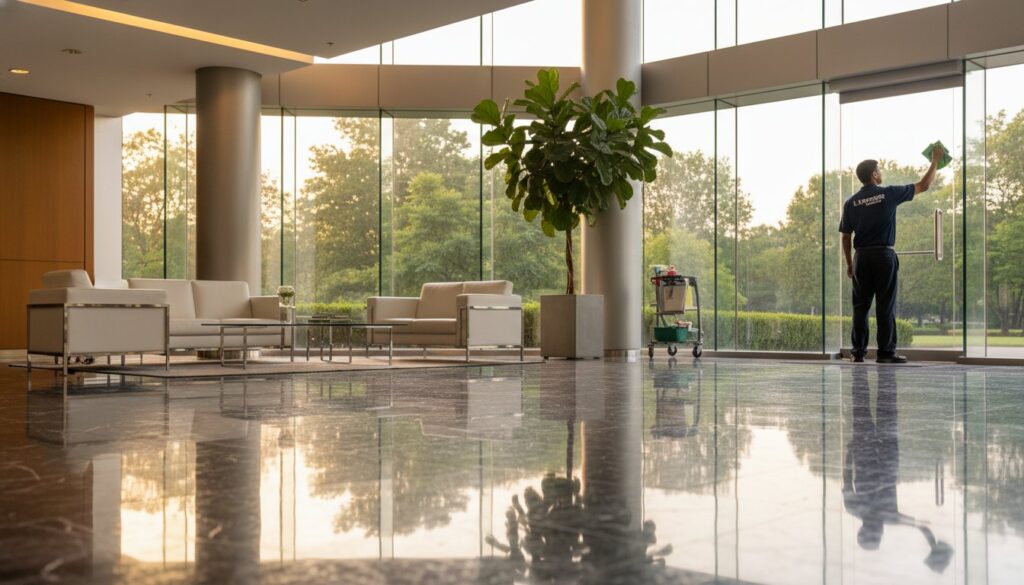
First Impressions Count: How Commercial Cleaning Elevates Your Business Image
Move Out Cleaning Cost: Average Prices & What Affects Them
Whether you’re wrapping up a lease or selling your home, one of the first questions that comes up is: how much will the move out cleaning cost me? It’s a fair question, and one that doesn’t always have a straightforward answer. Prices can swing significantly depending on factors like square footage, the condition of your space, and the specific tasks involved. At AlphaLux Cleaning, we handle move-out cleans across New York State every week, so we see the full range of what these jobs actually cost. Pricing transparency matters to us because we know you’re already juggling deposits, moving logistics, and a dozen other expenses. The last thing you need is a surprise on the cleaning bill. This article breaks down average move-out cleaning prices, what drives them up or down, and how to evaluate quotes so you’re not overpaying. We’ll walk through the real numbers, based on home size, cleaning scope, and add-on services, so you can budget with confidence before your move-out day arrives. What move-out cleaning includes Move-out cleaning is more thorough than a standard recurring clean. Professional move-out cleaning covers the entire property from top to bottom, targeting areas that often get skipped during routine maintenance. The goal is to return the space to a condition that satisfies a landlord’s inspection checklist or impresses a buyer walking through before closing. Understanding what’s included matters because scope directly affects your move out cleaning cost. If you compare two quotes without knowing what each one covers, you might choose the lower price only to find it excludes appliance cleaning or cabinet interiors that the other quote included. Scope clarity is how you make an honest comparison. Standard tasks covered in every room Every room in the property gets the same baseline treatment in a professional move-out clean. Cleaners dust and wipe all surfaces, including baseboards, window sills, door frames, and light switches. They also vacuum and mop floors, clean interior windows, and remove cobwebs from corners and ceiling lines that accumulate over time. Here’s what you can expect as standard across each room: Dusting all horizontal and vertical surfaces Wiping down baseboards, door frames, and molding Cleaning interior window glass and tracks Vacuuming carpets or mopping hard floors Wiping inside closets and cabinets Spot-cleaning walls for scuffs and marks Cleaning light fixtures and ceiling fans A thorough room-by-room clean is what separates a move-out service from a regular maintenance visit, and it’s also what justifies the higher price point. Kitchen and bathrooms: the heavy hitters Kitchens and bathrooms require significantly more time and effort than other areas of the property. In the kitchen, cleaners scrub the inside of the oven, degrease the stovetop and hood filter, and wipe down cabinet interiors and exteriors. The refrigerator interior is typically included in standard move-out packages as well, though you should confirm this before booking since some providers treat it as an add-on. Bathrooms receive the same level of attention. Toilets, showers, tubs, and sinks are scrubbed and disinfected, grout lines are targeted for buildup and mildew, mirrors are wiped streak-free, and exhaust fans are dusted and cleared. These two rooms often determine whether a tenant gets their security deposit back, so professionals spend more time here than anywhere else. What typically falls outside the scope Knowing what’s NOT included helps you avoid surprises on the final invoice. Most standard move-out cleaning packages do not cover exterior windows, deep carpet shampooing, or biohazard cleanup. Garage cleaning, outdoor areas like patios or balconies, and anything involving damage repair or painting also fall outside the scope of a typical job. Some tasks that seem obvious, like cleaning inside washer and dryer units or handling pest-related messes, may require separate service requests with different pricing structures. Always ask your cleaning provider for a written scope of work before you book, so you know exactly what’s covered and what you’ll need to add on to meet your landlord’s or buyer’s expectations. Average move-out cleaning cost in 2026 Most move-out cleaning jobs in 2026 fall between $150 and $500 for standard residential properties, though the range stretches well beyond that depending on size, condition, and location. In New York State, where labor costs run higher than the national average, expect to pay toward the middle or upper end of that range for most apartments and single-family homes. A studio or small one-bedroom might come in around $150 to $200, while a 3,000-square-foot house could easily reach $400 to $600 or more. The single biggest driver of move out cleaning cost is square footage, but the condition of the property plays an equally important role once cleaners actually see what they’re working with. Cost by home size Your home’s size is the most reliable starting point for estimating what you’ll pay. Cleaning companies use square footage or bedroom count as the primary pricing anchor because larger spaces require more time, more labor, and more cleaning supplies. Here’s a general breakdown of what most professional services charge in 2026: Home Size Estimated Cost Studio / 1 bed (under 700 sq ft) $150 – $220 2 bedroom (700-1,100 sq ft) $200 – $300 3 bedroom (1,100-1,800 sq ft) $280 – $400 4 bedroom (1,800-2,500 sq ft) $375 – $500 5+ bedroom / large home $475 – $650+ These figures reflect a standard move-out clean without add-ons like carpet shampooing or exterior window washing. Your actual quote may come in higher if the property hasn’t been cleaned in a while or if specific areas need extra attention. What the price range tells you A wide price range isn’t a red flag; it reflects how much variation exists between properties. Two 2-bedroom apartments can look completely different after a tenant moves out, and cleaning companies account for that when they price a job. A unit with built-up grease in the kitchen and soap scum in the bathrooms takes more time than a well-maintained space of the same size, so it costs more even at identical square footage. This is why
Move Out Cleaning for Homeowners: The Strategic Guide to a Flawless Transition
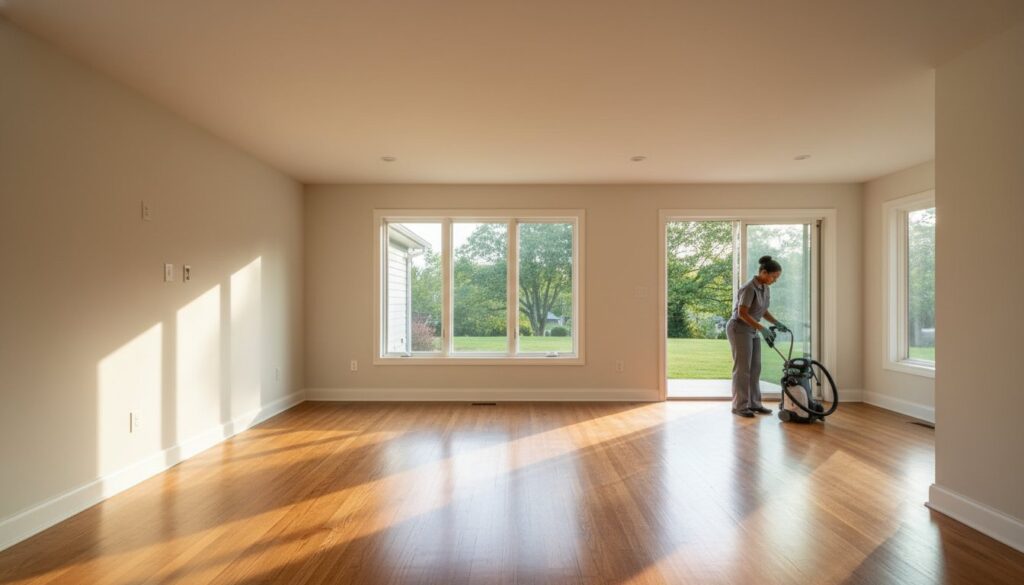
What if the final hurdle to your New York home sale isn’t the complex legal paperwork, but the dust lingering in your baseboards? You’ve likely spent weeks packing boxes and managing logistics, leaving you physically exhausted and anxious about the upcoming final walk-through. It’s natural to worry that a missed detail might complicate your closing date. Professional move out cleaning for homeowners transforms this stressful final chore into a strategic real estate investment. By prioritizing a pristine environment, you protect your investment and ensure the new owners step into a space that reflects your high standards. The “Invisible Clean” addresses the elements buyers notice only if they’re neglected. This includes clearing dust from air vents, wiping ceiling fan blades, and vacuuming window tracks where grit often accumulates. Floor care is equally specialized. Hardwood and tile surfaces receive treatments designed to highlight their natural luster, while high-traffic carpeted areas are restored to a uniform finish. To see how professionals like Luminara Cleaning Services approach these tasks, you can find out more about Carpet Cleaning and the standards required for a truly deep clean. This level of move out cleaning for homeowners ensures that every square inch of the property reflects the value of the investment. We understand that a seamless transition requires more than just a surface wipe. This guide will show you how deep cleaning provides total relief from the moving burden while navigating specific 2026 requirements, such as NYC’s official bin regulations for waste disposal and the latest low-VOC standards for bathroom cleaners. You’ll discover how a meticulous approach to your property’s final presentation guarantees a successful closing and provides the mental clarity you need to embrace your new residence with confidence. Key Takeaways Learn why professional move out cleaning for homeowners is a critical step in preventing property condition disputes during the final walk-through. Identify the specific deep-cleaning zones, such as range hoods and bathroom grout, that require specialized attention to meet buyer expectations. Understand the hidden costs of DIY cleaning, including equipment rentals and the impact of move-out fatigue on your overall transition. Discover the strategic 24-48 hour window for scheduling your cleaning to ensure the property is in peak condition for the new owners. Recognize how a meticulous approach to home sanitization provides the mental clarity and relief needed to focus on your new residence. Table of Contents Beyond the Broom: Why Move-Out Cleaning is Critical for Homeowners The Anatomy of a Comprehensive Move-Out Cleaning Checklist DIY vs. Professional Move-Out Cleaning: A Homeowner’s Comparison Timing and Coordination: Scheduling for a Seamless Exit The AlphaLux Standard: Premium Move-Out Services in New York Beyond the Broom: Why Move-Out Cleaning is Critical for Homeowners For most, selling a home represents the culmination of years of financial and emotional investment. While renters focus on recovering a security deposit, homeowners must view the transition through the lens of equity and legal liability. A standard “surface clean” rarely suffices when thousands of dollars in closing costs are on the line. Investing in move out cleaning for homeowners ensures that your property meets a “closing-ready” standard, which is vastly different from simply being tidy. This level of care signals to the buyer that the home has been meticulously maintained, which reduces anxiety and builds immediate trust before they sign the final documents. A spotless environment has a profound psychological impact during the final walk-through. When a buyer sees dust on the baseboards or grease on the range hood, they start to wonder what else has been neglected. They might question the integrity of the HVAC system or the plumbing. By utilizing professional cleaning services, you eliminate these doubts. You’re not just scrubbing floors; you’re protecting your property’s reputation in a competitive New York market where word of mouth and agent relationships are everything. The Final Walk-Through and Your Legal Obligations Standard New York real estate contracts typically include a “broom clean” clause. While this sounds simple, its lack of a precise legal definition often leads to post-closing friction. A home that is technically swept but still carries the scent of the previous owner’s pets or shows grime in the kitchen cabinets can trigger a dispute. Exceeding the contract minimums is a strategic move that prevents these delays. Deep cleaning also serves as a final inspection of your home’s infrastructure. When surfaces are clear of dust and debris, it’s much easier to confirm that the floors, walls, and built-in fixtures are in the condition promised during the sale. Protecting Your Real Estate Investment and Equity Your home is likely your most significant asset. Professional move out cleaning for homeowners acts as a final quality control step after the movers have finished their work. Once the furniture is gone, hidden scuffs and accumulated dust become visible. Addressing these details reinforces the home’s value in the buyer’s mind. It ensures they feel they’re receiving a premium product. This attention to detail often leads to smoother transitions and a higher likelihood of future referrals from real estate professionals who appreciate sellers who take pride in their property until the very last moment. The Anatomy of a Comprehensive Move-Out Cleaning Checklist A truly effective comprehensive move-out checklist goes far beyond what a standard weekly service provides. When performing move out cleaning for homeowners, the focus shifts toward sanitization and restoration. In the kitchen, this involves a deep-dive into degreasing range hoods and meticulously cleaning the interior of every cabinet and drawer. These areas often harbor hidden residue that only becomes apparent once the dishes are packed away. Since New York State revised VOC regulations in 2026 to set a 1% threshold for non-aerosol cleaners, using compliant, high-quality products is essential for a safe transition. Bathrooms require rigorous sanitization protocols. We focus on grout scrubbing and the removal of stubborn hard water deposits that can dull the appearance of high-end stone or tile. Detailing often-overlooked spots like baseboards, light switches, and door frames removes the tactile evidence of daily life, leaving the home feeling fresh and untouched. These
5 Oven Cleaning Service Pros In NY: Pricing & What’s Included
A grimy oven doesn’t just look bad, it affects how your food tastes, how efficiently your appliance runs, and even the air quality in your kitchen. If you’ve been putting off scrubbing through layers of baked-on grease, hiring a professional oven cleaning service is one of the smartest shortcuts you can take. But finding the right one in New York means knowing what you’re actually paying for. At AlphaLux Cleaning, we handle deep cleaning across New York homes and businesses, so we know firsthand what separates a thorough clean from a surface-level wipe-down. That experience gives us a sharp eye for quality, and we used it to put together this guide. We compared pricing, methods, and what’s included across five reputable oven cleaning pros in the state. Below, you’ll find a breakdown of each service, what they charge, how they work, and which one might be the right fit for your kitchen. Whether you need a one-time deep clean or something more regular, this list will help you make a confident hire. 1. AlphaLux Cleaning AlphaLux Cleaning operates across New York state and brings a thorough, detail-focused approach to every job. Their oven cleaning service goes well beyond a quick wipe, covering internal components, racks, and door glass using non-toxic, eco-friendly products that leave no chemical residue behind. What you get with AlphaLux oven cleaning Every booking includes a hands-on deep clean of the oven interior, targeting baked-on grease, carbon buildup, and food debris from the cavity walls, floor, and ceiling. Staff are fully vetted, background-checked, and insured, so you get peace of mind alongside a spotless result. A proper deep clean can restore your oven’s heat efficiency and cut down on smoke and odors during cooking. What’s included vs add-ons The standard oven clean covers the interior cavity, removable racks, and door glass. AlphaLux also lets you customize your visit by adding stovetop burner cleaning or range hood degreasing when you book, so you can tackle the whole cooking area in one appointment. Typical pricing in New York and what changes it Pricing for a standard oven clean in New York typically starts in the $80 to $120 range. The final number depends on oven size, the severity of grease buildup, and any add-ons you select, so heavily soiled appliances or double ovens will push the cost higher. Who this service fits best AlphaLux suits homeowners and renters who want a vetted, insured professional rather than an unverified gig worker. It is also a practical choice for landlords turning over a unit and households that prioritize safe, eco-friendly cleaning products. How to book and what to prep You can book online or request a free estimate directly through the AlphaLux website. Before your cleaner arrives, pull out any items stored inside the oven and clear the area around the appliance so the team can start immediately. 2. The Cleaning Authority The Cleaning Authority is a national franchise with locations across New York. They focus primarily on recurring home cleaning plans rather than one-off specialist jobs, which shapes how their oven cleaning service fits into a booking. How their oven cleaning typically works When you request oven cleaning through The Cleaning Authority, it generally gets bundled into a full home cleaning appointment rather than offered as a standalone service. That means you book a complete house clean and include the oven as part of that visit. If the oven is all you need cleaned, this structure may not be the most cost-effective setup for your budget. What’s included vs add-ons Standard visits cover exterior oven surfaces and door glass. A deep interior clean with rack removal is usually treated as an extra request, so confirm what your specific plan includes before the cleaner arrives. Typical pricing in New York and what changes it Recurring plans in New York typically run $150 to $250 per visit, depending on home size. Adding interior oven work can push that number higher. Who this service fits best This option suits homeowners already on a recurring cleaning plan who want basic oven maintenance folded into their regular schedule without booking a separate appointment. How to book and what to prep Book directly through your local franchise location. Before the visit, remove any items stored inside the oven and confirm that deep oven cleaning is covered under your specific plan. 3. Merry Maids Merry Maids is a national cleaning franchise with locations throughout New York. Their model leans on recurring home cleaning schedules, so their approach to oven and appliance work reflects that structure. How their appliance and oven cleaning typically works Merry Maids includes appliance cleaning as part of broader home cleaning visits rather than offering it as an isolated appointment. You request oven work when scheduling your visit, and the team folds it into the overall clean. If deep oven cleaning is your only priority, a franchise built around recurring full-home visits may not be the most efficient route. What’s included vs add-ons A standard visit covers exterior oven surfaces and control panels. Interior deep cleaning, rack removal, and door glass scrubbing are typically treated as extra requests, so confirm those details when you book. Typical pricing in New York and what changes it Expect $150 to $260 per visit for a standard home clean in New York. Adding an oven cleaning service with interior access pushes that total higher based on the level of buildup. Who this service fits best Merry Maids works well for existing recurring customers who want light oven maintenance layered into their scheduled visits without booking a separate appointment. How to book and what to prep Contact your local Merry Maids franchise to confirm oven cleaning is included in your plan. Clear everything out of the oven and remove racks beforehand to save time on your appointment. 4. MaidPro MaidPro is a national franchise with locations across New York that focuses on recurring residential cleaning plans. Their oven work is structured as an optional add-on rather than a
Deep Kitchen Cleaning Services NYC: The Ultimate Professional Guide for 2026
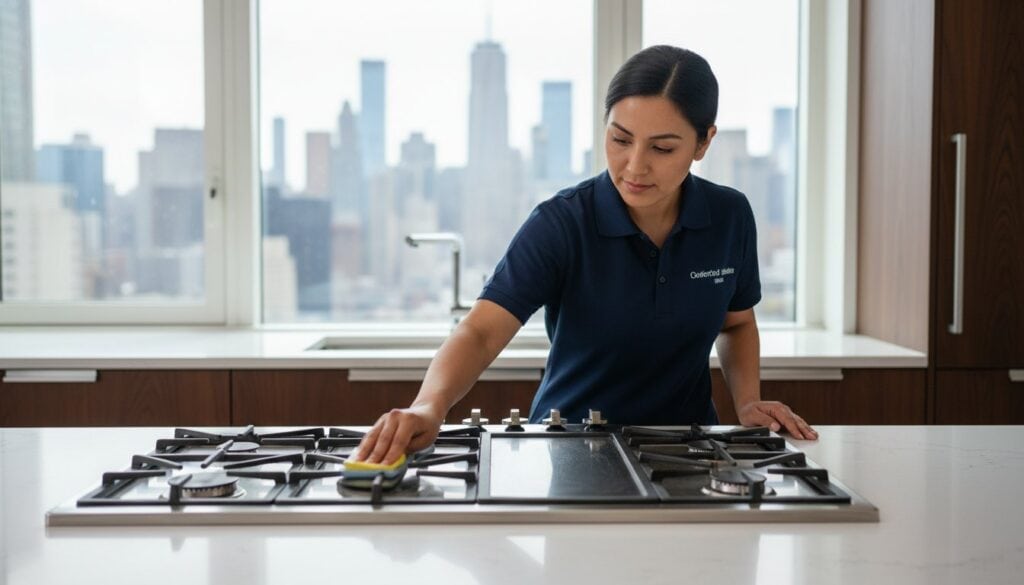
What if the heart of your Manhattan home is harboring layers of urban soot and hidden grease that a standard wipe-down simply cannot reach? You likely spend significant time maintaining your living space, yet the persistent film on your cabinets and the dust infiltrating from the busy streets often feel like an endless challenge. It’s difficult to feel truly at ease in a kitchen when you’re worried about hidden bacteria or the harsh chemicals found in many store-bought cleaners. We understand that your time is a premium resource and your health is a top priority. By choosing professional deep kitchen cleaning services nyc, you can transform your high-traffic cooking area into a pristine, health-conscious sanctuary. This guide will show you exactly how a meticulous, professional approach eliminates deep-seated allergens and restores your appliances to a showroom-quality finish. We’ll walk through the essential 2026 standards for a thorough restoration and provide the clarity you need to select a dependable partner who treats your home with the respect it deserves. Key Takeaways Understand how NYC’s unique environmental factors, such as urban soot and grease accumulation, make periodic restorative cleaning a necessity for a healthy home. Identify the specific high-touch areas and “top-to-bottom” techniques that distinguish a professional restoration from a standard surface tidy. Compare the specialized tools and heavy-duty degreasers used in deep kitchen cleaning services nyc against the equipment used for standard weekly maintenance. Learn the essential vetting criteria for NYC service providers, focusing on insurance for high-rise buildings and the use of professional-grade HEPA filtration. Discover how eco-friendly, high-performance products can transform your kitchen into a pristine culinary sanctuary without the use of harsh, toxic chemicals. Table of Contents Why Professional Deep Kitchen Cleaning is Essential in NYC Residences The Anatomy of a Comprehensive Deep Kitchen Cleaning Service Standard vs. Deep Kitchen Cleaning: Which Do You Need? What to Look for in NYC Deep Kitchen Cleaning Services Experience the AlphaLux Cleaning Standard in Your NYC Kitchen Why Professional Deep Kitchen Cleaning is Essential in NYC Residences Maintaining a kitchen in Manhattan or Brooklyn involves more than just clearing the counters. In a city where life moves at a relentless pace, your kitchen often bears the brunt of daily activity. Professional deep kitchen cleaning services nyc offer a restorative process that goes far beyond the capabilities of a standard weekly tidy. While a typical cleaning focuses on surface aesthetics, a deep clean targets the deep-seated grime and bacteria that accumulate in the shadows of your most high-traffic health zone. High-density living in New York means that your kitchen is likely working harder than its suburban counterparts; this leads to an accelerated rate of wear and tear that requires specialized attention to correct. The unique environmental factors of the city present a constant challenge for local residents. Urban soot, a fine particulate matter caused by dense traffic and city air, has a way of infiltrating even the most well-sealed apartments. This dust settles into porous surfaces and mixes with the microscopic particles of oil that escape your stovetop during cooking. Over time, this creates a stubborn, tacky film that traps allergens and compromises the integrity of your cabinetry and appliance finishes. Addressing this buildup requires more than a simple sponge. It demands a professional approach to ensure the environment remains healthy and functional. The “Invisible” Grime of Urban Living Microscopic pollutants often find a permanent home on top of high cabinets and behind heavy appliances where standard tools cannot reach. These areas become magnets for aerosolized cooking oils, which act as an adhesive for dust and pet dander. Neglecting these hidden corners doesn’t just affect the look of your space. It has direct implications for food safety and hygiene. When grease is allowed to sit, it can become a breeding ground for bacteria, potentially contaminating the very surfaces where you prepare your meals. Professional deep kitchen cleaning services nyc utilize specific techniques to neutralize these invisible threats, ensuring every inch of your kitchen is truly sanitized. Reclaiming Your Culinary Sanctuary Your kitchen is the heart of your home and a primary site for wellness and creativity. It’s difficult to find culinary inspiration when you’re distracted by persistent grease or the feeling that the space is never truly sanitized. A deep clean provides more than just a visual transformation; it offers profound psychological relief. Walking into a kitchen that feels showroom-quality allows you to focus on your cooking rather than your to-do list. By outsourcing this intensive labor, you reclaim your valuable weekend time to enjoy the city while knowing your food preparation area is a safe, pristine sanctuary. The Anatomy of a Comprehensive Deep Kitchen Cleaning Service A professional restoration follows a strict, logical sequence designed to achieve a level of cleanliness that maintenance wipes simply cannot reach. This process begins with a top-to-bottom philosophy. Technicians start at the highest points of the room, such as ceiling fans, recessed light fixtures, and the tops of high cabinets. By working from the ceiling down to the floor, we ensure that any dislodged dust or particulates land on surfaces that haven’t been sanitized yet. This systematic approach prevents cross-contamination and ensures every inch of the space receives attention. High-touch surfaces like light switches, cabinet pulls, and faucet handles are treated with focused care to eliminate germs in these high-traffic contact zones. During a deep clean, moving small appliances is a mandatory step. Toasters, blenders, and coffee makers are relocated to scrub the countertops and backsplashes underneath them where crumbs and grease often hide. We pay special attention to grout lines, using specialized tools to lift stains and bacteria from these porous areas. This meticulous attention to detail is what defines premium deep kitchen cleaning services nyc provided by our team. By addressing these hidden areas, we create a kitchen that isn’t just visually clean, but fundamentally sanitized. Beyond the Surface: Professional Degreasing Standard household cleaners often fail against the stubborn film that develops in active kitchens. Professional-grade degreasing is the removal of polymerized
Kitchen Cleaning Checklist: Daily, Weekly & Monthly Tasks
A clean kitchen doesn’t happen by accident, it happens with a system. Without one, grease builds up on the stovetop, crumbs collect in corners, and that mystery smell in the fridge just keeps getting worse. A solid kitchen cleaning checklist breaks the work into manageable steps so nothing gets overlooked, and your kitchen stays a space you actually want to cook in. The trick is knowing what to clean and how often. Some tasks need daily attention. Others only matter once a month. When you organize your cleaning by frequency, the whole process becomes less overwhelming and far more effective, whether you’re maintaining your own home or managing a commercial kitchen that needs to meet higher standards. At AlphaLux Cleaning, we help homeowners and businesses across New York keep their spaces spotless through professional, detail-oriented cleaning services. We built this checklist from real experience, the same approach our trained team uses when deep cleaning kitchens throughout Long Island and beyond. Below, you’ll find a complete breakdown of daily, weekly, and monthly tasks to keep your kitchen fresh, sanitary, and ready for whatever you’re serving up next. 1. Hire AlphaLux Cleaning for a kitchen deep clean Before you work through your personal kitchen cleaning checklist, it helps to start from a clean baseline. AlphaLux Cleaning provides professional kitchen deep cleans for homeowners and businesses across New York, so you can take over with a maintenance routine instead of trying to tackle years of buildup on your own. What it covers A deep clean from AlphaLux goes far beyond wiping down surfaces. Our trained team scrubs inside appliances like ovens, microwaves, and refrigerators, degreases range hoods and stovetops, cleans behind and underneath heavy equipment, and tackles grout lines, cabinet faces, and baseboards that most people skip entirely. A professional deep clean removes the built-up grease, grime, and bacteria that regular wiping simply cannot reach. Here is a quick look at what a kitchen deep clean from AlphaLux typically includes: Oven interior cleaning, including racks, walls, and door glass Refrigerator interior wipe-down and deodorizing Range hood and filter degreasing Cabinet exterior scrubbing Sink and faucet sanitizing Floor cleaning, including corners and edges Countertop and backsplash disinfecting When it matters most Certain situations call for a professional deep clean rather than a standard wipe-down. If you are moving into a new home, preparing a rental for new tenants, recovering from a kitchen renovation, or simply realizing your kitchen has not had a thorough clean in months, a professional service is the right move. Businesses running commercial kitchens or office break rooms should schedule professional cleaning regularly to maintain sanitation standards and keep staff and clients comfortable. A single visit can also give you a proper reset before you start maintaining the space yourself. Helpful tips When you book with AlphaLux, clear your countertops and empty your fridge before the team arrives. This allows the cleaners to reach every surface without wasting time moving items around. You should also flag any specific problem areas upfront, whether that is a burnt oven bottom, a greasy range hood, or a fridge with a persistent odor. The more detail you provide ahead of the appointment, the more thorough and targeted the results will be. 2. Set up your kitchen cleaning routine A cleaning routine only works when it fits your real life. Before you commit to any schedule, think about how often your kitchen gets used, how many people cook in it, and how much time you can realistically set aside each day. Building a routine around your actual habits is what makes it stick long-term. What it covers Setting up your routine means deciding which tasks belong to which frequency tier. Your kitchen cleaning checklist works best when divided into daily, weekly, monthly, and seasonal layers, each matched to how much attention those areas actually need. Here is a simple way to think about it: Daily: high-contact surfaces like stovetops, sinks, and countertops Weekly: appliance exteriors, floors, and the inside of the microwave Monthly: refrigerator interiors, cabinet faces, and range hood filters Seasonal: deep cleaning behind appliances, inside cabinets, and overlooked fixtures When it matters most Your routine matters most when life gets busy and consistency becomes harder to maintain. Picking a specific time for daily tasks, like right after dinner, removes the decision fatigue that causes skipped cleaning. Writing your schedule down and posting it somewhere visible makes it far more likely you will follow through. A routine built around your real habits will always outperform a perfect one you never follow. Helpful tips Start with two or three non-negotiable daily tasks before adding anything else. Once those feel automatic, layering in weekly and monthly tasks becomes much easier. A simple checklist format lets you track what gets done and catch gaps before they turn into bigger cleaning problems down the line. 3. Daily kitchen cleaning checklist Your daily tasks are the backbone of any kitchen cleaning checklist. They take less than ten minutes when done consistently, but skipping even a few days allows grease, bacteria, and odors to build up fast. The goal with daily cleaning is to reset your kitchen after each use so it never reaches a point where a quick wipe-down is no longer enough. What it covers Daily kitchen cleaning focuses on the high-contact surfaces and items that collect grime with every meal. These are the areas that affect both hygiene and how your kitchen feels to cook in the next day. Wipe down stovetop and burner grates after cooking Clean countertops with a food-safe disinfectant Wash dishes or run the dishwasher Rinse and dry the sink, then wipe the faucet Empty the trash if it is full or smells Sweep or spot-clean the floor around the stove and prep areas Wipe down the exterior of appliances you touched during cooking When it matters most Daily cleaning matters most on the days you cook the most, especially after meals involving oil, raw meat, or anything that splatters. Doing these tasks
Commercial Cleaning for Gyms in Long Island: The Premium Sanitation Standard for 2026

Could the invisible state of your facility be the silent factor impacting your member retention rates? While a busy gym floor is a sign of success, it also introduces complex challenges like persistent locker room odors and the serious risk of skin infections such as MRSA or staph. You understand that providing a safe, high-end environment is essential, yet finding a reliable partner for commercial cleaning for gyms long island often feels like a compromise between harsh chemicals and inconsistent results. We believe that a pristine facility is a vital component of a well-managed life and a thriving business. This article explores how specialized, eco-friendly deep cleaning protects your athletes, preserves your strength equipment, and meets the rigorous sanitation standards of 2026. With corporate wellness mandates increasing by 20% this year, your commitment to hygiene is now a primary competitive advantage. You will learn how a meticulous approach to sanitation reduces your liability and ensures your cardio machines last for years. We will preview the essential protocols that transform your gym from a simple workout space into a premium sanctuary for health and mental clarity. Key Takeaways Understand why standard janitorial services often fall short and how addressing bio-load on specialized fitness surfaces is essential for athlete safety. Discover the “Clean-First” philosophy that ensures high-moisture areas like locker rooms are truly sanitized rather than just visually refreshed. Learn how specialized commercial cleaning for gyms long island uses non-toxic, eco-friendly products to protect your members from skin infections and respiratory issues. Identify the specific New York State health regulations and local county expectations that impact how you manage your fitness center’s sanitation. Explore how to customize a recurring cleaning plan that preserves your expensive equipment and creates a premium sensory experience for every member. Table of Contents The Stakes of Fitness Hygiene: Why Long Island Gyms Require Specialized Care The AlphaLux Cleaning Deep Cleaning Protocol for Fitness Facilities Eco-Friendly vs. Industrial Chemicals: Protecting Your Athletes’ Health Navigating Local Compliance and Safety for Long Island Gyms AlphaLux: Your Partner in Long Island Gym Excellence The Stakes of Fitness Hygiene: Why Long Island Gyms Require Specialized Care Gym cleaning is much more than a cosmetic chore. It’s the specialized process of removing bio-load, sweat, and pathogens from both porous and non-porous fitness surfaces. In a high-traffic environment, organic material accumulates rapidly on rubber mats, vinyl upholstery, and steel weights. Standard janitorial services often fail here because they treat a fitness center like a typical office. While a general commercial cleaning crew might focus on emptying bins and wiping glass, they frequently overlook the microscopic layers of skin cells and moisture that harbor bacteria. Without specialized knowledge of fitness-specific biology, standard cleaning simply moves dirt around rather than eliminating it. The sensory experience of your facility directly impacts your bottom line. In 2026, member retention is closely tied to facility scent. A persistent “gym funk” isn’t just an inconvenience; it’s a sign of bacterial growth deep within porous materials. Masking these odors with heavy perfumes often backfires, creating a cloying environment that suggests poor hygiene. Meticulous deep cleaning is the only permanent solution for these odors. By extracting the source of the smell from floor crevices and equipment seams, you provide the fresh, neutral environment that modern athletes expect. Pathogen Protection: Beyond the Surface Communal fitness spaces are high-risk zones for infections. High-touch areas like free weights, cardio touchscreens, and yoga mats are prime real estate for MRSA, staph, and ringworm. These pathogens thrive in the warm, humid conditions common in Nassau and Suffolk training centers. The professionals at AlphaLux Cleaning target the microscopic layer of grime that competitors miss. By focusing on the microscopic level, we ensure that every square inch of your facility is safe for skin contact, reducing your liability and protecting the health of your community. The Long Island Fitness Market: A Competitive Landscape Fitness enthusiasts in Nassau and Suffolk counties have exceptionally high expectations. In a market saturated with boutique studios and luxury clubs, facility aesthetics are a major differentiator. Prospective members often check Google and Yelp reviews specifically for mentions of cleanliness before signing a contract. A single negative comment about a dusty fan or a lingering locker room odor can deter dozens of leads. Investing in commercial cleaning for gyms long island allows you to position your facility as a premium destination. When your space reflects meticulous maintenance, you justify premium membership rates and build long-term trust with your clientele. The AlphaLux Cleaning Deep Cleaning Protocol for Fitness Facilities True sanitation requires more than a quick spray of disinfectant. Many providers rely on technology like electrostatic sprayers to coat surfaces, but they often ignore the physical layer of soil already present. You simply can’t effectively disinfect a surface that’s covered in dirt, sweat, or body oils. The AlphaLux Cleaning “Clean-First” philosophy dictates that every surface must be physically cleaned before any sanitizing agent is applied. This meticulous two-step process ensures that pathogens have nowhere to hide. It’s the reason our commercial cleaning for gyms long island is considered the gold standard for high-traffic fitness environments. Every gym has a unique layout and specialized flooring. Whether you have rubberized weight room floors or high-end locker room tiling, our plans are customized to match your specific materials. We only deploy insured professionals who undergo a rigorous vetting process. This high standard ensures that your facility is handled with the precision and respect it deserves. Our staff understands the difference between a standard floor buffer and the specialized equipment needed for gym mats. If you’re looking for a partner who understands these complexities, you can explore our commercial cleaning options to find a plan that fits your facility’s needs. Step 1: Intensive Soil and Bio-Load Removal We begin by using non-toxic surfactants specifically designed to break down the stubborn body oils and sweat buildup found on fitness equipment. Our team pays particular attention to the “dust zones” that standard crews often ignore. We meticulously clean baseboards, the areas behind
8 Best Vacation Rental Cleaning Service Options In NY
A single bad review about cleanliness can tank your Airbnb listing faster than almost anything else. If you manage a short-term rental in New York, finding a reliable vacation rental cleaning service isn’t optional, it’s the backbone of your guest experience and your reputation. Between tight turnover windows, high guest expectations, and the sheer volume of bookings during peak season, handling cleaning on your own gets old fast. At AlphaLux Cleaning, we work with property owners across New York who need consistent, detail-oriented turnovers they don’t have to think twice about. We know what it takes to keep a rental guest-ready because we do it every day, and we also know we’re not the only solid option out there. That’s why we put together this list with honesty in mind, not just self-promotion. Below, you’ll find eight of the best vacation rental cleaning services operating in New York, including what each one does well and who they’re the best fit for. Whether you manage one property on Long Island or a portfolio across the state, this guide will help you choose a cleaning partner that actually shows up and delivers. 1. AlphaLux Cleaning AlphaLux Cleaning is a New York-based professional cleaning company built to handle both residential properties and short-term rental turnovers across the state. Their staff is fully insured, background-checked, and trained to work within the tight windows that vacation rental hosts deal with between check-out and check-in. What sets them apart from a general cleaning company is their focus on consistency, which is exactly what rental hosts need most. What AlphaLux Cleaning covers for turnovers AlphaLux covers the full scope of a vacation rental cleaning service: linen changes, kitchen sanitizing, bathroom deep cleans, floor care, and restocking guest supplies. Every job follows a property-specific checklist so nothing falls through the cracks between one guest leaving and the next arriving. They also use eco-friendly, non-toxic products, which is a plus if your guests include families or people with sensitivities. A documented, property-specific checklist is what separates a one-time good clean from a turnover operation you can actually count on. Who AlphaLux Cleaning fits best in NY AlphaLux works best for individual hosts and small portfolio managers operating across New York, especially on Long Island. If you want a direct working relationship with a vetted local team rather than sorting through unknown cleaners on a third-party marketplace, this setup removes a lot of the guesswork and gives you real accountability. Pros and cons to consider Before committing, here is a clear look at both sides: Pros: Fully insured staff, eco-friendly products, customized turnover plans, free estimates, direct communication with the team Cons: Service area is limited to New York, so hosts with properties in other states will need to look at another option Pricing and how quotes work AlphaLux builds quotes around your specific property size, turnover frequency, and requirements. There are no platform fees or booking surcharges layered on top. Hosts who schedule recurring turnovers typically lock in better rates than those booking one-off cleans. How to book and set turnover standards You book directly through the AlphaLux Cleaning website using their online request form. From there, you work with the team to lock in your checklist, preferred timing windows, and any property-specific instructions around linens, restocking, or access logistics. 2. Turno Turno (formerly TurnoverBnB) is a dedicated marketplace and scheduling platform built specifically for short-term rental hosts. It connects you with local cleaners who specialize in turnovers and integrates with major booking calendars so cleanings can trigger automatically after each checkout. How Turno helps you manage turnover cleanings Turno syncs with your Airbnb, VRBO, or other booking platforms to auto-schedule cleanings the moment a guest checks out. You can send cleaners a custom checklist and receive photo confirmation when the job wraps up, cutting down on the back-and-forth follow-up most hosts deal with. Who Turno fits best in NY Turno works best for hosts managing multiple properties who want a software-first approach to turnover coordination. If you already have a trusted cleaner, you can also add them directly to the platform rather than hiring from the marketplace. Pros and cons to consider Pros: Calendar sync, photo verification, custom checklists, built-in payments Cons: Cleaner quality varies by area, and vetting each one falls on you Automation handles the scheduling, but the quality of your vacation rental cleaning service still depends entirely on who you choose to do the work. Pricing and platform fees Turno takes a small percentage of each cleaning transaction. There is no monthly fee for basic access, which keeps the entry cost low for hosts just getting started. How to set up listings, checklists, and scheduling You build a property profile inside Turno, connect your booking calendar, and create a checklist for each unit. Once that is in place, cleaners get automatic notifications every time a checkout is confirmed. 3. Merry Maids Merry Maids is a national franchise cleaning brand with locations operating across New York State. They serve both residential and commercial clients, and some franchise locations will accommodate short-term rental turnovers depending on your property’s location and scheduling needs. What Merry Maids offers for vacation rentals Standard residential cleaning services make up the core of what Merry Maids delivers, including kitchen and bathroom sanitizing, floor care, and surface cleaning. How well this translates into a reliable vacation rental cleaning service depends largely on which local franchise you contact, since each one operates independently and controls its own scope of work. Who Merry Maids fits best in NY This option works best for hosts who already use Merry Maids for their primary residence and want to extend that relationship to a nearby rental. If you prefer the assurance of a nationally recognized brand over sourcing an independent cleaner, Merry Maids offers that name recognition and baseline consistency. Pros and cons to consider Pros: Established brand, insured staff, multiple NY franchise locations Cons: Not purpose-built for STR turnovers, and checklist customization varies by franchise Confirm
Affordable Apartment Cleaning in Brooklyn: Quality Meets Value in 2026
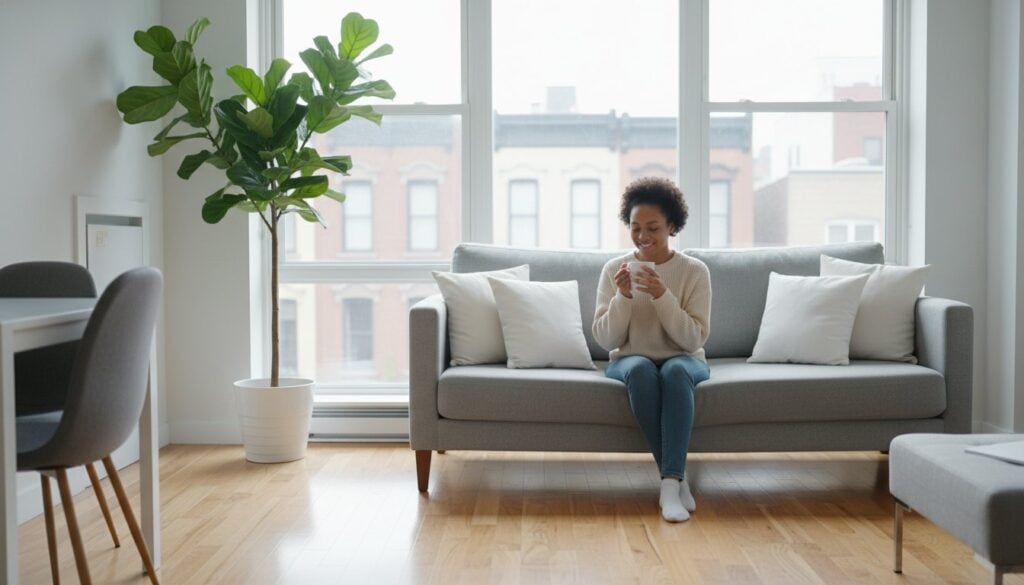
Is it truly possible to secure a meticulous, professional clean in a city where the cost of living feels like a constant upward climb? For many New Yorkers, the search for affordable apartment cleaning brooklyn often feels like a stressful choice between unreliable budget apps and services that are simply out of reach. You’ve likely felt the frustration of inconsistent results or the anxiety of letting unvetted individuals into your personal space. We believe that maintaining a beautiful home shouldn’t be a source of stress or a risk to your peace of mind. With the New York City minimum wage now at $17.00 per hour, the landscape of professional services is evolving. This guide will show you how to navigate these changes to find high-quality care that fits your budget without compromising on safety or eco-friendly standards. You’ll learn how to identify providers who treat cleaning as a professional craft, allowing you to reclaim your personal time and enjoy the quiet satisfaction of a well-maintained environment. We’ll explore the essential markers of value that ensure your apartment remains a healthy, serene sanctuary. Key Takeaways Understand how to define true value by balancing professional reliability and safety with your budget rather than simply seeking the lowest hourly rate. Identify why professional insurance and bonding are non-negotiable requirements for protecting your home and providing peace of mind. Learn how recurring service plans offer a more cost-effective path to affordable apartment cleaning brooklyn compared to one-time deep cleaning appointments. Discover the lifestyle benefits of non-toxic, eco-friendly cleaning standards that promote a healthier indoor environment for your family and pets. Gain insights into how a customized cleaning checklist ensures your specific needs are met while maximizing the efficiency of every service visit. Table of Contents Navigating the Search for Affordable Apartment Cleaning in Brooklyn Defining Real Value: What to Expect from an NYC Cleaning Service How to Vet Budget-Friendly Cleaners Without Sacrificing Security Maximizing Your Cleaning Budget: Recurring vs. One-Time Plans AlphaLux Cleaning: Premium Brooklyn Apartment Care at Accessible Rates Navigating the Search for Affordable Apartment Cleaning in Brooklyn Living in Brooklyn often means balancing a high-energy career with a social life that spans from Dumbo to Bay Ridge. Amidst the late nights and long commutes, your apartment should serve as a restorative sanctuary rather than another item on your to-do list. Finding affordable apartment cleaning brooklyn is not merely about finding the lowest possible price point. It’s about securing a service that respects your space and your schedule. In 2026, the market has shifted. Modern residents now understand that true affordability is found at the intersection of professional efficiency and long-term reliability. Choosing a “budget” option from an unvetted platform often introduces hidden costs that many residents overlook. You might find yourself purchasing expensive cleaning supplies or managing the logistical headache of a cleaner who lacks professional equipment. There is also the significant risk associated with workers who aren’t insured or bonded. A professional service manages these complexities for you. They provide the peace of mind that comes with knowing your home is in expert hands. This transition allows you to reclaim hours of your weekend, transforming a routine chore into a lifestyle solution that supports your mental clarity. The Brooklyn Apartment Challenge Brooklyn homes present unique maintenance hurdles that suburban cleaning services rarely encounter. High-traffic streets often lead to a persistent layer of urban soot on windowsills and surfaces. Limited storage in historic walk-ups means most residents don’t have room for bulky industrial vacuums or a dozen specialized chemicals. Professional teams arrive prepared with compact, high-performance tools designed for the specific needs of NYC architecture. Whether you live in a sprawling Bed-Stuy brownstone with original hardwood or a modern studio in Downtown Brooklyn, specialized care is required to preserve older building materials while ensuring a deep, hygienic clean. Shifting from Price-First to Value-First Value is defined by the quality of the result relative to the investment. A comprehensive What to Expect from an NYC Cleaning Service includes meticulous attention to high-touch areas and the use of professional-grade, eco-friendly supplies. These non-toxic products are a vital investment in your long-term health, especially in the smaller footprints of city apartments. Returning to a space that has been handled with precision provides a psychological lift that far outweighs the cost of the service. It’s the relief of knowing that every corner has been dusted and every floor sanitized; this allows you to breathe easier in the place you call home. Securing affordable apartment cleaning brooklyn shouldn’t mean sacrificing the quality of the products used in your living environment. Defining Real Value: What to Expect from an NYC Cleaning Service True value in the New York market isn’t found by simply selecting the lowest quote. Instead, it’s a careful calculation where reliability, thoroughness, and safety are weighed against the total cost. When you seek affordable apartment cleaning brooklyn, you’re looking for a partner who delivers a meticulous result every time, ensuring you don’t have to spend your own time re-cleaning missed spots. A professional service should provide a clear, standardized checklist that includes dusting all surfaces, sanitizing high-touch areas, vacuuming, and mopping floors with precision. This structured approach transforms a simple house chore into a professional craft, providing the relief of a truly refreshed environment. Transparency is another hallmark of a trustworthy provider. In a city where deceptive trade practices can be common, a reputable company will offer straightforward pricing without hidden fees. With the NYC minimum wage reaching $17.00 per hour in 2026, realistic pricing reflects a commitment to fair labor and high standards. It’s essential to Vet Budget-Friendly Cleaners to ensure they are properly bonded and insured. This protects your home from the unexpected and establishes a foundation of trust that discount platforms often lack. By prioritizing these professional protections, you ensure that your investment in a clean home is also an investment in your own security. Standard vs. Deep Cleaning: Choosing for Your Budget Understanding the difference between service levels is key
Professional Carpet Cleaning Cost: Per Room Vs. Sq Ft In NY
If you’re getting quotes for carpet cleaning in New York, you’ve probably noticed that prices vary, a lot. Some companies charge by the room, others by the square foot, and a few seem to pull numbers out of thin air. Understanding the real professional carpet cleaning cost before you book means you won’t overpay, and you’ll know exactly what you’re getting. Pricing transparency matters, especially when you’re comparing services across Long Island or anywhere else in the state. At AlphaLux Cleaning, we believe you deserve straight answers about what things cost and why. We’ve put together this guide based on current New York pricing so you can see how per-room and per-square-foot rates actually break down. We’ll cover the factors that shift the price, cleaning method, carpet condition, home size, and help you figure out which pricing model works best for your space. By the end, you’ll have a clear picture of what to budget and what questions to ask before hiring any carpet cleaning service in New York. Why professional carpet cleaning costs vary in NY New York isn’t a single market. Prices in Manhattan and prices in upstate New York can differ by 30% or more for the exact same job. Labor costs, overhead, and local competition all push rates in different directions, which is why two companies quoting on the same carpet can give you completely different numbers. Knowing what actually moves the price helps you read those quotes accurately and budget before you book. The professional carpet cleaning cost in New York depends on multiple overlapping factors, not just the size of your carpet. Location and local market rates Long Island and the New York City metro area tend to carry higher rates than rural parts of the state. A company operating out of Nassau County pays more for labor, insurance, and fuel than one working in a smaller upstate town, and those costs get passed on to you. Expect to pay roughly 15 to 25% above national averages if your property sits in the metro area or on Long Island. Your ZIP code also determines how many cleaning providers are competing for your business. More competition in dense areas can push prices lower, but it can also create wide variation in service quality, so the cheapest quote isn’t always the best one. Carpet size and condition Square footage is the single biggest cost driver for most carpet cleaning jobs. A 200-square-foot living room costs significantly less than a 600-square-foot open-plan office, even when the rate per square foot stays the same. Larger spaces take more time, more product, and more equipment to clean thoroughly. Heavily soiled or stained carpet adds to the final bill. Technicians may need to pre-treat stains, apply extra solution, or run multiple passes with their equipment. If your carpet hasn’t been professionally cleaned in over a year, factor in the real possibility of an upcharge for the additional work. Type of service requested Standard maintenance cleaning costs less than a deep clean or a move-out clean. A basic refresh for a well-maintained carpet takes less time and fewer products than one that needs stain removal, deodorizing, or heavy extraction. Move-in and move-out cleans are typically the most thorough and therefore the most expensive service tier you can request. Per room vs per square foot pricing in New York When you’re comparing quotes, two pricing models will come up most often: per room and per square foot. Both are legitimate, but they produce very different numbers depending on your home’s layout and room sizes. Per room pricing Per room pricing in New York typically runs $25 to $75 per room, with averages landing around $40 to $50 for a standard bedroom or living room. Companies that use this model almost always cap the room size, usually at 200 to 300 square feet, so if your room runs larger, expect an upcharge or a renegotiated rate before the job starts. If a company charges per room without mentioning a size limit, ask about it before you book. Per square foot pricing Square footage pricing gives you more transparency when rooms vary in size. In New York, rates typically land between $0.20 and $0.40 per square foot for standard steam cleaning, with higher rates for specialty methods or heavily soiled carpet. For a 1,500-square-foot home, that puts the professional carpet cleaning cost between $300 and $600 depending on the method and the carpet’s condition. The table below shows how each model compares at different home sizes: Space Size Per Room (avg. $45/room) Per Sq Ft (avg. $0.30) 1 room / 200 sq ft $45 $60 3 rooms / 600 sq ft $135 $180 5 rooms / 1,000 sq ft $225 $300 For larger open-plan spaces, per square foot pricing usually gives you a fairer number. For smaller homes with standard-sized rooms, per room pricing can work out to be the better deal. What drives the final price in NY homes and offices Beyond room count and square footage, several other variables push the professional carpet cleaning cost up or down before the technician even unrolls a hose. Understanding these factors helps you anticipate what your quote will look like and gives you leverage when discussing pricing with a provider. Carpet type and fiber material Wool, silk, and natural fiber carpets require gentler, more labor-intensive cleaning methods than synthetic options like nylon or polyester. Specialty fibers can increase the base rate by 10 to 20% because technicians need to use different equipment settings and approved solutions to avoid damage. If your home has high-end area rugs or wall-to-wall natural fiber carpet, expect that to show up in the quote. Telling your cleaning company the carpet fiber type upfront can prevent surprises on the final invoice. Number of floors and accessibility Multi-story homes and office buildings add complexity to any carpet cleaning job. Hauling equipment up stairs takes more time and physical effort, and some companies charge a per-floor fee or adjust their hourly rate