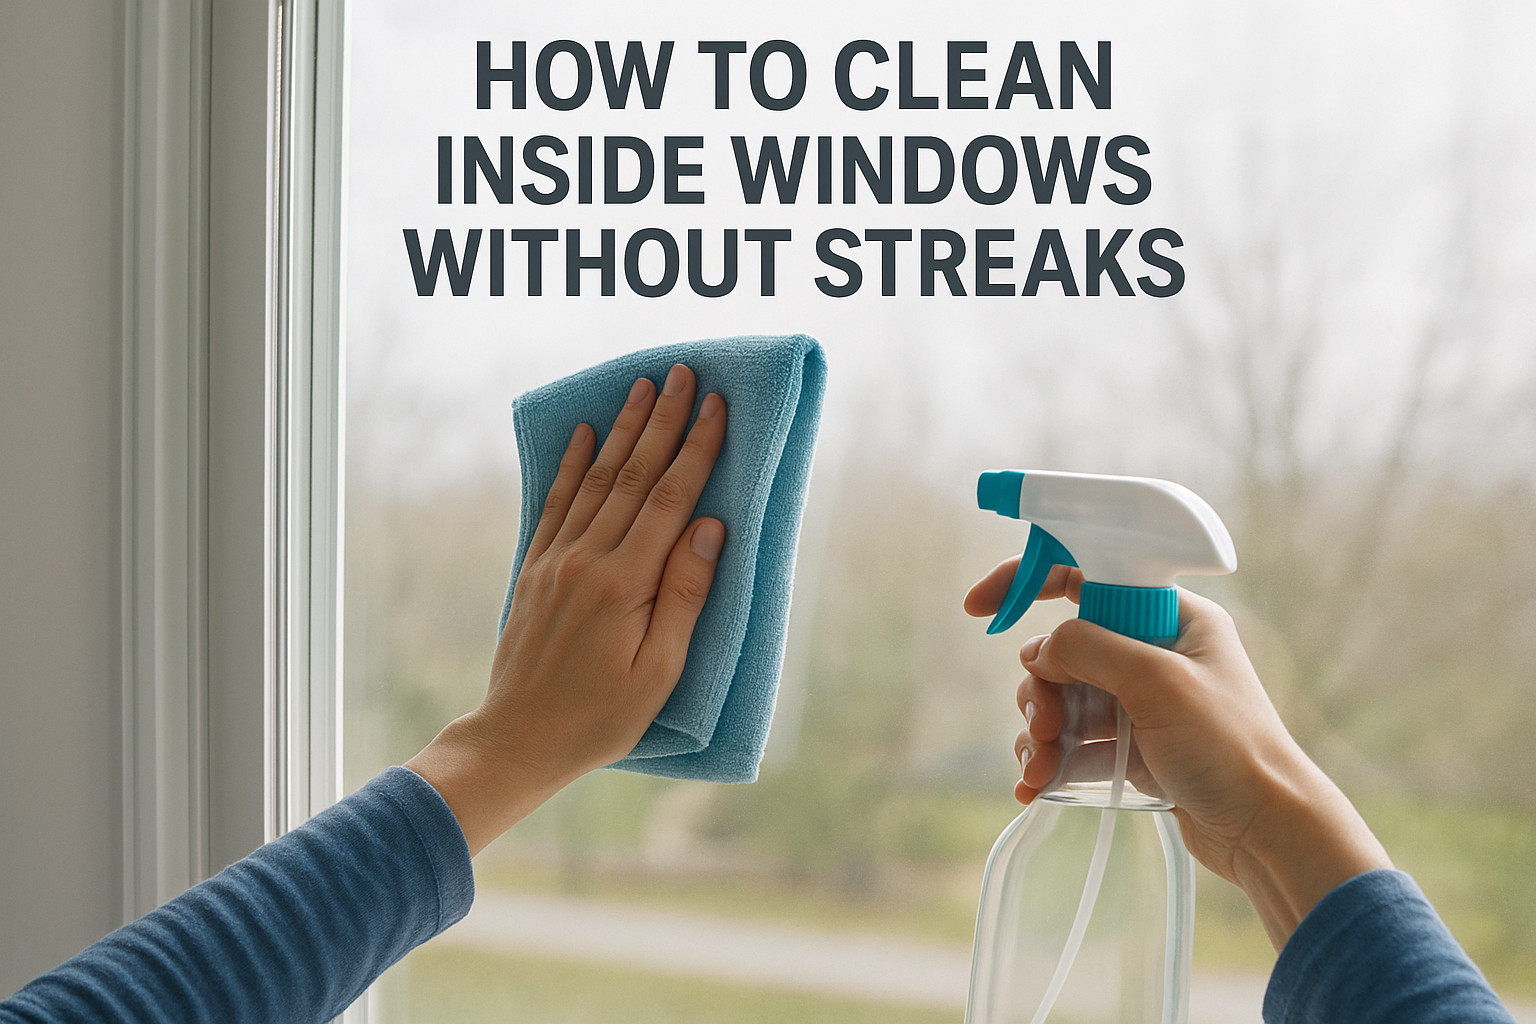
You cleaned your windows, stepped back to admire the results, and now all you see are streaks catching the sunlight. Frustrating, right? Figuring out how to clean inside windows the right way isn’t complicated, but there’s a method to it, and most people skip the steps that actually matter. The good news is that a streak-free finish is completely achievable with a few simple tools and the right technique.
At AlphaLux Cleaning, we clean interior windows across homes and businesses throughout New York every day. Our team knows exactly what works, what doesn’t, and why certain products leave residue behind. We put this guide together based on the methods our professionals actually use on the job, not recycled tips from the back of a spray bottle.
Below, you’ll find a clear, step-by-step process for cleaning your inside windows and tracks, from choosing the right solution to the final wipe-down. Whether you’re prepping for guests, handling a move-out, or just tired of looking through smudged glass, this guide will get you there.
What you need before you start
Having the right supplies ready before you start makes the entire process faster and more effective. Gathering everything upfront means you won’t have to stop mid-clean to hunt for a cloth or run to the store. For anyone serious about learning how to clean inside windows without leaving streaks, setup is half the job.
Cleaning solutions
The solution you choose directly affects your results. Dish soap mixed with warm water (a few drops per gallon) is one of the most reliable options for cutting through grime. If you prefer something store-bought, a dedicated glass cleaner works well, but avoid anything with bleach or heavy fragrance since those tend to leave residue behind.
Skip multi-purpose sprays on glass. Most of them contain ingredients that evaporate unevenly and leave a film on the surface.
You can also make a DIY solution using distilled white vinegar and distilled water in a 1:1 ratio. Tap water contains minerals that cause spots, so using distilled water is worth the extra step if you want a truly clean finish.
Tools and supplies
Your tools matter just as much as your cleaning solution. A microfiber cloth or a lint-free cloth is the most important item on this list since paper towels leave fibers on the glass. A rubber-bladed squeegee is optional, but it dramatically speeds up the process on larger windows and reduces the chance of streaking.
Here’s a quick checklist of what to have ready before you begin:
- Two microfiber cloths (one for washing, one for drying)
- A squeegee with a clean rubber blade
- A bucket or spray bottle
- Your cleaning solution (DIY or store-bought)
- A dry cloth or old toothbrush for tracks and frames
- Cotton swabs for tight corners
Having everything laid out before you begin keeps the process smooth and prevents you from rushing. Rushing is the most common reason streaks appear in the first place.
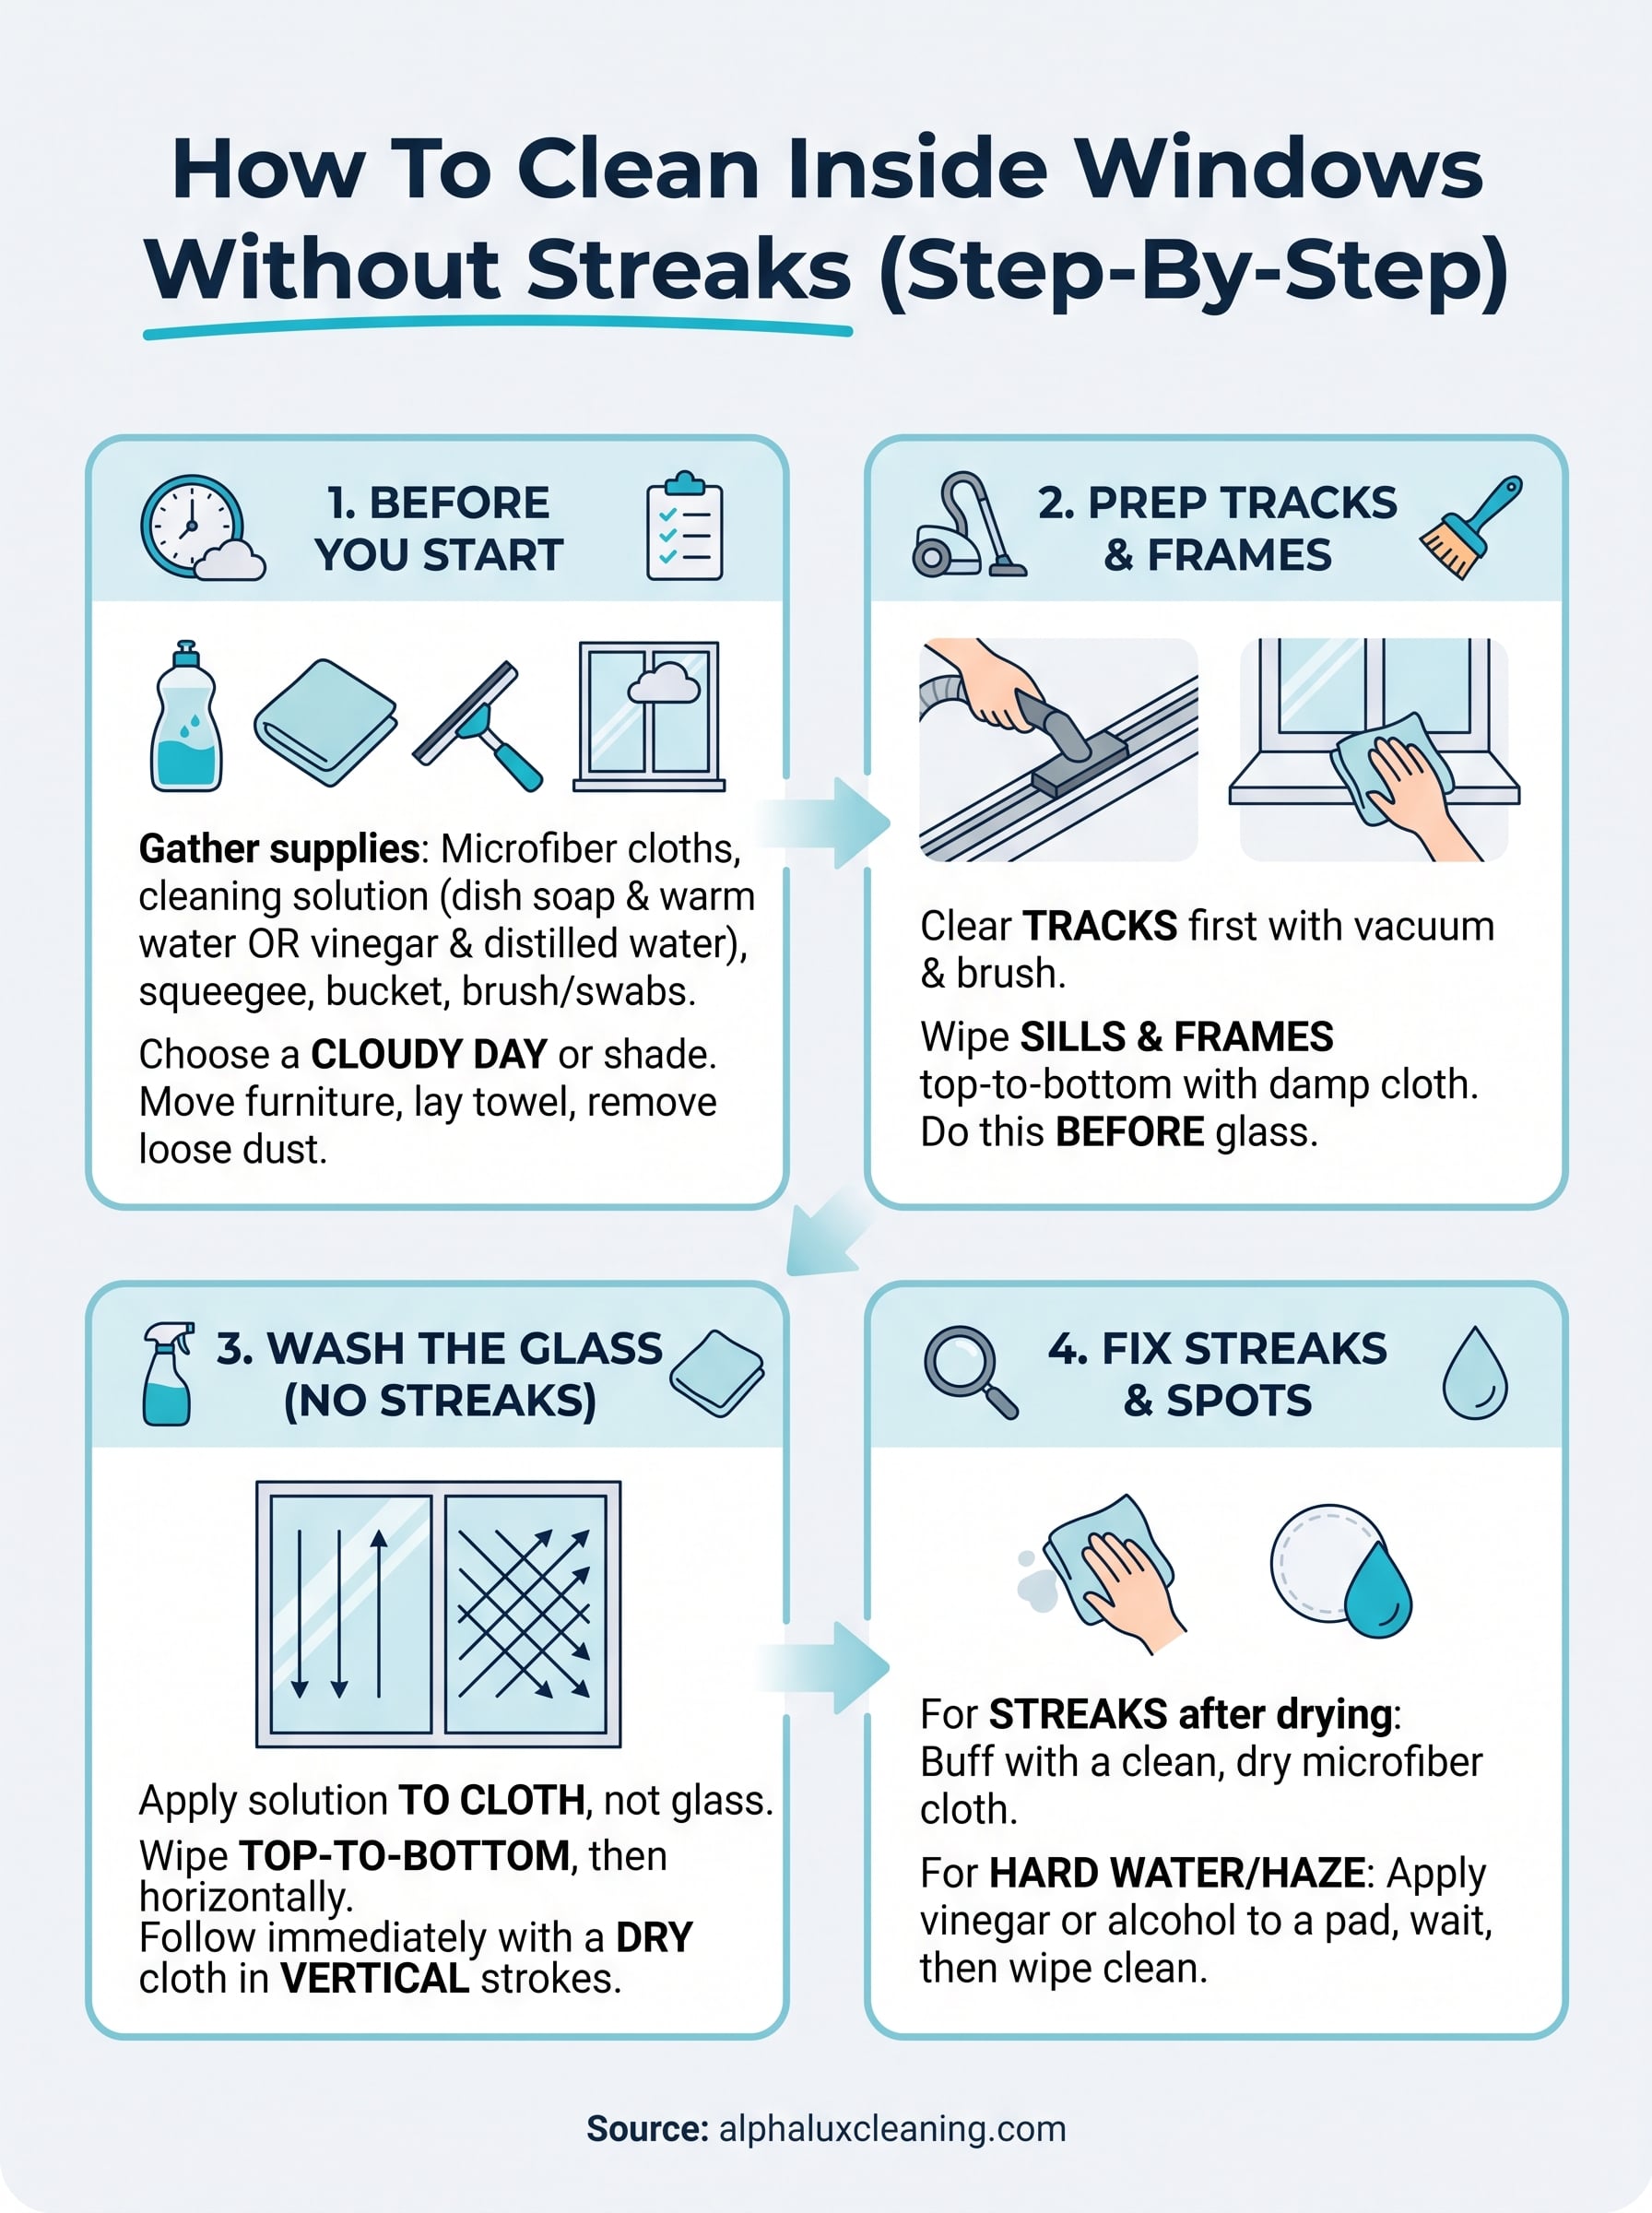
Step 1. Pick the right day and prep
Timing matters more than most people expect when figuring out how to clean inside windows. Direct sunlight hitting the glass causes your cleaning solution to dry too fast, which is the single biggest cause of streaks even when you use the right technique and the right products.
Choose the right lighting conditions
Pick a cloudy day or a shaded time of day for this task. If it’s bright outside, start with windows on the shaded side of your home first. Morning or late afternoon works much better than midday sun, and it makes it easier to spot any missed spots or smears before you move on to the next window.
Avoid cleaning windows in direct sunlight. The heat evaporates your solution before you get a chance to wipe it away cleanly.
Prep the space before you touch the glass
Move any furniture, blinds, or plants away from the window before you start. Lay a dry towel along the sill and floor below to catch any drips. Then remove loose dust and debris from the glass surface using a dry microfiber cloth or a soft brush. Skipping this step means you are pushing dry dirt around in your solution rather than lifting it off the glass entirely.
Step 2. Clean tracks, sills, and frames
Most people jump straight to the glass and skip this step entirely. That’s a mistake. Dirty tracks and frames release grime onto your freshly cleaned glass every time you open or close the window, undoing your work immediately.
Clear out the tracks first
The window tracks collect dust, dead insects, and compacted debris that a cloth alone won’t remove. Start by running a dry toothbrush or cotton swab along each track to break up the buildup. Then use your vacuum’s brush attachment to pull out the loosened debris before applying any liquid.
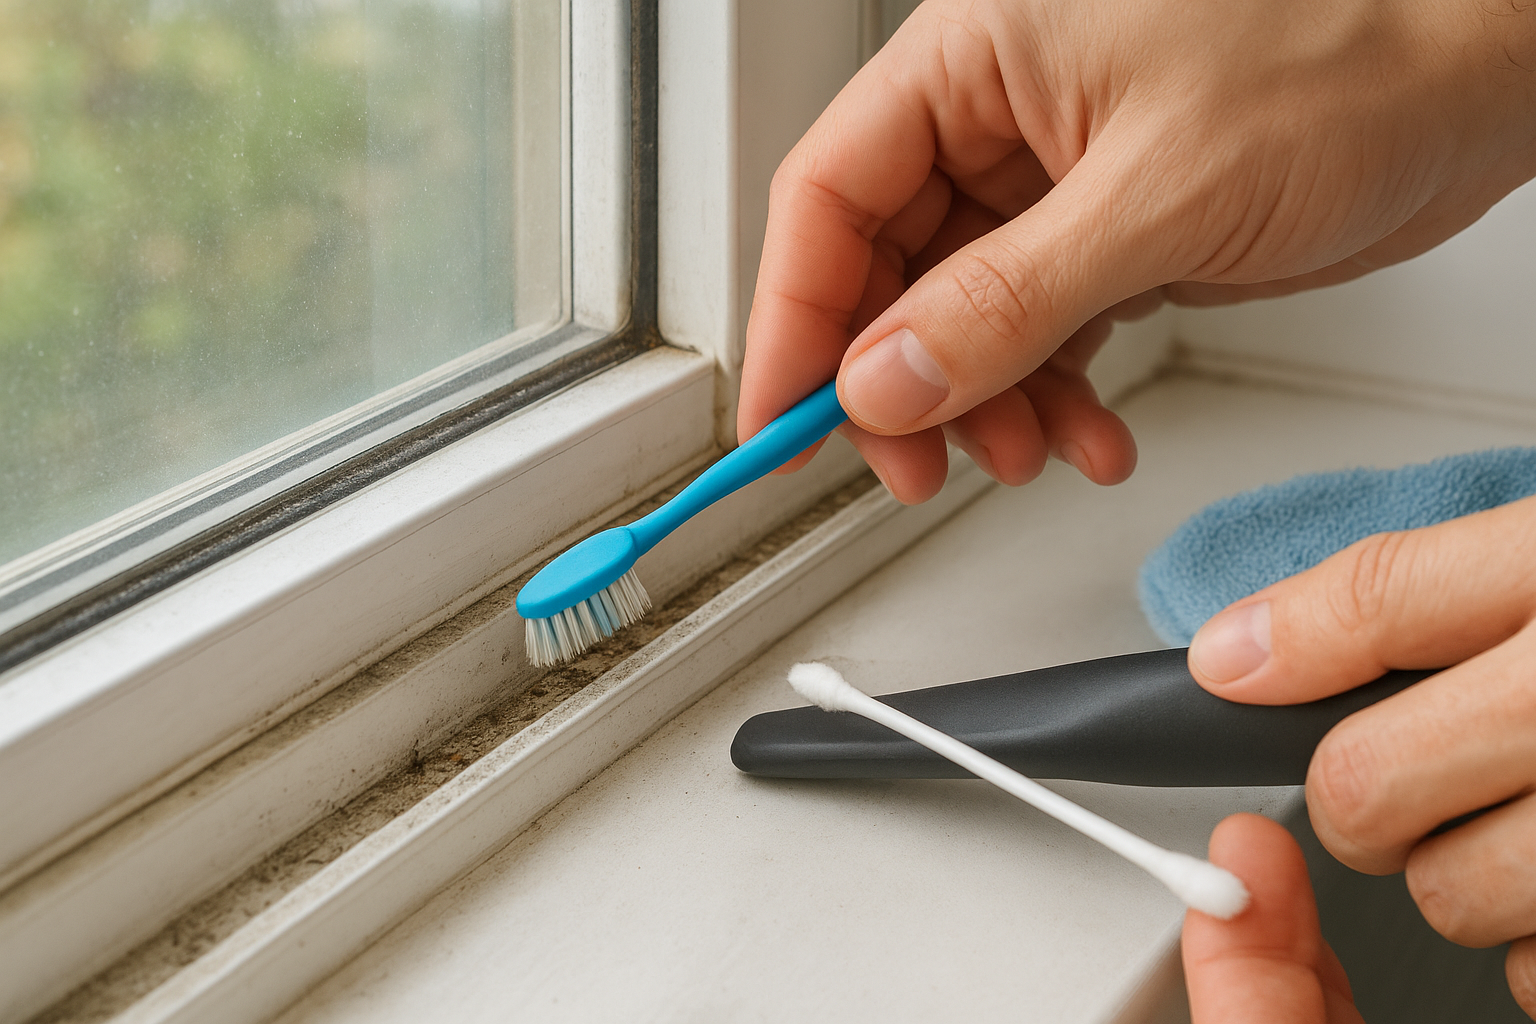
Don’t apply cleaning solution to tracks before vacuuming them out. Wet debris turns into a muddy paste that’s harder to remove than dry dirt.
Once the loose debris is gone, dip a cotton swab in your cleaning solution and run it through the track grooves. For stubborn spots, a flat-head screwdriver wrapped in a damp cloth fits neatly into the narrow channels without scratching them.
Wipe down sills and frames
After the tracks are clear, wipe the sill and frame with a damp microfiber cloth using your cleaning solution. Work from top to bottom so drips don’t land on areas you’ve already cleaned. Knowing how to clean inside windows properly means treating the entire window unit, not just the glass itself.
Step 3. Wash the glass without streaks
Now that the tracks and frames are clean, you can focus on the glass itself. How to clean inside windows without streaks comes down to two things: how you apply the solution and how you wipe it away. Most streaks happen because people spray too much product or move the cloth in random directions.
Apply the solution correctly
Spray your cleaning solution onto your microfiber cloth rather than directly onto the glass. Spraying directly on the surface causes liquid to pool in corners and along edges, which dries before you can wipe it clean and leaves visible marks. Use a light, even coat on the cloth so the glass gets moistened without being soaked.
Here’s what to avoid when applying solution to glass:
- Spraying more than two short bursts per pane
- Letting the solution sit on the glass for more than a few seconds
- Using a cloth that’s so wet it drips onto the sill
Use the right wiping motion
The direction you wipe determines whether you end up with a clear finish or a streaky mess. Start at the top of the glass and work downward in overlapping horizontal strokes, then follow up with a dry microfiber cloth using vertical strokes on the second pass. This two-pass method catches anything the first wipe missed.
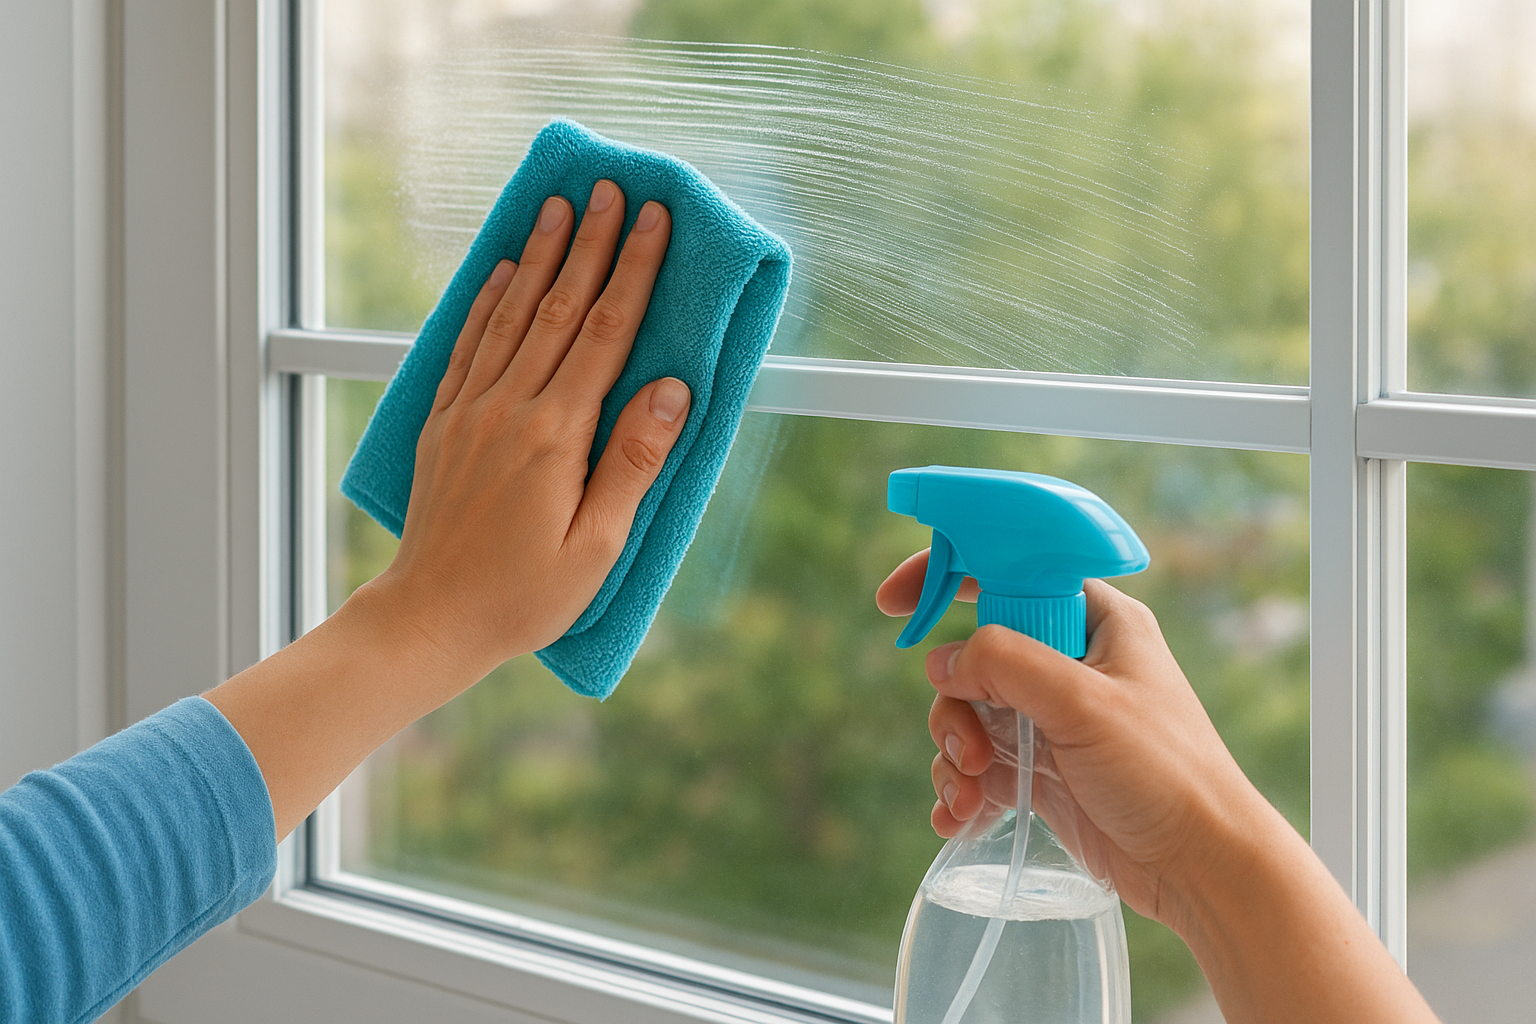
Switching direction between your wet and dry pass makes remaining streaks easy to see before they dry.
Use your second dry cloth immediately after the cleaning pass while the glass is still slightly damp.
Step 4. Fix streaks, haze, and hard spots
Even with the right technique, streaks and haze show up sometimes. Knowing how to clean inside windows means knowing how to handle the finish, not just the initial wash. Before you call the job done, inspect the glass at an angle in natural light to catch anything still sitting on the surface.
When streaks appear after drying
Streaks after the glass dries usually mean one of two things: too much product was applied, or the cloth wasn’t fully dry on the second pass. Fix this by buffing the streaked area with a clean, completely dry microfiber cloth using small circular motions. Don’t add more solution; the moisture already on the glass is enough to lift the residue.
If streaks keep reappearing no matter what you try, your cloth likely has detergent buildup from previous washes. Wash your microfiber cloths without fabric softener and try again.
Hard water spots and stubborn haze
Hard water spots are mineral deposits left behind by tap water and require a slightly different approach. Apply undiluted white vinegar directly to the spot with a cotton pad, let it sit for 30 to 60 seconds, then wipe it away with a dry cloth.
For haze that doesn’t respond to vinegar, a small amount of rubbing alcohol on a lint-free cloth cuts through the film without damaging the glass. Work in small sections and wipe immediately rather than letting the alcohol sit.
Keep them clear
Now you know how to clean inside windows without ending up with a streaky, frustrating finish. The process comes down to a few consistent habits: prep before you touch the glass, work top to bottom, use the right solution, and always follow up with a dry cloth while the surface is still slightly damp.
Keeping your windows clear long-term is easier than a full clean every time. A quick wipe-down with a dry microfiber cloth once a week removes dust and fingerprints before they build up into something harder to shift. Pay attention to the tracks too since dirty tracks are the fastest way to undo a clean glass pane.
If your windows need a full reset, or you simply want the job done properly without the effort, the AlphaLux Cleaning team is ready to help. Check out our professional cleaning services and book a free estimate today.