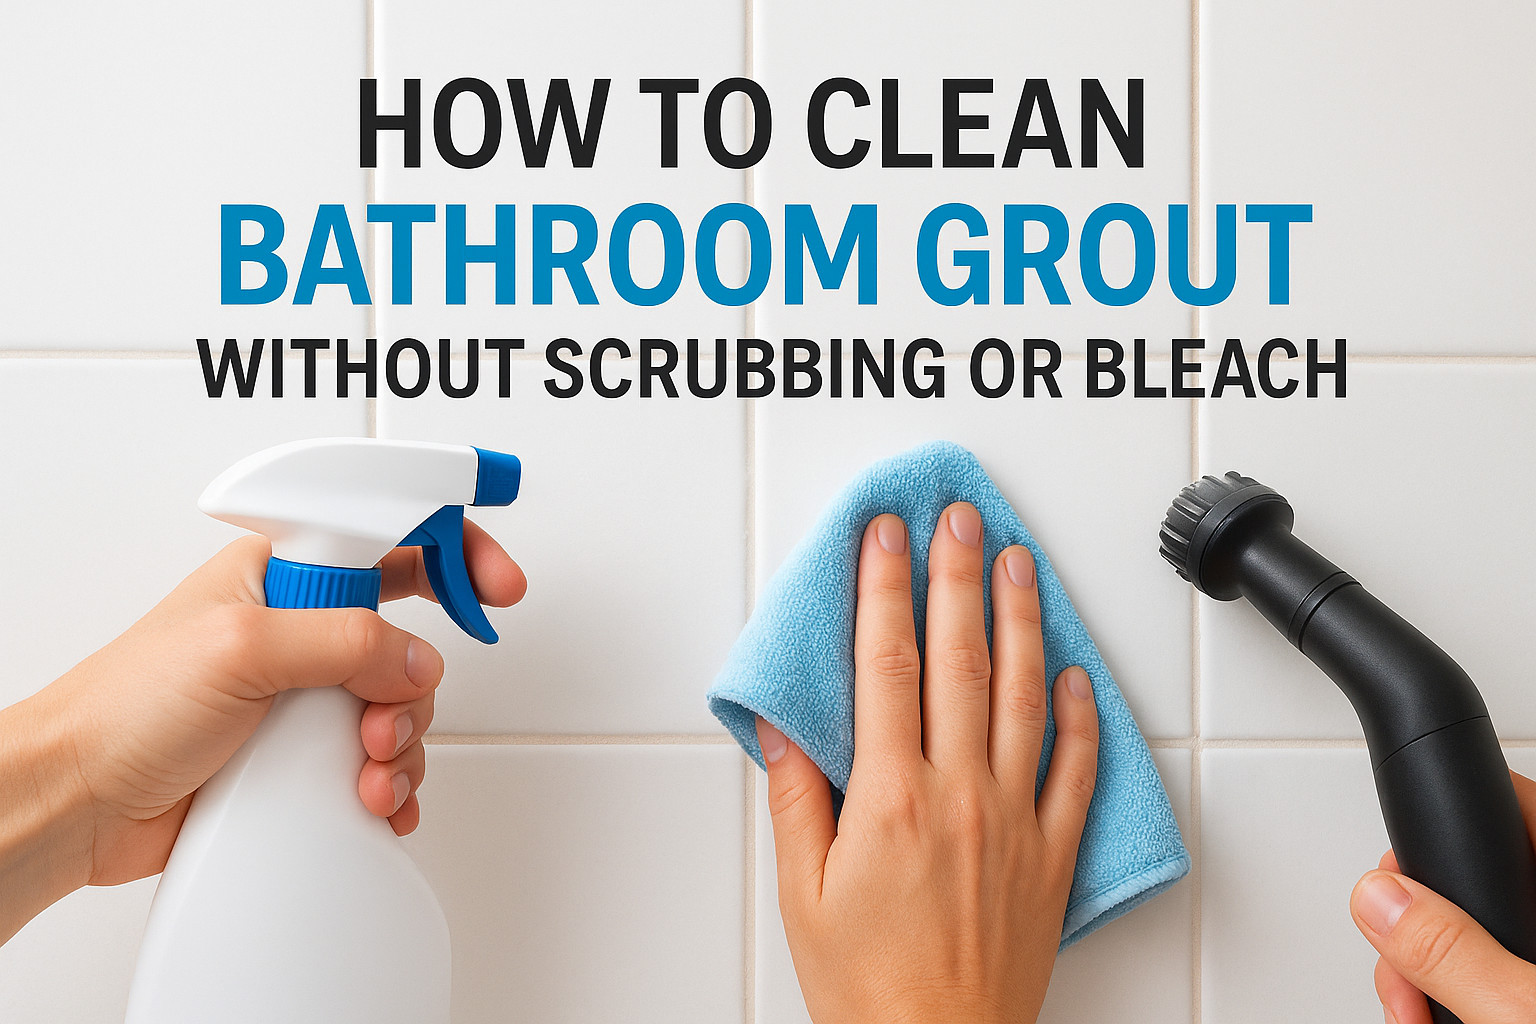
Dirty grout lines have a way of making even a recently cleaned bathroom look neglected. If you’ve been wondering how to clean bathroom grout effectively, you’re not alone, it’s one of the most common cleaning frustrations we hear about from homeowners across New York. The good news? You don’t need harsh bleach or hours of back-breaking scrubbing to get results.
At AlphaLux Cleaning, we tackle grout stains in bathrooms every day, from Manhattan apartments to Long Island family homes. Our team has tested dozens of methods and products, and we know which ones actually work, and which ones waste your time. That hands-on experience is exactly what shaped this guide, so you can get professional-level results on your own.
Below, we’ll walk you through simple, effective ways to clean bathroom grout using common household ingredients and a few targeted products. You’ll find step-by-step instructions, DIY cleaning recipes, and honest recommendations that skip the bleach entirely. Whether you’re dealing with mildew, soap scum, or mystery discoloration, this guide covers it all, so your grout looks like it did the day it was installed.
What you need before you start
Before you tackle how to clean bathroom grout the right way, set yourself up properly. Rushing into the job without the right supplies is the fastest way to waste time, damage your tile, or end up with grout that looks only marginally better than before. Most of what you need is inexpensive, easy to find, and likely already sitting in your kitchen or bathroom cabinet.
Cleaning supplies and solutions
Your grout cleaning kit doesn’t need to be elaborate. The two most effective DIY ingredients are baking soda and hydrogen peroxide, which combine into a thick paste that lifts discoloration without eroding the grout itself. For heavier buildup or mold, an oxygen-based powder cleaner like OxiClean dissolved in warm water gives you a soak-and-lift method that does most of the hard work without scrubbing.
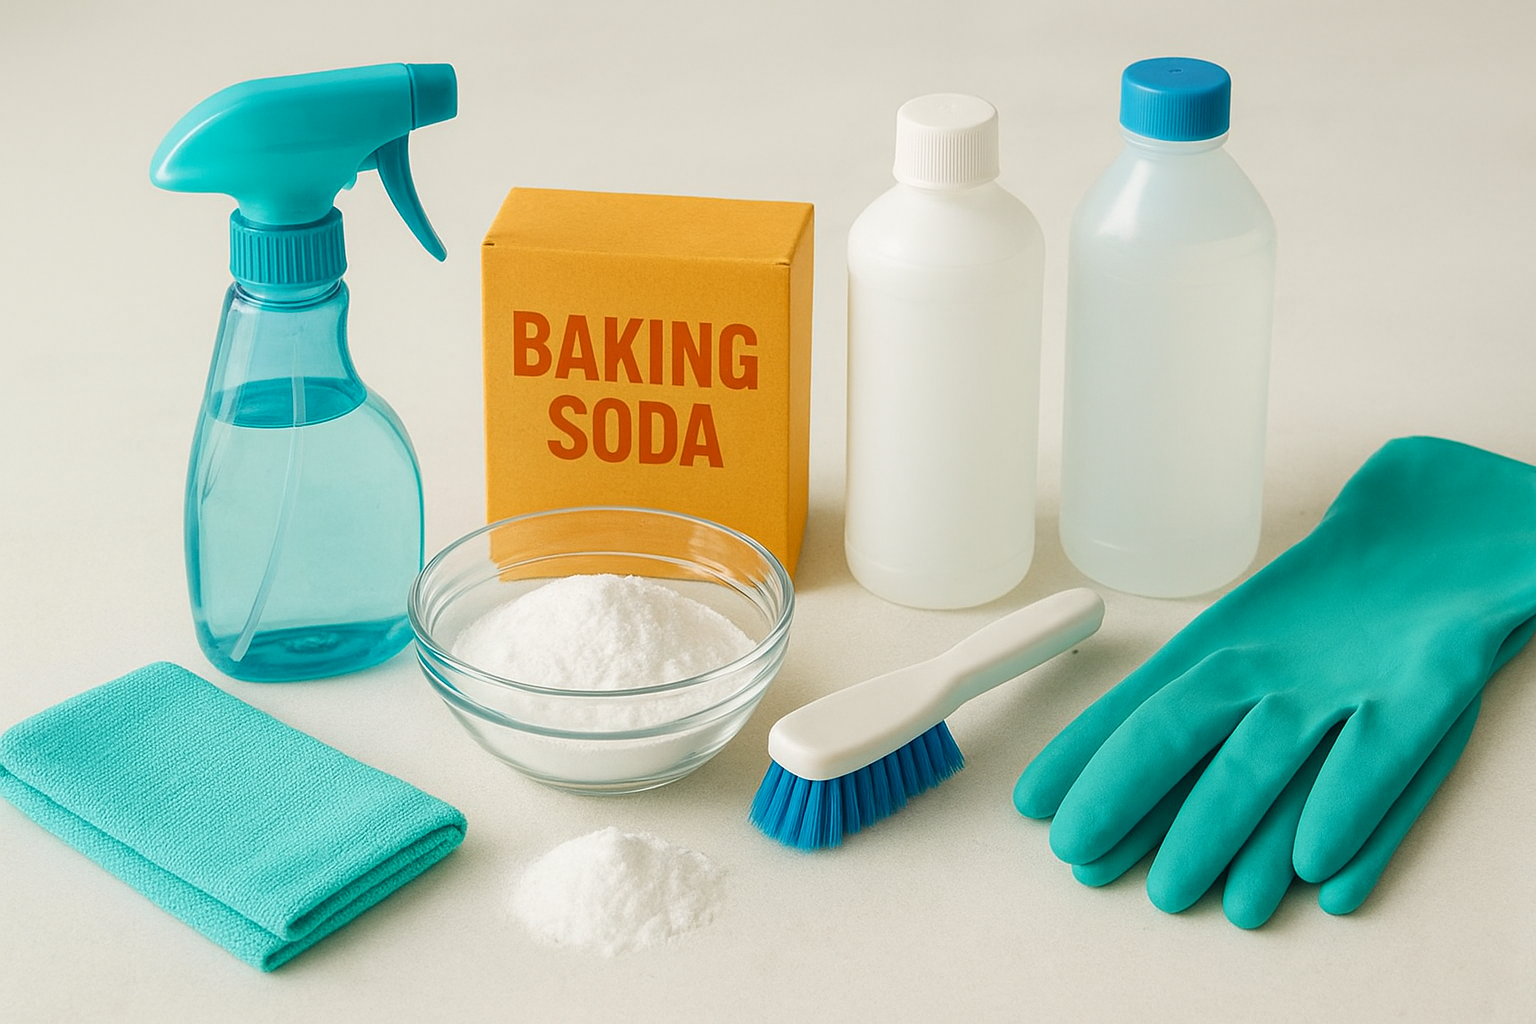
Here’s everything to have ready before you begin:
| Item | Notes |
|---|---|
| Baking soda | Standard grocery store box |
| Hydrogen peroxide (3%) | Available at any pharmacy |
| Oxygen-based cleaner | OxiClean or similar powder |
| Spray bottle | For applying liquid solutions evenly |
| Stiff-bristled grout brush | An old toothbrush works for small sections |
| Microfiber cloths | For wiping and drying surfaces |
| Rubber gloves | Protect your skin during longer jobs |
| Handheld steam cleaner | Optional, but very effective for deep grime |
Keeping all of these within arm’s reach before you start means your cleaning solutions won’t dry out while you’re searching for a missing tool, which matters more than most people realize.
What to avoid bringing into this process
Bleach is the first product many people reach for, but it’s worth skipping entirely. Bleach degrades grout over time by weakening the binder that holds it together, which causes lines to crack, crumble, and trap more stains down the road. The fumes in a small, poorly ventilated bathroom are also a genuine health concern, especially if they mix with other cleaning products accidentally.
Wire brushes and metal scrubbing pads belong on the same avoid list. Metal bristles scratch tile glazing and dig into soft grout, creating tiny grooves that collect dirt and make every future cleaning session harder. A stiff nylon brush gives you all the mechanical action you need without causing any surface damage.
Step 1. Prep the area and do a spot test
Good preparation takes about five minutes and prevents most avoidable problems. Before you learn how to clean bathroom grout effectively, you need to confirm the surface is ready and that your chosen cleaning solution won’t react badly with your specific tile. Skipping this step is how people end up with discolored tile or wasted product that dries before it can work.
Clear the surface
Remove everything from the shower or floor area before applying anything. Clear out shampoo bottles, bath mats, and soap dishes so you can reach every grout line without awkward angles. Then lightly wet the grout with warm water from your spray bottle, which opens the porous surface and helps any cleaning solution you apply next penetrate the stain instead of just sitting on top.
Here’s a quick pre-clean checklist:
- Remove all items from the shower floor, ledge, and nearby surfaces
- Open a window or turn on the exhaust fan to ventilate the room
- Wet grout lines with warm water before applying any solution
- Put on rubber gloves before you start
Run a spot test first
Pick a small, inconspicuous section of grout, such as a corner near the floor or behind a fixture, and apply your cleaning solution there first. Wait three to five minutes, then wipe it away and check for color change, surface lift, or any soft or crumbling texture.
If your test spot shows any discoloration or surface damage after wiping, stop and switch to plain warm water with a stiff nylon brush instead.
This step is especially important if your grout is colored or tinted, or if your tile is a natural stone like marble or travertine, both of which react poorly to oxidizing or acidic cleaners.
Step 2. Lift stains with an oxygen-based soak
An oxygen-based soak is one of the most effective approaches for how to clean bathroom grout that has gone dark, developed mold, or collected years of soap and mineral buildup. Unlike scrubbing, this method uses a chemical reaction to break the bond between the stain and the grout’s porous surface, so the dirt lifts out rather than getting pushed deeper in.
Mix your oxygen soak solution
Start by dissolving two tablespoons of oxygen-based powder cleaner (such as OxiClean) in two cups of warm water inside a spray bottle or small bowl. Stir until the powder is fully dissolved before you apply anything. The warm water activates the oxygen release, which is what actually breaks apart the stain rather than just masking it.
Use this table to scale your mixture based on how much area you’re cleaning:
| Area Size | Powder | Water |
|---|---|---|
| Small section (1-2 sq ft) | 1 tbsp | 1 cup |
| Standard shower floor | 2-3 tbsp | 2 cups |
| Full bathroom floor | 4-5 tbsp | 4 cups |
Let it sit, then wipe clean
Pour or spray the solution directly onto the grout lines and let it sit for 10 to 15 minutes. You may notice light fizzing, which means the oxygen is actively breaking down stain particles at the surface level.
If the solution starts to dry before the dwell time is up, mist the area lightly with plain warm water to reactivate it rather than starting over.
After the soak, use your stiff nylon brush to work the solution into any remaining spots, then rinse the entire surface with warm water and wipe it down with a microfiber cloth.
Step 3. Use steam to loosen deep grime
Steam is the most effective method for tackling deeply embedded grime in grout that oxygen soaks alone can’t fully reach. When you press a steam cleaner nozzle directly against the grout line, the high-temperature moisture penetrates the porous surface, breaks apart organic buildup like mold and soap scum, and forces it upward without any chemical contact at all.

Set up your steam cleaner
Fill your handheld steam cleaner with plain distilled water to prevent mineral deposits from forming inside the unit. Let it heat up fully before you start, which typically takes 60 to 90 seconds depending on the model. Hold the nozzle roughly one inch from the grout line so the steam concentrates directly on the buildup rather than dispersing across the surrounding tile.
Using distilled water instead of tap water extends the life of your steam cleaner and prevents white mineral residue from being deposited back onto your freshly cleaned grout.
Work in small sections
The most reliable approach to how to clean bathroom grout with steam is to move slowly across short sections of two to three feet at a time. Keep the nozzle moving steadily rather than holding it in one spot, which prevents the tile from absorbing too much heat too quickly. After each pass, wipe the loosened grime immediately with a dry microfiber cloth before it cools and re-settles into the grout line.
Follow this pattern for consistent results:
- Steam a 2-3 foot section of grout lines
- Wipe immediately with a dry microfiber cloth
- Move to the next section and repeat until the entire surface is done
Step 4. Rinse, dry, and keep grout from re-staining
The final step in learning how to clean bathroom grout properly is one most people rush through: rinsing thoroughly and drying the surface completely. If you leave cleaning residue or moisture sitting in the grout lines, you create the exact conditions that attract new dirt and encourage mold to return within days.
Rinse thoroughly and dry completely
Start by rinsing the entire cleaned area with clean warm water, working from the top of the wall downward so you’re always moving loosened residue away from already-rinsed sections. Repeat the rinse at least twice to clear any remaining oxygen cleaner or steam residue from the surface.
Skipping a second rinse is one of the most common reasons grout re-darkens quickly after cleaning, since leftover product residue attracts dust and soap particles.
After rinsing, dry the grout lines with a clean microfiber cloth rather than letting the surface air-dry. Air-drying leaves mineral deposits from tap water behind, which cloud the grout surface and create a thin layer that traps future staining faster than clean, dry grout would.
Seal your grout to stop future staining
Once your grout is fully dry, which typically takes one to two hours in a well-ventilated bathroom, apply a penetrating grout sealer to protect the work you just did. Sealer fills the microscopic pores in the grout surface, blocking soap scum, mold spores, and minerals from taking hold again.
Follow this sealing routine to get the most protection:
- Wait until grout is completely dry before applying any sealer
- Apply sealer in thin, even coats using a small brush or applicator bottle
- Wipe away any excess sealer from tile surfaces within five minutes
- Allow the sealer to cure for at least 24 hours before using the shower
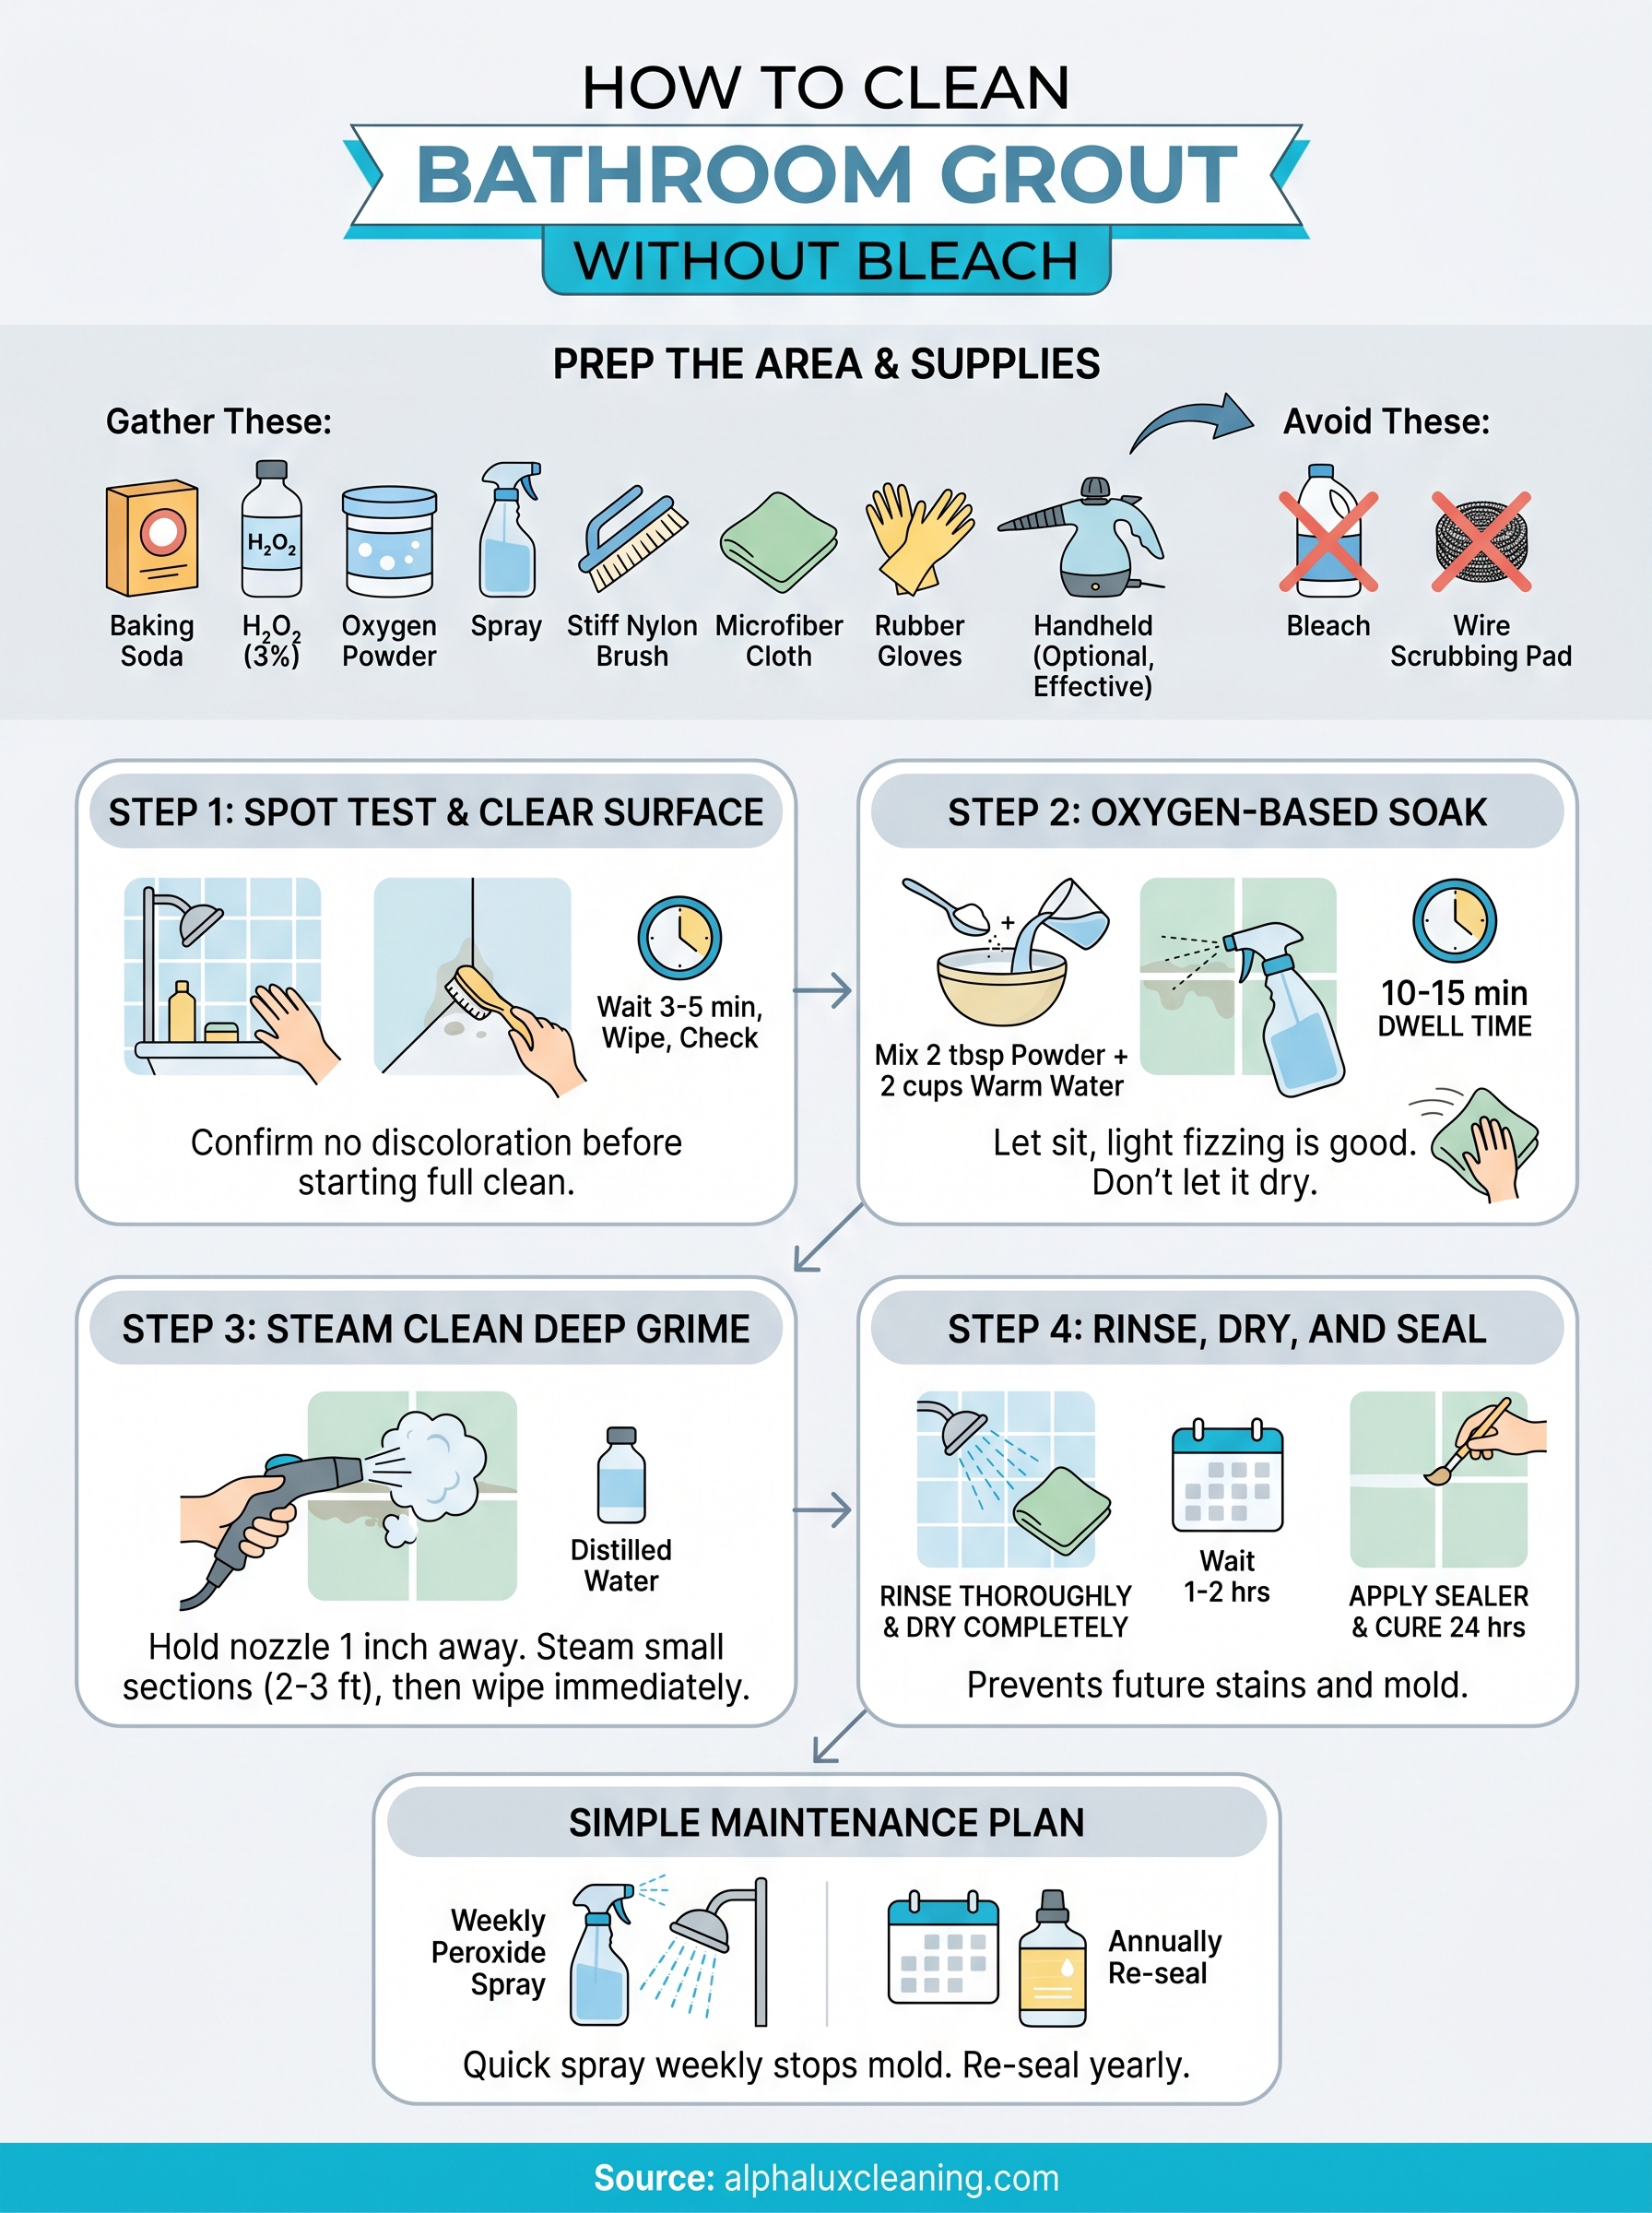
A simple plan to keep grout clean
Now that you know how to clean bathroom grout without bleach or heavy scrubbing, the real goal is making sure you don’t have to do a deep clean every few months. A quick spray of hydrogen peroxide after your shower two or three times a week prevents mold from gaining a foothold. Resealing your grout once a year keeps the surface protected and cuts your cleaning time in half going forward.
Consistency beats intensity every time. A five-minute weekly wipe-down with warm water and a damp cloth keeps soap scum from hardening into the kind of buildup that takes real effort to remove. If your bathroom gets heavy use or you notice staining returning quickly, that’s usually a sign that your grout sealer has worn off and needs a fresh coat.
If you’d rather leave the deep cleaning to someone else, AlphaLux Cleaning handles bathroom grout and tile cleaning across New York.