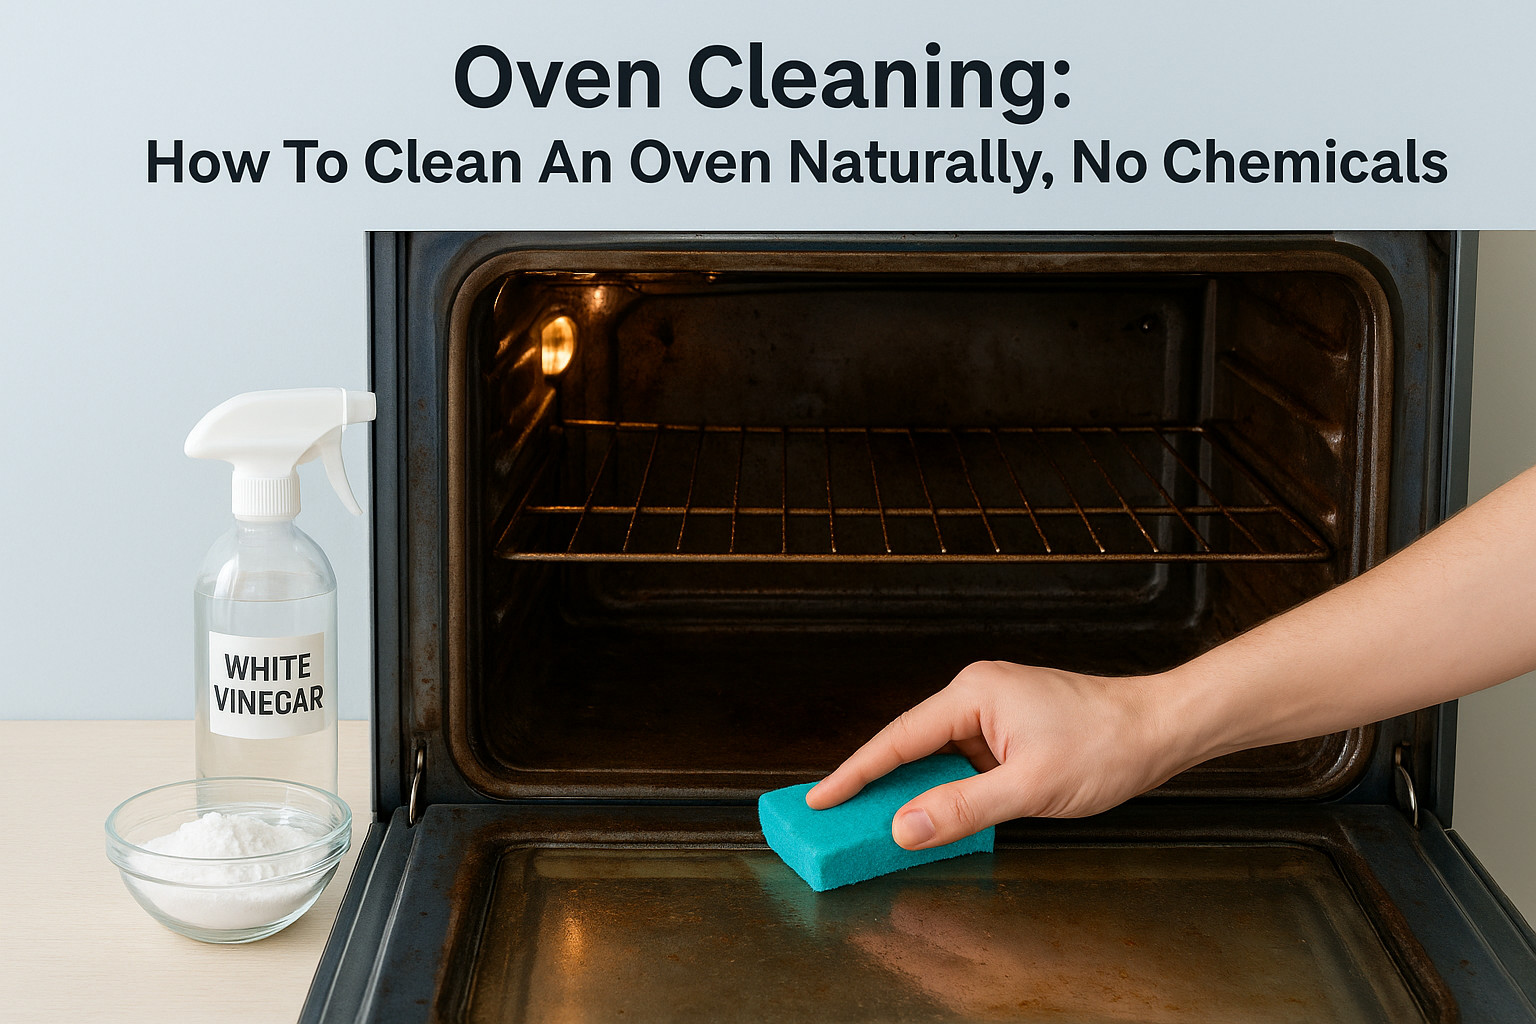
That burnt-on grease caked inside your oven didn’t appear overnight, and it won’t disappear with a single wipe. But here’s the good news, you don’t need to reach for a can of harsh, fume-heavy chemicals to get it out. Learning how to clean an oven naturally is simpler than most people think, and the supplies are probably already sitting in your kitchen cabinet.
Baking soda, white vinegar, and a little patience can cut through even the most stubborn buildup, no toxic sprays required. These methods are safer for your home, your family, and the air you breathe while cooking dinner. At AlphaLux Cleaning, we use eco-friendly, non-toxic cleaning products across every home and business we service in New York, so we know firsthand that going chemical-free doesn’t mean sacrificing results.
In this guide, we’ll walk you through practical, step-by-step methods to deep clean your oven using common household ingredients. You’ll learn how to tackle the interior, the racks, the glass door, and those greasy spots everyone forgets about. Whether your oven needs a light refresh or a full deep clean, these natural techniques will get the job done right.
What you need and what to avoid
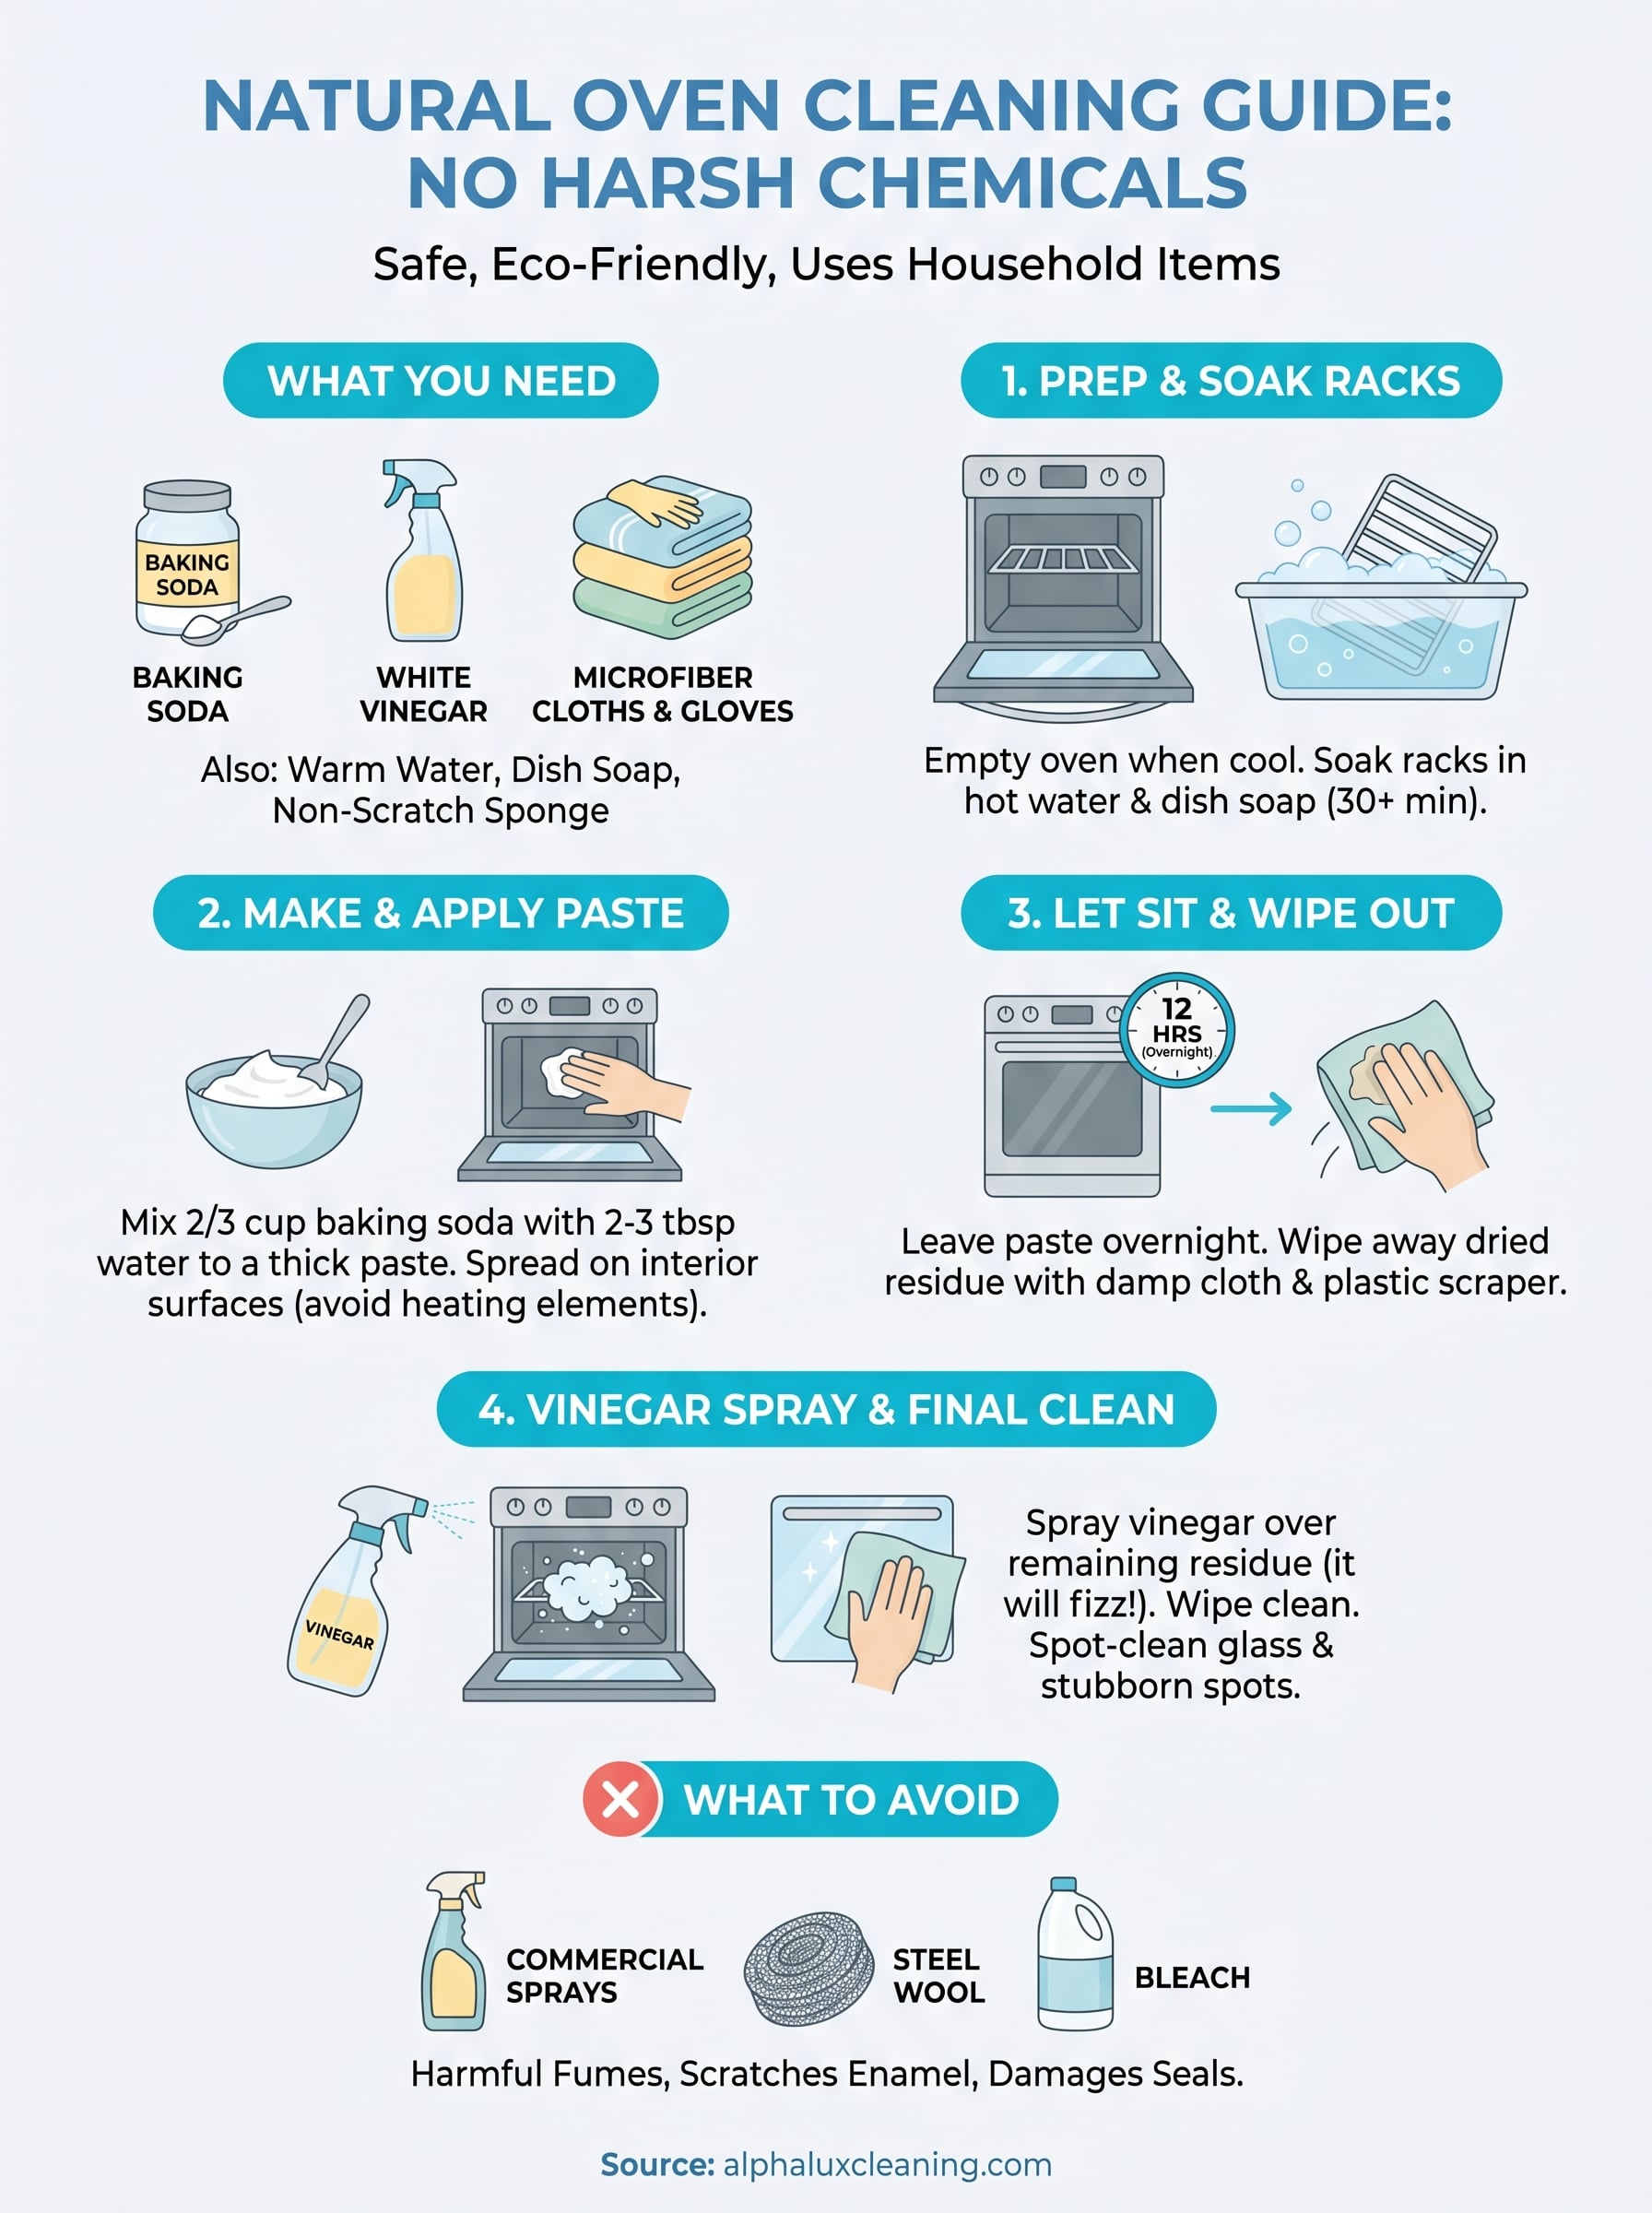
Before you start scrubbing, it helps to know what’s actually going to work and what’s going to make things worse. Gathering the right supplies upfront saves you from stopping mid-clean to hunt through cabinets, and knowing what to skip prevents you from damaging your oven’s interior surfaces or leaving behind residue that burns off the next time you cook. A few minutes of preparation here makes the whole process faster and more effective.
The supplies you’ll need
Everything you need to clean an oven naturally is inexpensive and easy to find. Most of these items are already in your kitchen or pantry, which is exactly why this method works so well for busy households. You don’t need a specialty cleaning kit or a product with a dozen unpronounceable ingredients on the label.
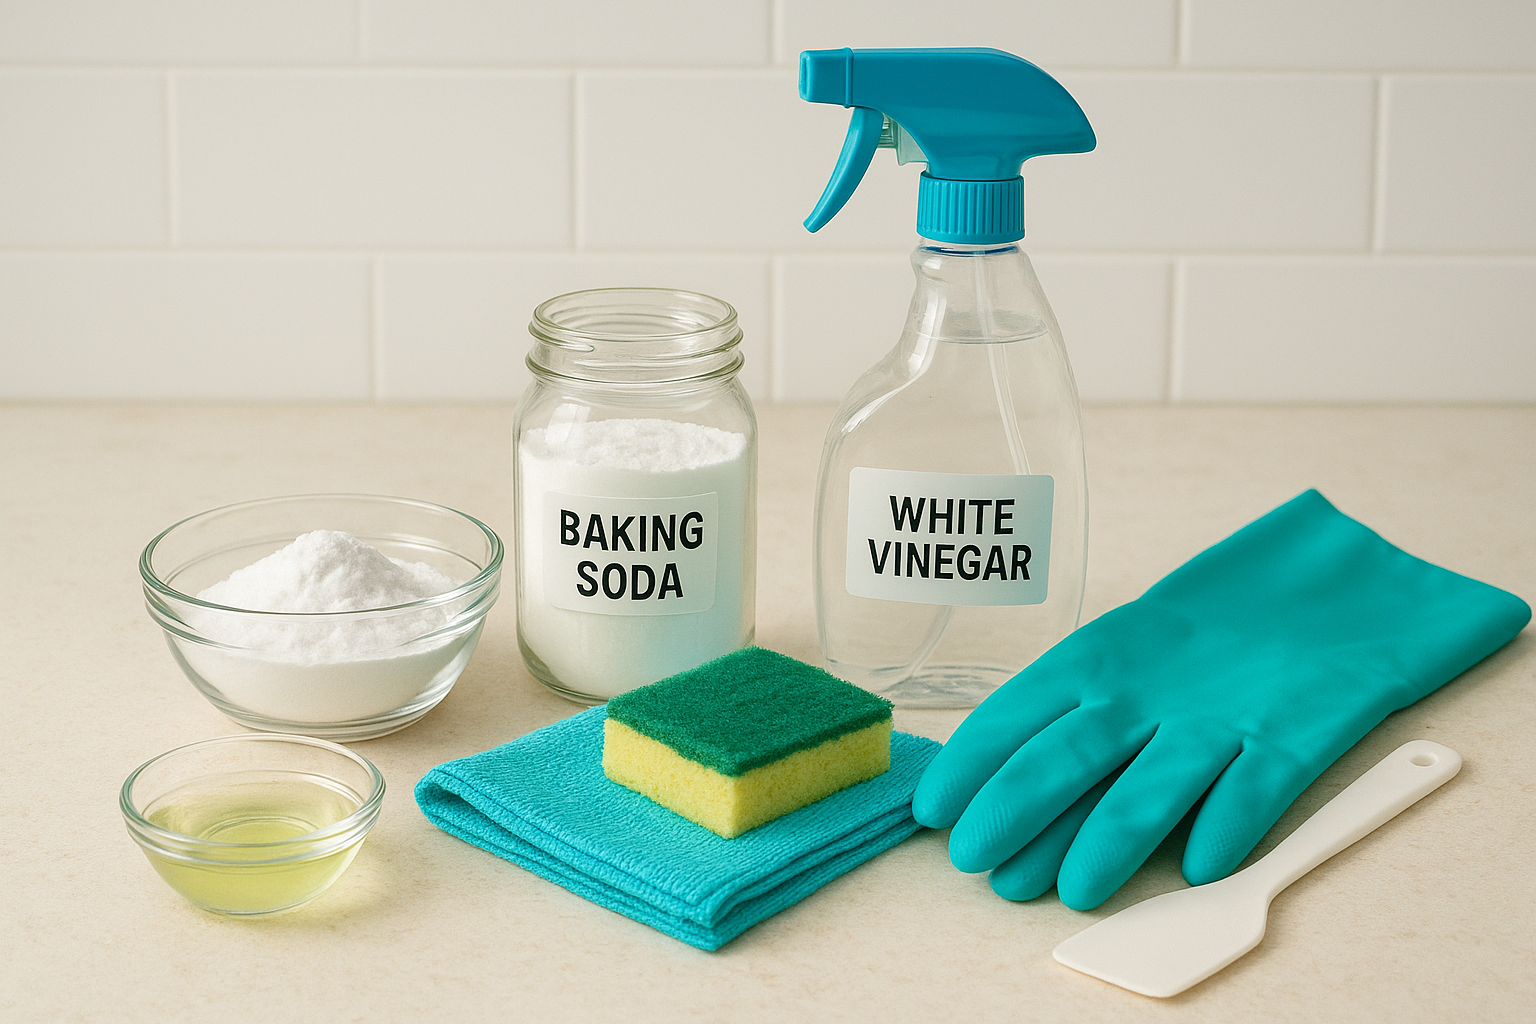
Here’s what to grab before you start:
- Baking soda (at least half a cup; more for heavily soiled ovens)
- White vinegar in a spray bottle
- Dish soap (a few drops, useful for soaking racks)
- Warm water and a mixing bowl
- Microfiber cloths or old rags for wiping surfaces clean
- A non-scratch scrubbing pad or sponge for tougher spots
- Rubber gloves to protect your hands during scrubbing
- A plastic or silicone spatula for scraping loose debris without scratching
- Lemon juice (optional, but useful for cutting grease and leaving a fresh scent)
Baking soda is mildly abrasive and naturally alkaline, which makes it effective at breaking down grease and baked-on food residue without scratching oven surfaces when applied correctly.
You can mix your baking soda paste directly in a small bowl. A ratio of roughly two-thirds cup baking soda to two or three tablespoons of water gives you a thick, spreadable consistency that clings to the vertical walls inside the oven without sliding off before it has time to work. If the paste feels too dry, add water a small splash at a time.
What to avoid and why it matters
Knowing what not to use is just as important as knowing what works. Some products you might instinctively reach for can cause real problems, from damaging the oven’s interior coating to leaving chemical residue that affects your food the next time you cook.
Avoid these products entirely:
| Product | Why to avoid it |
|---|---|
| Commercial oven sprays (e.g., Easy-Off) | Contain caustic chemicals that release toxic fumes and can irritate skin and lungs |
| Bleach | Reacts badly with food residue, leaves chemical traces, and can damage door seals |
| Steel wool or abrasive metal pads | Scratches enamel and protective coatings on oven walls and racks |
| Ammonia-based cleaners | Produce strong fumes that are especially dangerous in an enclosed oven space |
| Undiluted citrus oil cleaners | Can leave flammable residue if not thoroughly rinsed before the oven is used again |
Steel wool specifically deserves a warning here because many people grab it for tough jobs. Inside an oven, it leaves microscopic scratches that trap grease over time, which makes every future cleanup harder than the last. A plastic scraper or a non-scratch sponge handles the same job without the damage.
Your oven’s enamel coating is more fragile than it looks. Protecting that surface with the right tools and gentle, natural ingredients keeps it easier to maintain long-term and extends the life of your appliance. Going natural isn’t just better for your health; it’s also gentler on the equipment you use every day.
Step 1. Prep the oven and tackle the racks
Before you apply any cleaning solution, the oven needs to be completely empty and cool. Starting with a warm or hot oven is a safety issue, and it also causes your baking soda paste to dry out too quickly to do its job. Give the oven at least an hour after its last use before you begin, and pull out the racks, thermometer, and any foil liners sitting on the bottom.
Clear the oven interior and protect your floor
Pull everything removable out and set it aside. Remove the oven racks, any pizza stones, and the bottom oven drawer if your model has one. Lay an old towel or a few sheets of newspaper directly in front of the oven door. Debris will fall out as you scrape and wipe, and protecting your floor now means less cleanup later.
Take a dry microfiber cloth or a slightly damp one and wipe out any loose crumbs, ash, or dry debris sitting on the oven floor. A plastic spatula works well here to gently scrape off anything flaky or loose without scratching the enamel. You’re not trying to get it spotless at this stage; you’re just clearing away the loose material so your baking soda paste can reach the actual baked-on grease underneath.
Soak the racks right away
Oven racks collect the same grease and burnt food as the oven interior, but they’re easier to handle because you can submerge them. Fill your bathtub or a large utility sink with hot water, add a generous squirt of dish soap, and submerge the racks completely. Let them soak for at least 30 minutes, though an hour or longer gives you noticeably better results on heavily soiled racks.
Soaking the racks while the paste sits inside the oven means both are working at the same time, so you’re not adding extra time to the overall process.
While the racks soak, you’ll be applying your baking soda paste to the oven interior. When you come back to the racks, most of the grease will have loosened enough to scrub off with a non-scratch sponge and some elbow grease. For any remaining stuck-on spots, sprinkle a small amount of baking soda directly on the rack surface, scrub, and rinse thoroughly under warm running water before returning them to the oven.
Step 2. Make and apply the baking soda paste
With your racks soaking and the oven interior cleared of loose debris, it’s time to mix your cleaning paste and get it working on the grease. This step is where the real cleaning happens, and doing it correctly gives the baking soda enough contact time to break down baked-on residue without you having to scrub aggressively later.
Mix the paste to the right consistency
Combine two-thirds cup of baking soda with two to three tablespoons of warm water in a small bowl. Stir slowly and add water in small increments until the mixture reaches a thick, spreadable texture, similar to toothpaste or hummus. You want it dense enough to cling to vertical oven walls without sliding down. If it turns runny, add a bit more baking soda to firm it back up.
A paste that’s too thin won’t stay where you put it, and a paste that’s too dry will crumble off before it has time to work into the grease.
For ovens with heavier buildup or grease that’s been there a long time, you can add a few drops of dish soap to the mix. This boosts the paste’s ability to cut through fat residue and helps it adhere to surfaces that are especially greasy.
Apply the paste evenly across the oven interior
Put on your rubber gloves, then spread the paste across every interior surface using your fingers or a spatula. Work methodically: start at the back wall, move to the side walls, then coat the oven floor. Press the paste directly into stained areas and anywhere you can see dark, baked-on grease rings.
There are a few spots that are easy to skip but worth paying attention to when you’re figuring out how to clean an oven naturally with this method:
- The corners where the walls meet the floor
- Around the heating element (avoid coating the element itself)
- The inside edges of the oven door frame
- Any raised ridges or rack supports along the side walls
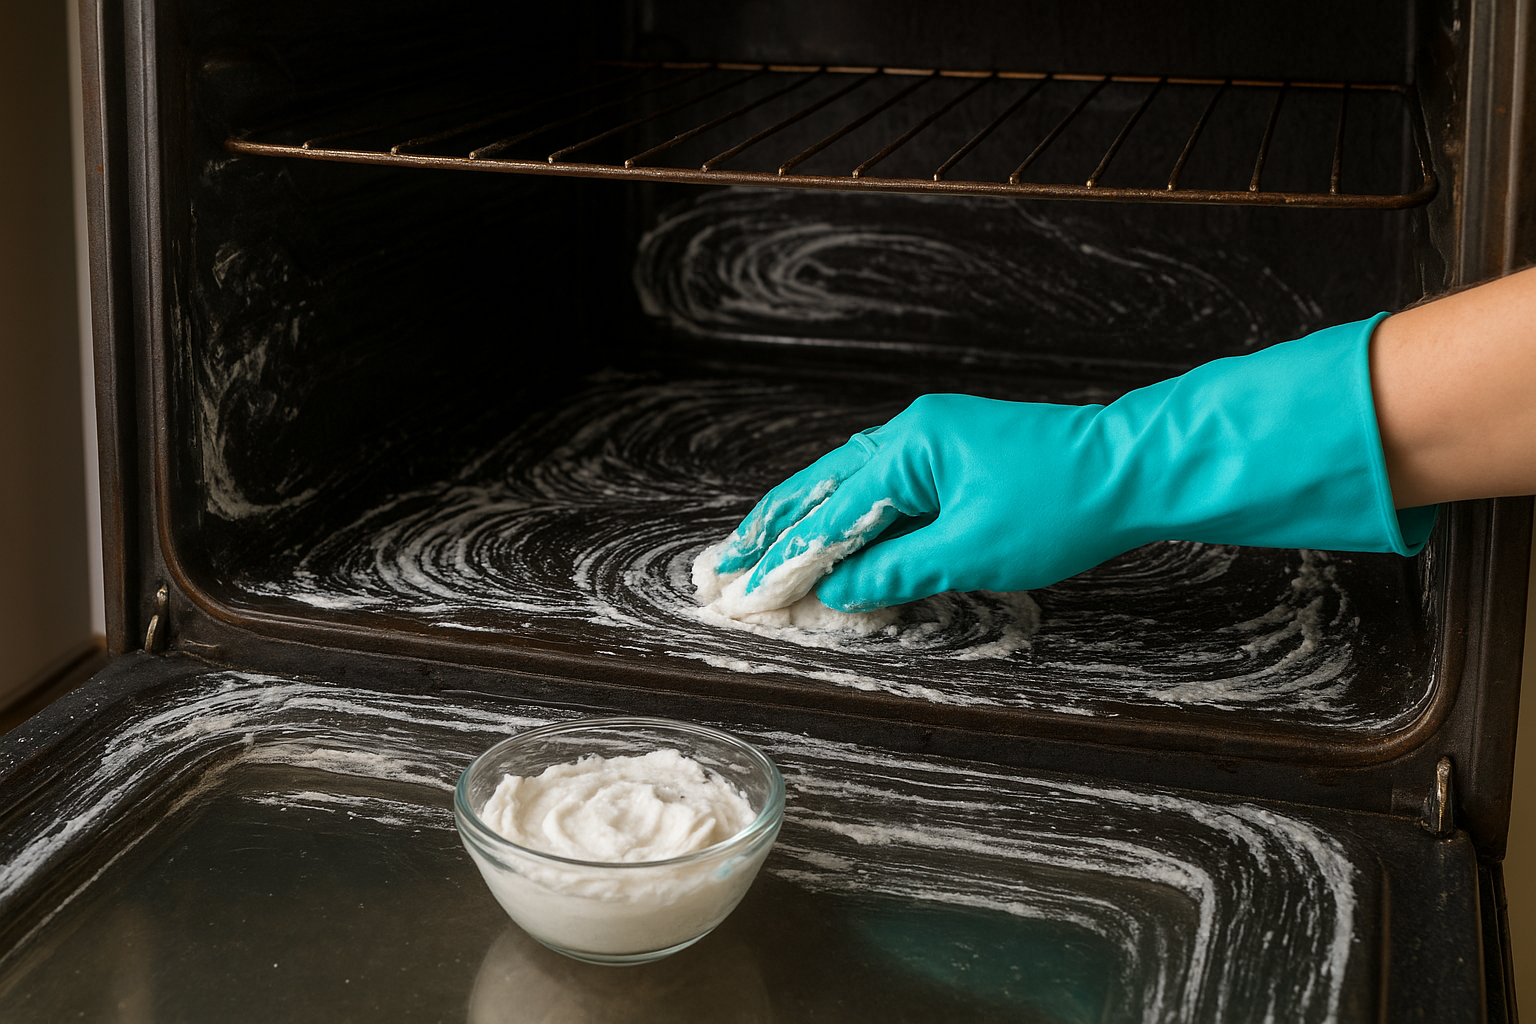
Once the paste is applied, close the oven door and leave it for a minimum of 12 hours, overnight being ideal. The longer the paste sits, the more it penetrates and lifts grease, which means significantly less effort when it comes time to wipe everything out. Resist the urge to rush this step.
Step 3. Wipe it out and finish with vinegar
After 12 hours, or ideally a full overnight soak, the baking soda paste has done the heavy lifting for you. You’ll notice it has dried out and darkened in areas where it absorbed grease and grime. That color change is a sign it worked. Now your job is to remove it cleanly and finish with white vinegar to neutralize any residue left behind.
Remove the paste from the oven interior
Put your gloves back on and grab a damp microfiber cloth or sponge. Start wiping the paste away from the back wall and work your way forward, rinsing your cloth frequently so you’re not just spreading the residue around. The baking soda will come off in gray or brown clumps depending on how soiled the oven was. Use a plastic spatula to scrape off any thicker deposits that the cloth alone won’t lift, keeping your strokes flat against the surface to avoid scratching.
Work through the corners, the side walls, and the oven floor in sections. Rinse your cloth or swap it for a clean one every few wipes. Getting the paste fully out at this stage matters because any dried baking soda left on the surface will create a white, chalky film once the oven heats up again.
Don’t rush the wipe-down phase. Taking an extra five minutes here means you won’t be dealing with white residue every time you open the oven door for the next two weeks.
Spray with vinegar and do the final wipe
Once you’ve removed as much paste as possible, fill a spray bottle with plain white vinegar and spray it directly over the entire oven interior. You’ll see it start to foam and fizz immediately wherever baking soda residue remains. This is a normal chemical reaction between the acid in vinegar and the alkaline baking soda, and it’s exactly what you want. It’s one of the most effective parts of learning how to clean an oven naturally, because the fizzing action lifts the last traces of buildup without any scrubbing.
Let the vinegar sit for two to three minutes, then wipe everything down with a clean, damp cloth. At this point, the oven walls and floor should look visibly clean, and any remaining grease rings should be significantly lighter or gone entirely. Leave the oven door open for 10 to 15 minutes to let it air out before moving on to stubborn spots or the glass.
Step 4. Remove stubborn buildup and clean oven glass
Even after an overnight baking soda soak and a thorough vinegar wipe, a few stubborn spots may still be clinging to the oven floor or walls. This is normal, especially in ovens that haven’t been deep cleaned in a while. Before you declare the job done, take a close look at any dark patches that remain and deal with them directly using a targeted approach.
Handle the spots the paste didn’t fully lift
For burnt-on residue that survived the paste, a second focused application works better than scrubbing harder. Dab a small amount of fresh baking soda paste directly onto the stubborn spot and let it sit for another 20 to 30 minutes. Then scrub with a non-scratch sponge using firm, circular motions. Most spots will release with this method. If a particular area is extremely carbonized, a plastic scraper held at a low angle can help lift the deposit before you scrub.
Applying heat briefly can also help: warm the oven to 200°F for five minutes, turn it off, let it cool for 20 minutes, and then scrub. The residual warmth softens baked-on grease without making the oven too hot to work inside safely.
Here’s a quick reference for matching the tool to the type of buildup:
| Buildup type | Best tool |
|---|---|
| Loose, flaky debris | Dry microfiber cloth |
| Grease rings and stains | Baking soda paste + non-scratch sponge |
| Thick, carbonized deposits | Plastic scraper, then baking soda paste |
| Light haze or film | White vinegar spray + damp cloth |
Clean the oven glass door
The glass door is one of the most visible parts of your oven, and baked-on grease on the inside of the glass is one of the first things people notice. Cleaning it is a key part of knowing how to clean an oven naturally without using chemical sprays. Spread a thin layer of baking soda paste directly onto the interior glass surface, let it sit for 15 to 20 minutes, and then wipe it away with a damp cloth.
For streaks and haze left after wiping, spray white vinegar directly on the glass and buff it dry with a clean microfiber cloth using a circular motion. This removes the chalky film and leaves the glass clear. If your oven door has a gap between the outer and inner panes, check your owner’s manual for instructions on accessing it, since some models allow you to remove the door panels for a more complete clean.
A clean oven, the easy way
Now you know how to clean an oven naturally using supplies you already own. Baking soda, white vinegar, and a little time do the work that expensive chemical sprays claim to handle, and they do it without the fumes, the residue, or the risk. The process takes patience more than effort, and the results speak for themselves.
Keeping up with your oven after this deep clean is much easier than starting from scratch. A quick wipe after every few uses prevents grease from baking on again, and a light baking soda scrub once a month keeps buildup from ever getting out of hand. Your oven will stay cleaner longer with far less work.
If you’d rather hand the deep cleaning off entirely, the team at AlphaLux Cleaning handles exactly that. Every clean uses eco-friendly, non-toxic products, so your home stays safe and spotless from top to bottom.